Showing posts with label fabric paper. Show all posts

Friday, April 12, 2019

Fabric paper: could the end be near?


This will be my final page of fabric paper.  I suspect you are tired of seeing these, but they take forever to dry.

Just as I did with the last three pages, I chose some beautiful tissues, both decorative and plain, along with dress pattern tissues.  I paired them with this ugly fabric I purchased one year in a thrift store.  I'm always looking for ways to use this ugly fabric, and this is a perfect way, since the large leaf pattern is mostly covered with the tissue.

Once dry, it was time to trim the fabric paper.

Next, I sewed the three sheets of fabric paper I have made over the past several days.  Soon I will adhere the pages back to back using Wonder Under (also known as Pellon, a bonding agent that is heat activated-think dry glue for fabric), then the fun part will come: decorating these pages.

Today is Day 12 of 22 and I made my final sheet of fabric paper for this book, incorporating gifted and formerly used decorative and dress makers tissues.  I then sewed the edges of each of the papers.  Thank you for visiting.  I am truly grateful for your visit.

These photos were taken on Wednesday afternoon, and they made me smile, so I'm going to share them with Annie (at A Stitch in Time) and the gang at Friday Smiles.

When I returned home from my afternoon session treating my neighbor's cat while she's on vacation, I was overtaken with joy at how beautiful all the tulips in my yard were.  Every one had bloomed.

Even my rose bush, chopped nearly to the ground last year by a well intentioned master gardener, is making a comeback.

Bits of yellow and red

have sprung up all over a yard that already needs to be mowed.  Awe, the joys of home ownership.

This probably as much as the beauty of the tulips, made me happy.  These are Lilies of the Valley that were nearly choked out by overpowering vinca vines I ripped out in this area last year.

So what happens when you get a hard freeze overnight? 

Apparently, the tulips know how to survive.

They close and turn their "heads" away from the north wind.

That's what I did today, too, as the wind raged from the north and temperatures dropped over 40 degrees (from 86 F Wednesday to 42 F Thursday).


These hadn't even bloomed on Wednesday and now they are fighting to stay alive!

For those of you who know flowers, can you tell me what those tiny purple ones are?  They were a surprise to me and I'd love to know what to call them.

Thanks again for your continued support, and I hope to see you at Friday Smiles today, too.

Saturday, April 6, 2019

More fabric paper


I hope you saw my Second Thursday Tutorial where I created fabric paper.  If you missed an earlier post from this month on fabric paper, it is here.  Today I'm making a third.  It will be used as one side of a second page in my fabric paper book.

Once again, I chose some beautiful tissues, both decorative and plain, along with dress pattern tissues.  I paired them with this ugly fabric I purchased (10 yards, in fact) one year in a thrift store.

These take an entire day to dry, so I hope to have something more tangible soon.

For Day 6 of 22, I once again recycled and repurposed used tissue and dress maker tissues, along with some new, albeit ugly fabric.  All tissues were gifted, none were purchased, including the dress maker tissue.

Thank you for continuing with me on this 22 day recycling journey.  I am grateful for you, and promise to be finished with fabric paper soon.

Since this is a rather pathetic post today, I thought I would show you another photo I found in my basement of the Arch taken in front of the Old Courthouse.

I photographed the photo, then remembered that Susi thought I should scan it.

Since my scanner has been on the fritz for awhile, now, I'll let you decide which is better.

When I took this photo, the building on the left was the Adam's Mark Hotel.  It is now a Hyatt Regency.  You are seeing the front of the Old Courthouse, which is the opposite side that you see from the Arch.  The statue is called The Runner.

For those of you unfamiliar with the Old Courthouse, which was free to enter and visit the times I was there (but I doubt that is the case now, since it appears to be part of the Arch tour), it is famous for the Dred Scott case.  It was also where slaves were auctioned in one of the court wings (Probate Court) until 1861.

Dred Scott was a slave who had been taken into a "free" state, where he had been allowed to live free.  Then his "master" returned him to Missouri, a slave state.  Scott sued and claimed he was a free man.  The state court ruled against Scott, the Federal court ruled against Scott, and the Supreme Court ruled against Scott, claiming Scott was NOT a citizen of the United States, but property, whether he had been free in another state or not.

The Chief Justice wrote that Scott was a slave regardless how much time he had lived in a free state.
The question is simply this: Can a negro, whose ancestors were imported into this country, and sold as slaves, become a member of the political community formed and brought into existence by the Constitution of the United States, and as such become entitled to all of the rights, and privileges, and immunities, guarantied [sic] by that instrument to the citizen?
— Dred Scott v. Sandford, 60 U.S. at 403.
The court claimed that slaves were not citizens.  Thinking this would put a stop to the slavery issue, it had the opposite effect and was one of the major causes for starting the War Between the States (or Civil War).   After the war, the Supreme Court admitted it was the worst decision by the highest court in the land they had ever made.

Also, per the Free Kibble site (found on my right sidebar):
It's FEED ME Friday - We're donating 5X the kibble to feed shelter pets today!
So don't forget to visit and help them donate more kibble.  Bleubeard and Squiggles will love you for it, too.

Thursday, April 4, 2019

Fabric paper revisited


I'm sure several of you saw my Second Thursday Tutorial where I created fabric paper.  Today I'm making another.  It will adhere to the back of the piece I made previously.

I chose some beautiful tissues, both decorative and plain, along with dress pattern tissues.

These dry so slowly in my chilly craft room.  Now I must cut the fabric paper to size.

For Day 4 of 22, I recycled and repurposed used tissue and dress maker tissues, along with some new, albeit ugly fabric I purchased one year in a thrift shop.  All tissues were gifted, some of which were used to hide gifts in gift bags or used to wrap around gifts in boxes.

Thank you for joining me today.  I'm so happy you stopped by.

Thursday, March 14, 2019

Second Thursday Tutorial: Fabric paper


For this month's tutorial, we will be making fabric paper.  You may have seen this technique before on the internet, because it's a great way to combine paper and fabric.  I have no idea who invented this technique, but I am certainly grateful.

We will begin with fabric on the left and tissue and dress pattern tissue on the right.  Originally, I had forgotten about the four yards of leaf print I purchased one year at a thrift shop, but now I realize it will be far better than the blue I had originally intended to use.  The idea is to pick very thin cotton as your background fabric and tissue paper, dress pattern tissue, or napkins for your paper.  Do not choose anything heavy for either the paper or the fabric.

It's wise to wash new fabric to remove any sizing, then tear the fabric to size before you begin.  There is no need to iron the fabric.

Now it's time to pour all purpose PVA (white glue) into a cup.  As an alternative, you may use mod podge, or tacky glue.

Add an equal amount of water and stir thoroughly.

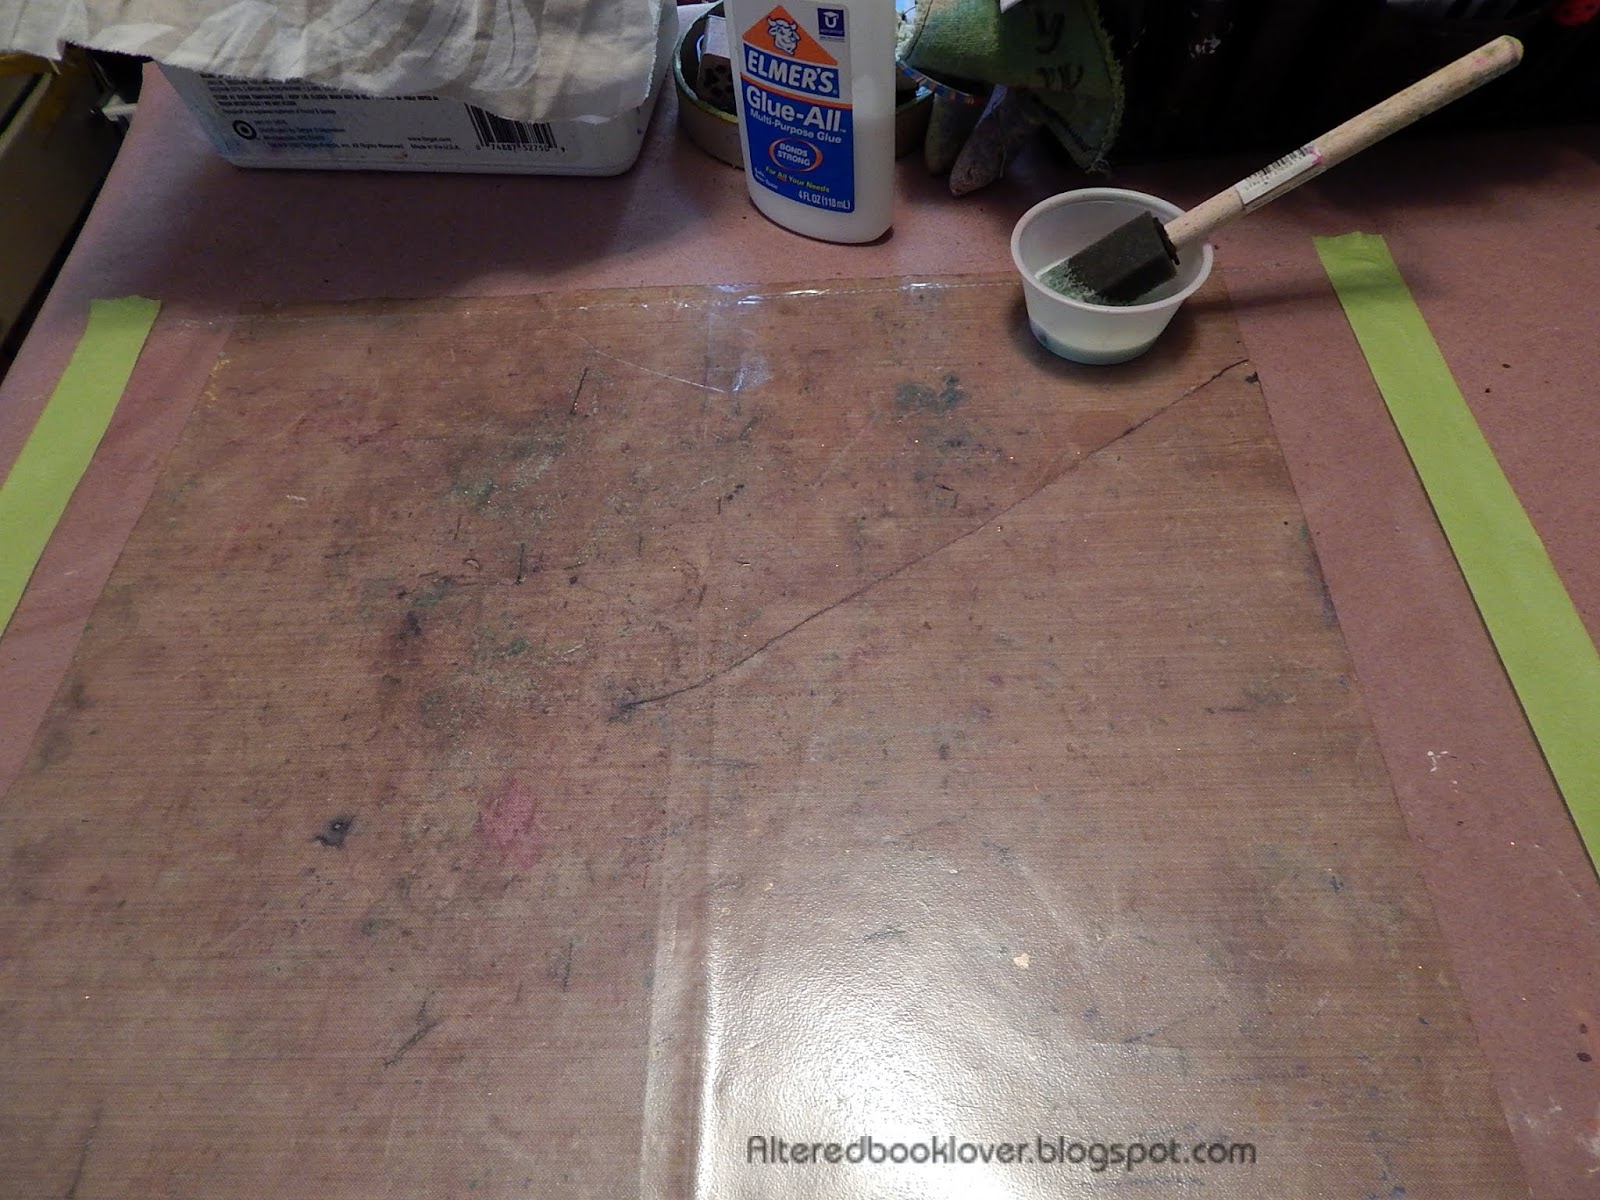
You will also need a sheet of plastic.  This can be a plastic bag, sheet of plastic, or, as I have chosen, an old plastic sheet protector, which must be cut open.

Affix the plastic to your table using low tack tape.

Be sure your glue/water mix is completely mixed using a brush.  I used a foam brush, but I'm not sure that is the wisest choice, since the foam brush soaks up a large amount of the mixture.  As an aside, be sure you start with a new brush and not one that has been used with ink in the past!

In a way, I was glad the glue had been tinted with green because it made it easy to see where I missed spots on the fabric.  Saturate your fabric with the glue/water mix.

Add your first layer of tissue paper and gently cover with more glue/water mix.

Gently add additional layers of tissue and gently cover with glue/water mix.  Please do as I say, not as I do!  You can see I got overly enthusiastic and tore through two layers of tissue in a few places.

I found when I tore the tissue it was because I hadn't wet it enough.  Once I added more of the mix, I had less trouble.

Add as many or as few layers as you choose in the colors of your choice.  Tear the tissue, or leave whole, it is your choice.

It's at this point, you may add paint, inks, mica powders, or leave plain.  Allow the fabric paper to dry, preferably overnight.

Once dry, the fabric paper is easy to remove from the plastic backing.   Now it's time to trim the tissue to the size of the fabric. 
 Fold your fabric paper in half, or leave flat to be used as the beginning of a collage. 

Sew around your images, or sew straight lines.  The fabric paper is now very pliable.  The longer you work with it, the more pliable it becomes.

Using variegated thread is always a nice touch.


I love how the three layers show through.


Although the back will not show in my fabric paper, it is still quite lovely, especially since I have no way to drop my feed dogs.

Once folded, this is the size the paper fabric will be for a book I intend to create.

I am so happy you joined me today.  Be aware, each piece takes forever to dry, so plan ahead if you need to make something for a gift.  I had intended to make three of these using different tissues, but I didn't account for the amount of drying time they required.

Thanks for visiting today, and once this goes live, it will be on my tutorials page, where you can find it anytime.