


.JPG)


Before we begin, I realize there is a LOT of reading this week, as well as a lot of photos. Fortunately, if you live in the United States, you have an extra day to play in your book this week. However, this is the meat and potatoes (even for a vegetarian like myself) of what you must do to get ready for what will follow. Once again I apologize for what Blogger is doing to my font and images, but I have NO control over this, at least none I can see. This week we will cover the following:
Lesson 2
A brief history of altered books
Choosing your theme
A brief history of altered books
Choosing your theme
Gathering ephemera
Basic supplies
Segregating your ephemera
Paint
Prepping your book
Basic supplies
Segregating your ephemera
Paint
Prepping your book
Now that you have chosen a book with a sewn spine (a rule you MUST follow), the next rule of altered books is THERE ARE NO RULES. What I will give you is advice and guidance. However, you are always free to break the rules, because there are none.
Again, I apologize for the slow start. However, if you complete this lesson, it will take you about two to four hours, depending on your choice of page removal and the thickness of your book. And of course, soon these lessons will be completely technique driven.
Again, I apologize for the slow start. However, if you complete this lesson, it will take you about two to four hours, depending on your choice of page removal and the thickness of your book. And of course, soon these lessons will be completely technique driven.
A brief history of ABs:
Altered books have been around since medieval times when monks scraped old passages from parchment and created new pages in old books. The new books that they created were known as palimpsests. Altering books evolved as a main stream art form in the sixties, when artist Tom Phillips created a form of altered book called A Humument. Some of you may be familiar with this book, which seems to be a classic among altered book artists. In the late 1990s, altered books began to appear in the mainstream paper art community. It started as an outgrowth of the scrapbook and collage communities. Now it’s your turn to contribute to history.
Picking your theme:
Picking your theme is nearly as important as picking a good book. Your theme will determine many aspects of your design, such as your main or focal images, backgrounds, embellishments, ephemera,* and possibly even your color choices.
You can pick a theme that interests you, such as wine, quotes, rocking horses, Paris, summer at the beach, travel, time, money, your favorite hobby (examples: golf, swimming, painting), fashion, a favorite trip, family (real or faux), games, the circus, holidays, tea time, butterflies, donuts, favorite color, a trip into space, cowboys, etc. The sky’s the limit.
You might want to pick a theme in which you have many images already saved. I have made altered books of "Time," "Money," "Asia," "California Dreaming," "CSI, Crime Scene Investigation," "Buffy," "Halloween," and "Hands," to name a few. I had all kinds of images saved before I ever started making most of these ABs. I also made a book I named "Coll-AH-ge," in which I started with nothing, and created a collage each time I became inspired, especially by art I found right in my mailbox.
Alternately, you might decide to use this as a techniques-only book. For this type of book, you would document somewhere on the page what the technique was you worked on during that lesson. That way you would have a record of what you made and how you made it. However, rather than just documenting the technique, you should try to incorporate it in some sort of spread with the technique neatly printed somewhere on the page. You could also attach a tag to the page documenting the technique. Remember, the choice is yours.
Don’t confuse this with a journal. We will not be journaling. There won't be word prompts to spur you on. Don’t confuse this with a scrapbook. We won’t be scrapbooking. There is a difference. ABs are about collage, mixed media, lumps, and bumps. To me, the difference between scrap booking and/or card making and ABs is when making an AB you start from scratch and design/create everything. When making cards or scrapbook layouts, you usually start with a design or layout and pre-made acid free supplies that have been created for you. Also, we won’t be pouring out our souls or daily life experiences on these pages as in an art journal, at least not in words, nor will family photos or journaling be the main focus of the spreads. We won't be writing long messages about our lives, either. In fact, what will mostly be on your pages will be a title, saying, or a few well placed words that fit the spread. Many times, I've not even included words in my spreads! Other times, if I do include words, these words are computer generated. Having said that, if you are a stamper, feel free to bring your alphabet(s) out. I realize this is an over simplification, but it’s how I see the difference in these media.
Nearly as important as theme, but often overlooked is "style." What is your artistic style? What style are you going for? Examine your previous spreads if you’ve made some. If you are a card maker or scrapbooker, you probably already know your style. If not, look at various examples of altered art and decide what you are drawn to. Do you prefer artsy, vintage, retro, modern, cute? Do you like bright colors or muted? Do you prefer hodge-podge to structured? Or, do you favor them all?
REVIEW:
1. Pick a theme you like.
2. Pick a theme you’ve got lots of "stuff’" for.
3. Conversely, don’t pick a theme, but devote your book to techniques.
4. Determine your artistic style.
Gathering stuff, including ephemera, embellishments, and theme items:
*Ephemera: printed material that has little or no value and is not intended to be saved or preserved. These can include postcards, catalogs, cash register receipts, parking stubs, posters, tickets, bookmarks, airsickness bags, restaurant take out menus, napkins, and any piece of clean paper meant to go into the trash after use.
If you are unfamiliar with the word and want to learn more about ephemera, here are a couple of places you can visit: http://www.ephemeraology.com/ (a blog with lots of photos) and The Ephemera Society: http://www.ephemerasociety.org/
Obviously, you will want your ephemera, embellishments, and images to match your theme. Don’t overlook dictionary or vocabulary pages, game pieces, paid receipts, flashcards, and such. Save tissue papers and dress patterns. Gather junk mail that applies to your theme. Buttons, charms, and the like will add flare to your pages and you can incorporate them to correspond with your theme. Don’t overlook your friends and family. They can save "STUFF" for you, and once you tell them what you’re looking for, you’ll be inundated with supplies.
Basic supplies:
You can spend a small fortune on art supplies, including those for ABs. However, you probably have far more tools and supplies than you think if you have ever done any paper crafting. Since I’m a low tech kind of gal, and not out to sell someone’s products, my list of items needed for an AB are fairly simple and straight forward. You will find that I live up to my name as Queen of Free, but there are a few things you must have in order to create. If your funds are limited, spend money on tools and glue instead of fancy papers, cutesy embellishments, and scrapbook supplies. If you have them, fine. You probably won’t need them, anyway!!! If not, that’s OK, too. We’ll be making a lot of our own backgrounds and embellishments from things you already have and you can keep your scrapbook paper and embellishments for those acid free projects you want to work on.
Don't forget your special talent. I know you have one. All of us do, or you wouldn't be visiting an art blog. Maybe it’s crocheting, stamping, drawing, sewing, or working with mosaics, glass, fibers, photography, beads, etc. Whatever it is, you should find a way to incorporate it in your AB.
Traditional AB materials include scraps of paper and other flat materials such as newspaper and magazine clippings, shopping bags, alterable photographs (or photocopies of these photographs), wallpaper, and foil, along with objects such as string, beads, feathers, and fabric.
AB basics may encompass images, text, solid colors, or a mixture of these. You may want a recognizable image or word, or simply a suggestion, feel, color, or texture. Be sure these compliment or coordinate with your chosen theme. Most important, use what you have. Start from available materials and work from there. DO NOT go out and buy anything, unless you have NEVER held a piece of paper in your hand before.
Create those items you don't have. Most pages in your ABs will be some form of collage. Since collage is a blend of elements, it lends itself well to mixed media. You could paint, draw, stamp, doodle, or stencil in between the elements you find, or cover over them. Most important, don't rule out unusual materials. Use sandpaper, alterable blurry photographs, rice, seeds, dried flowers, staples, paint chips (free at American and Canadian home improvement stores) clipolas, various forms of tape, or rusty wire.
If you have NONE of these, a trip to your local thrift store is far better (and cheaper) than a trip to your local craft, hardware, or office supply store. You can often find paint, and one of a kind items not found in your big box stores that cater to the masses.
The supplies you will absolutely need are:
A well constructed book which you should already have
Scissors and/or craft knife
(Optional) paper cutter
Gesso (white, cheap student quality, no need to buy Liquitex or Golden brands)
(Optional: I have been told gesso is hard to find and quite expensive in countries other than North America. Use whatever product you use to replace the gesso, including cheap white paint.)
Glues, both wet and dry (various, pros and cons of each will be discussed in the coming weeks)
 Wax paper or Press & Seal (recommended)
Foam and bristle brushes
Old credit or hotel card
Several bottles of cheap acrylic paint (more on that later)
Dictionary and/or phone book pages
3-D element that will fit into your niche
Items from your "junk" drawer (yep, we all have them)
Bamboo skewer, small knitting needle, awl, or something similar to scratch words into paint.
Self healing cutting mat approximately the length of your book (if you don't own a small mat, you can use a piece of heavy corrugated cardboard)
A brick or large heavy book (for weighing down your prepped book) which you will only need during the preparation stages.
Needed, but not required items:
Ruler, preferably cork-backed metal (or some way to mark the size and thickness of your niche)
Magazine images that support your theme
Junk mail
A good ink pen or pencil for drawing lines
Ephemera or found objects such as buttons, cancelled postage stamps, postcards, ticket stubs, fabric, ribbon, lace, tissue paper, old dress patterns, napkins, fibers, paint chips, bottle caps, scrabble tiles, flash cards, tape, etc.
Heat tool
White card stock
Printer paper
Optional items:
Wire and Wire forming tools
Beads
Crayons
Colored pencils
Leafing pens (gold, silver, made by Krylon)
Rubber stamps that fit the theme of the book
Dye and/or pigment ink pads
Reinkers (ink in bottles that you would use to add ink to a stamp pad)
Cosmetic wedges and sponges
Sea sponge
Cotton swabs
Twill tape or grosgrain ribbon
Scissors
Decorative punches
Masking tape
Sandpaper
Fibers
Ribbons
String
Thread
Needle
Chalk
Fabric
Stickers
Tissue paper
Decorative napkins
Paper clips or clipolas
Stapler and staples
Sea glass
Tape roller, like an ATG
Eyelets (and setter)
Brads (and punch)
Workable fixative, spray sealer, or cheap aerosol hairspray
Clear packing tape or cold laminate sheets
Glimmer spray mists (any brand will work, as will homemade mists)
Masks and/or stencils
Punches, either hand held or decorative
Glitter
Heat tool
Permanent markers (like Sharpie
Decorative ink pens (like gel pens)
Specialty pens, pencils, paint (such as watercolors, India ink, pan pastels, gouache, water soluble pencils, water soluble oil pastels, chalk pastels, H2Os, powdered pigments, and/or traditional oil pastels)
Really, really, really optional items:
Xyron, crop-a-dile, die cutting machine, sewing machine, soldering iron, hot glue gun, rock tumbler, toaster oven for baking polymer clay, beeswax and dedicated melting pot.
Since there are SO many items on the list, I'm sure you have at least a handful of the supplies you need to get started. Remember, there is NO NEED to buy anything. Most of your supplies are already in your home. It's just a matter of looking at them in a different light.
Segregating your supplies:
It is best to store your ephemera, embellishments, ribbons, etc. that go with your theme in an organizer of your choice. There are lots on the market, but here are two cheapie alternatives:
Expanding folder (if you are starting with a lot of "stuff")
A zippered baggie (large)
A shoe box (keep the tissue the shoes were wrapped in to use in your book)
 This is how I saved my first class AB and supplies. I kept everything I used in this cloth basket. Although it doesn't have handles, I was able to pick it up easily. It contained all the images and stuff I'd been collecting for several years. I don't expect you to have as much "stuff" in the beginning. After all, I have very few rocking horse images right now. However, if you look around, you'll find all kinds of images and goodies that will match your theme.
Paint:
A note about cheap paint:
Cheap paint is best for ABs. Save your expensive paints for special pages and projects. If you don’t own any paint at all, please wait to purchase until after we learn a bit more about color in a future lesson.
Here in the US, you might be able to get paint free from your local Household Hazardous Waste site. Mine is called the HHW Swap and Shop. I believe they are found in larger towns, so it doesn't hurt to see if your city has one. I'm not familiar with this project in other countries, but I suspect there is some form, since Europe and Australia are far more environmentally conscious than we are in the states.
Review:
1. Gather your papers and magazine images relevant to your theme
2. Keep these images, decorative papers, and your book in the same spot
3. Do NOT buy anything for this project, unless you are out of glue
or a required staple
Prepping your book:
There are two methods for prepping a book. Most people will tell you to leave a small flap on two pages, skip a page, cut away two more pages, skip a page, etc. Then glue the two pages together, thus hiding the flaps. Supposedly this is the preferred method and please feel free to do this if you wish. The pro on this way people "in the know" say is it creates less stress on the spine and creates a strong page. The con is, it doesn’t reduce the bulk in the spine. However, if you wish to prep your book this way, here is how it's done.

Altered books have been around since medieval times when monks scraped old passages from parchment and created new pages in old books. The new books that they created were known as palimpsests. Altering books evolved as a main stream art form in the sixties, when artist Tom Phillips created a form of altered book called A Humument. Some of you may be familiar with this book, which seems to be a classic among altered book artists. In the late 1990s, altered books began to appear in the mainstream paper art community. It started as an outgrowth of the scrapbook and collage communities. Now it’s your turn to contribute to history.
Picking your theme:
Picking your theme is nearly as important as picking a good book. Your theme will determine many aspects of your design, such as your main or focal images, backgrounds, embellishments, ephemera,* and possibly even your color choices.
You can pick a theme that interests you, such as wine, quotes, rocking horses, Paris, summer at the beach, travel, time, money, your favorite hobby (examples: golf, swimming, painting), fashion, a favorite trip, family (real or faux), games, the circus, holidays, tea time, butterflies, donuts, favorite color, a trip into space, cowboys, etc. The sky’s the limit.
You might want to pick a theme in which you have many images already saved. I have made altered books of "Time," "Money," "Asia," "California Dreaming," "CSI, Crime Scene Investigation," "Buffy," "Halloween," and "Hands," to name a few. I had all kinds of images saved before I ever started making most of these ABs. I also made a book I named "Coll-AH-ge," in which I started with nothing, and created a collage each time I became inspired, especially by art I found right in my mailbox.
Alternately, you might decide to use this as a techniques-only book. For this type of book, you would document somewhere on the page what the technique was you worked on during that lesson. That way you would have a record of what you made and how you made it. However, rather than just documenting the technique, you should try to incorporate it in some sort of spread with the technique neatly printed somewhere on the page. You could also attach a tag to the page documenting the technique. Remember, the choice is yours.
Don’t confuse this with a journal. We will not be journaling. There won't be word prompts to spur you on. Don’t confuse this with a scrapbook. We won’t be scrapbooking. There is a difference. ABs are about collage, mixed media, lumps, and bumps. To me, the difference between scrap booking and/or card making and ABs is when making an AB you start from scratch and design/create everything. When making cards or scrapbook layouts, you usually start with a design or layout and pre-made acid free supplies that have been created for you. Also, we won’t be pouring out our souls or daily life experiences on these pages as in an art journal, at least not in words, nor will family photos or journaling be the main focus of the spreads. We won't be writing long messages about our lives, either. In fact, what will mostly be on your pages will be a title, saying, or a few well placed words that fit the spread. Many times, I've not even included words in my spreads! Other times, if I do include words, these words are computer generated. Having said that, if you are a stamper, feel free to bring your alphabet(s) out. I realize this is an over simplification, but it’s how I see the difference in these media.
Nearly as important as theme, but often overlooked is "style." What is your artistic style? What style are you going for? Examine your previous spreads if you’ve made some. If you are a card maker or scrapbooker, you probably already know your style. If not, look at various examples of altered art and decide what you are drawn to. Do you prefer artsy, vintage, retro, modern, cute? Do you like bright colors or muted? Do you prefer hodge-podge to structured? Or, do you favor them all?
REVIEW:
1. Pick a theme you like.
2. Pick a theme you’ve got lots of "stuff’" for.
3. Conversely, don’t pick a theme, but devote your book to techniques.
4. Determine your artistic style.
Gathering stuff, including ephemera, embellishments, and theme items:
*Ephemera: printed material that has little or no value and is not intended to be saved or preserved. These can include postcards, catalogs, cash register receipts, parking stubs, posters, tickets, bookmarks, airsickness bags, restaurant take out menus, napkins, and any piece of clean paper meant to go into the trash after use.
If you are unfamiliar with the word and want to learn more about ephemera, here are a couple of places you can visit: http://www.ephemeraology.com/ (a blog with lots of photos) and The Ephemera Society: http://www.ephemerasociety.org/
Obviously, you will want your ephemera, embellishments, and images to match your theme. Don’t overlook dictionary or vocabulary pages, game pieces, paid receipts, flashcards, and such. Save tissue papers and dress patterns. Gather junk mail that applies to your theme. Buttons, charms, and the like will add flare to your pages and you can incorporate them to correspond with your theme. Don’t overlook your friends and family. They can save "STUFF" for you, and once you tell them what you’re looking for, you’ll be inundated with supplies.
Basic supplies:
You can spend a small fortune on art supplies, including those for ABs. However, you probably have far more tools and supplies than you think if you have ever done any paper crafting. Since I’m a low tech kind of gal, and not out to sell someone’s products, my list of items needed for an AB are fairly simple and straight forward. You will find that I live up to my name as Queen of Free, but there are a few things you must have in order to create. If your funds are limited, spend money on tools and glue instead of fancy papers, cutesy embellishments, and scrapbook supplies. If you have them, fine. You probably won’t need them, anyway!!! If not, that’s OK, too. We’ll be making a lot of our own backgrounds and embellishments from things you already have and you can keep your scrapbook paper and embellishments for those acid free projects you want to work on.
Don't forget your special talent. I know you have one. All of us do, or you wouldn't be visiting an art blog. Maybe it’s crocheting, stamping, drawing, sewing, or working with mosaics, glass, fibers, photography, beads, etc. Whatever it is, you should find a way to incorporate it in your AB.
Traditional AB materials include scraps of paper and other flat materials such as newspaper and magazine clippings, shopping bags, alterable photographs (or photocopies of these photographs), wallpaper, and foil, along with objects such as string, beads, feathers, and fabric.
AB basics may encompass images, text, solid colors, or a mixture of these. You may want a recognizable image or word, or simply a suggestion, feel, color, or texture. Be sure these compliment or coordinate with your chosen theme. Most important, use what you have. Start from available materials and work from there. DO NOT go out and buy anything, unless you have NEVER held a piece of paper in your hand before.
Create those items you don't have. Most pages in your ABs will be some form of collage. Since collage is a blend of elements, it lends itself well to mixed media. You could paint, draw, stamp, doodle, or stencil in between the elements you find, or cover over them. Most important, don't rule out unusual materials. Use sandpaper, alterable blurry photographs, rice, seeds, dried flowers, staples, paint chips (free at American and Canadian home improvement stores) clipolas, various forms of tape, or rusty wire.
If you have NONE of these, a trip to your local thrift store is far better (and cheaper) than a trip to your local craft, hardware, or office supply store. You can often find paint, and one of a kind items not found in your big box stores that cater to the masses.
The supplies you will absolutely need are:
A well constructed book which you should already have
Scissors and/or craft knife
(Optional) paper cutter
Gesso (white, cheap student quality, no need to buy Liquitex or Golden brands)
(Optional: I have been told gesso is hard to find and quite expensive in countries other than North America. Use whatever product you use to replace the gesso, including cheap white paint.)
Glues, both wet and dry (various, pros and cons of each will be discussed in the coming weeks)

Foam and bristle brushes
Old credit or hotel card
Several bottles of cheap acrylic paint (more on that later)
Dictionary and/or phone book pages
3-D element that will fit into your niche
Items from your "junk" drawer (yep, we all have them)
Bamboo skewer, small knitting needle, awl, or something similar to scratch words into paint.
Self healing cutting mat approximately the length of your book (if you don't own a small mat, you can use a piece of heavy corrugated cardboard)
A brick or large heavy book (for weighing down your prepped book) which you will only need during the preparation stages.
Needed, but not required items:
Ruler, preferably cork-backed metal (or some way to mark the size and thickness of your niche)
Magazine images that support your theme
Junk mail
A good ink pen or pencil for drawing lines
Ephemera or found objects such as buttons, cancelled postage stamps, postcards, ticket stubs, fabric, ribbon, lace, tissue paper, old dress patterns, napkins, fibers, paint chips, bottle caps, scrabble tiles, flash cards, tape, etc.
Heat tool
White card stock
Printer paper
Optional items:
Wire and Wire forming tools
Beads
Crayons
Colored pencils
Leafing pens (gold, silver, made by Krylon)
Rubber stamps that fit the theme of the book
Dye and/or pigment ink pads
Reinkers (ink in bottles that you would use to add ink to a stamp pad)
Cosmetic wedges and sponges
Sea sponge
Cotton swabs
Twill tape or grosgrain ribbon
Scissors
Decorative punches
Masking tape
Sandpaper
Fibers
Ribbons
String
Thread
Needle
Chalk
Fabric
Stickers
Tissue paper
Decorative napkins
Paper clips or clipolas
Stapler and staples
Sea glass
Tape roller, like an ATG
Eyelets (and setter)
Brads (and punch)
Workable fixative, spray sealer, or cheap aerosol hairspray
Clear packing tape or cold laminate sheets
Glimmer spray mists (any brand will work, as will homemade mists)
Masks and/or stencils
Punches, either hand held or decorative
Glitter
Heat tool
Permanent markers (like Sharpie
Decorative ink pens (like gel pens)
Specialty pens, pencils, paint (such as watercolors, India ink, pan pastels, gouache, water soluble pencils, water soluble oil pastels, chalk pastels, H2Os, powdered pigments, and/or traditional oil pastels)
Really, really, really optional items:
Xyron, crop-a-dile, die cutting machine, sewing machine, soldering iron, hot glue gun, rock tumbler, toaster oven for baking polymer clay, beeswax and dedicated melting pot.
Since there are SO many items on the list, I'm sure you have at least a handful of the supplies you need to get started. Remember, there is NO NEED to buy anything. Most of your supplies are already in your home. It's just a matter of looking at them in a different light.
Segregating your supplies:
It is best to store your ephemera, embellishments, ribbons, etc. that go with your theme in an organizer of your choice. There are lots on the market, but here are two cheapie alternatives:
Expanding folder (if you are starting with a lot of "stuff")
A zippered baggie (large)
A shoe box (keep the tissue the shoes were wrapped in to use in your book)

Paint:
A note about cheap paint:
Cheap paint is best for ABs. Save your expensive paints for special pages and projects. If you don’t own any paint at all, please wait to purchase until after we learn a bit more about color in a future lesson.
Here in the US, you might be able to get paint free from your local Household Hazardous Waste site. Mine is called the HHW Swap and Shop. I believe they are found in larger towns, so it doesn't hurt to see if your city has one. I'm not familiar with this project in other countries, but I suspect there is some form, since Europe and Australia are far more environmentally conscious than we are in the states.
Review:
1. Gather your papers and magazine images relevant to your theme
2. Keep these images, decorative papers, and your book in the same spot
3. Do NOT buy anything for this project, unless you are out of glue
or a required staple
Prepping your book:
There are two methods for prepping a book. Most people will tell you to leave a small flap on two pages, skip a page, cut away two more pages, skip a page, etc. Then glue the two pages together, thus hiding the flaps. Supposedly this is the preferred method and please feel free to do this if you wish. The pro on this way people "in the know" say is it creates less stress on the spine and creates a strong page. The con is, it doesn’t reduce the bulk in the spine. However, if you wish to prep your book this way, here is how it's done.

Supplies clockwise from left:
A book
Glue stick
Self healing mat
Cutting tool, such as the Fiskars or an X-acto knife
Ruler
Pen or pencil (not shown)
A book
Glue stick
Self healing mat
Cutting tool, such as the Fiskars or an X-acto knife
Ruler
Pen or pencil (not shown)

First, using a rubber band or clothes pin, section off the needed number of pages in the back of the book for your niche. Leave at least 50-75 pages in the back of your book for a niche. In fact, you should roughly measure the thickness of the 3-D element (more on that in two weeks) you plan to use and leave enough pages to encapsulate it.

Beginning in the front of the book, select two adjacent pages.


Using your ruler, place a line 1/2" in from the spine. The length of the line is up to you.

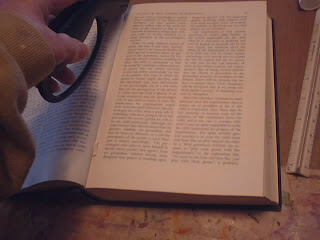
Do the same at the bottom. The "hump" you see in the spine area of the page was made by the cutting mat.

Using the edge of your ruler and your two lines as guides, draw a line the length of the page.

Although it's a bit hard to see in the photo because of the mat, the line runs the length of the page.

Using your cutting tool or X-acto knife, and a ruler, cut along the line. Two things you should note: 1) a plastic or wooden ruler should not be used. It will eventually be cut by your blade, which should be sharp. It is best to use a metal ruler with a cork back, but since I don't have one, I'm not using any ruler. 2)You must use some kind of cutting tool (X-acto, etc) because scissors just don't work for this step.

Remove the pages and you now have two "flaps."

Liberally glue around the outside edges of the next page. Glue both the flaps together and on both sides. You should use a "dry" glue, such as glue stick, gel medium, or rubber cement. Don't use a "wet" glue, such as Elmers.

With the book laid flat, fold the page in front of the flaps over to match up with the glued page. You will now have a sandwich which consists of one full page, two flaps, second full page.

Smooth around all the edges. Burnish the surface pages, using an old credit card, bone folder, hard ruler, or the palm of your hand. Don't forget the spine area. Be sure the edges are even and one doesn't overlap the other. You should allow the pages time to dry by closing the book and placing something heavy on top. This is one of those "hurry up and wait" tasks.

Continue removing pages until you get to the section you have partitioned off for your niche, or until you need to quit for the day. Close the book and allow the pages to thoroughly dry. Don't continue until you are sure the glue has had a chance to dry completely. You should also lay something heavy on top, such as a brick or a large book. Allow to completely dry overnight or longer if needed.
If you don't have glue sticks or tape, and the adhesive you used was water-based or was a "wet" glue that produced a lot of moisture, you might want to insert layers of wax paper on both sides of the glued pages to prevent the excess glue from seeping through to the next page. Remember to apply glue close to the spine for strength. You can see that is why I recommend a dry glue for this part of the process.

Be sure to save your excess pages. You are going to use some of them in your art. Even though it doesn't look like it, I have removed well over 1/3 of my pages from the book.
Alternative
The other way to prep your book is less popular and the one I use. Most AB artists frown on this method. Of course, I have to be different! After you read about this process, I'm sure you will be tempted to use it, too.
For this process you will need:
Your book
Cutting tool, such as the Fiskars or an X-acto knife (optional, but recommended)
Your book
Cutting tool, such as the Fiskars or an X-acto knife (optional, but recommended)
Beginning in the front of the book, select the two adjacent pages from the center of your signatures. Do you remember I told you to mark and be able to identify the center of each signature? You should begin by removing the center page, carefully tearing it away from the threads that run the length of the spine. Don't remove more than three consecutive double pages this way.
Now, moving to either side of the spine, I simply cut or tear the pages out of the book at the seams. I never tear/cut more than three pages at a time and leave about six pages in between. I also am very careful not to cut the string that holds the signatures together.
You do NOT have to glue two pages together using this technique, either. You may do so, if you choose, or wait until you are ready to make a spread. Several techniques we will make do not require double pages, one requires five single pages, and one requires three pages, which makes it harder if you must manipulate three or five double pages.
You do NOT have to glue two pages together using this technique, either. You may do so, if you choose, or wait until you are ready to make a spread. Several techniques we will make do not require double pages, one requires five single pages, and one requires three pages, which makes it harder if you must manipulate three or five double pages.
The pro of this way is it reduces the overall bulk of the book. The con is the same as above: it creates stress on the spine and the pages are no stronger than before. I’ve done it this way five times and have never had a book split or fall apart on me. However, that doesn’t mean it’s the right way. It means it’s one way. Please choose the one that makes you most comfortable.

You can see the difference in the pages I removed. The one on top is the one I cut. The one underneath is the one I removed with my knife or tore from the signature center.
REVIEW
REVIEW
1. Section off the pages you will save for your niche using a rubber band or clothes pin.
2. Remove pages per one of the two ways described above until you have removed at least 1/3 of the pages.
3. Save your excess pages.ASSIGNMENT for the second lesson:
Pick a theme
Gather your "stuff" that matches your theme
Gather your supplies
Gather magazine images and junk mail
Take a photo/scan of your book after removing excess pages
Take a photo/scan of your "stuff"
Post your theme along with your photos on your blog when I show Lesson 3 (in two weeks when we have and use the first Mr. Linky)
Please, please remember, the "assignments" are totally optional. You do not have to participate, you do not have to show your work. You may choose to quietly view the lesson, set the information aside, and not let anyone know you ever visited. It is completely up to you. However, if you join me in this venture, we will upload our blog entries in two weeks, showing our completed or in-progress assignments from this lesson.
Supplies you will need for our third lesson:
Your book
Sanding block (see below)
Tack or lint free cloth (see below)
Gesso, or alternative (see below)
The above three items are only necessary if you have a cardboard type book cover, but not needed if you have a cloth book cover
Some type of covering for your inside cover and niche (I will be providing examples of materials you can use for these)
Two heavy items to hold your pages upright
Supplies you will need for our third lesson:
Your book
Sanding block (see below)
Tack or lint free cloth (see below)
Gesso, or alternative (see below)
The above three items are only necessary if you have a cardboard type book cover, but not needed if you have a cloth book cover
Some type of covering for your inside cover and niche (I will be providing examples of materials you can use for these)
Old bristle paint brush (small, not foam)
Ink pen or pencil
Clamps or clothes pins
A rubber band to hold pages in place
Self healing mat or thick corrugated cardboard
Cutting tool or Xacto knife with a new blade (scissors will NOT work)
Ruler, or some way to measure and create straight linesTwo heavy items to hold your pages upright
Gel medium (preferred)
Once again, I am sharing this on CED. And I am thrilled you are back for a second lesson. Thanks so much. It makes me feel good that I'm not talking to myself!
Once again, I am sharing this on CED. And I am thrilled you are back for a second lesson. Thanks so much. It makes me feel good that I'm not talking to myself!


54 thoughtful remarks:
Hi Elizabeth
I am SO excited you are doing this - your tutorial is awesome! I hope you'll link your lessons to Inspire Me Monday (I missed last week's so link them both!) - I hope to participate when I am feeling better!
Ramona
http://create-with-joy.com
P.S. How and where is Bleubeard? Feels like forever since I've seen a new pic of him!
I think I understand all that!! Amazing or what? LOL Sounds like we are on the off... and I found another book at the thrift store which I prefer and it has lots of pages... so I think I am going to use that one... I think I have a theme too... and I am pretty sure I have everything on the need list so maybe tomorrow is tear pages out of books day!! Thanks for doing this Elizabeth... I know how much work it is.
Yeah - WOW - ready to remove pages - my book has colour plates in the centre of a couple of signatures so glad I can be rid of these. Need to find some of the Gesso I have read so much about but don't have. Also wondering what the last item you mentioned is "Gel Medium"??? Thanks Elizabeth this project is awesome.
Hi Elizabeth,
I am not sure I have all understood, since English isn't my mother language...
The last (let's say) half of the book is dedicated to a niche, and the 1st half is made of as many pages as there are around 4 pages (2 cut and 2 glued). Am I right ?
thanks in advance !
Ok, I think I've got it.... Looking forward to getting started now... thanks Elizabeth!
Thanks for replying on my blog, this is such a nice attentiveness !
I have used the translator, but sometimes it is completely odd ;-) or not precise enough, but with you reply I have got everything !
thank you so much !
Hi Elizabeth, I prefer the second method and have done some removing already!! pages I mean! :^)Patsy from
HeARTworks
Thanks for your reply with regards the "Gel Medium". Now you mention it is used as a glue I have realised it is probably the same as our Glue Gel. Some use silicon gel but I prefer a silicon free version called "Pinflair". Hope it is what you mean. I have removed quite a few pages from my book and searched the paper recycling box and magazines for bits and bobs, all sorted in a box ready..... Thanks
Great info, thanks for putting so much work into it. I have one question. What is a "heat tool"? All I can think of is a regular iron. I've seen something that heats for embossing - otherwise I'm in the dark.
Darla
Wow! This is a very detailed and complete post. This had to have taken quite a bit of time. Thank you for sharing your wonderful ideas so generously!
Wonderful tutorial ~ love your cat ~namaste, carol (A Creative Harbor) linked w/CED
Oh Elizabeth, how did you know I was wanting to alter a book???? Have just found all this while having a long overdue look on your blog, thank you so much my lovely. I shall have a look around my local charity/thrift shops tomorrow xxx
This is so thorough and clear. I know I will have to read through the two methods again BEcause I am one of those learners who switches learning styles when things are all static, even at thoroughly static as this wonderful tutorial. I find YouTube to BE very helpful as I can see and hear simultaneously, but I am going to give this a go as a learner, period, and trust the process.
Also, if anyone else is wondering about Gesso, my art teacher here had me using Kilz rather than store-bought Gesso. Kilz is a primer and really reasonably priced. The trick is that it needs to BE well stirred or shaken to get the consistency right. I've been using it for a few years Now and really like it. It's easy, too, to mix in the cheaper paints for backgrounds and such as well to use it as white paint for value. And it's water-based. Just sharing.
Looking forward to the fun. Thank you so much!!!
E~ you are amazing. Sure wish I had a guide like this when I made my first altered book! So complete and inspiring. can't wait to see the results of the class!
Most comprehensive Elizabeth, wow, how could we go wrong! xox Corrine
These lessons may actually get me away from the sewing machine and back to my books again. :)
This is fabulous info Elizabeth. Thanks for taking the time to put it all together.
What a great detailed tutorial! Thanks for sharing!
Woo woo! Lesson two and I'm raring to go but first I need to sort out my theme -have couple of ideas just need to find out which of them I have most ephemera and stamps for. Thanks for the instructions Elizabeth - very comprehensive.
I need to re-read the preparation details as I'm a bit unclear on the second one.
I understand taking the three pages from the centre of the signature but its the next bit about 'moving to either side of the spine, cut pages out at the seams'. By 'spine' do you mean the centre of each signature - sorry but I can't get the picture in my head.
Thanks
Ann B
xx
Excellent, Elizabeth. Very clear and I'm off to 'gather'!
Thanks for leaving me a message - all clear now.
Elizabeth the instructions are so comprehensive, thanks so much for all your hard work.
I have my book and will not need to buy anything, just need to organise it!
I need to think of my theme and start prepping my book ready to start.
Thank you.
X
Thank you so very much for mentioning my blog in this post! :D I'm thrilled that you think highly enough of my blog to send your students there - that means a lot to me! To those of you who were looking for inspiration: I hope you found some! :D Thanks again, and happy bookmaking!
Mel Kolstad, Owner
ephemeraology.com
That looks very interesting and you have lots of patience to outline everything in so much detail. I don't think I've ever heard of altered books before.
WOWEE Elizabeth!
when you do something you go all the way
you are so generous and so knowledgeable
this is already very impressive!
YOU ROCK!!!
oxo
Thanks Elizabeth, for all those details. Very easy to follow. I am opting for the page tearing method. So far, so good and no glue necessary ... yet.
i think i will opt for that less preferred method of tearing the pages. hope to start as soon as i get a free hour or so. thanks, Elizabeth!
I´ve made one AB before by glueing the pages together. Now I´ll try that other method and will tear the pages off... It´s so much easier!
This is a good lesson, clear advice! Thank you Elizabeth!
Hi Elizabeth,
I found my book and I can't hardly wait to begin... but I have a 2 quetions:
1) I found an old dictionary and it has a leather look cover, I don't believe it's real leather can I just put some gesso on it and alter it or do you think it's beter to apply some cloth?
2) I don't have gel medium so I'm gonna get me some but I did some research on the internet and there is something called: studio binder(from 4art an artist supply shop in the netherlands); its an acrylic binder (based on water) Suitable as a binding agent when making paint. It is also used as glue and as ruin ring for acrylic paint. Dries glossy and transparent. Could I use this too, its a lot cheaper :)
Oh and I defenitly go for your method, by tearing pages.
Thanks and House says hi to bleubeard.
Thanks so much for sharing such detailed instructions. I'm excited to start cutting pages. Still working on a theme - I want something broad but not too broad, hmmmmm...... This will be FUN!
These are wonderful directions! So clear--and thanks for all the photos. I have my book (several in fact), I have my theme, I'm gathering stuff, and I'm ready to start tearing/cutting pages as per your preferred method!
Hi Elizabeth,
Thank you for the quick reply! I can't find any other store that sells the binder. All the information the website gave I already transelated in my question so I'm gona stick (it that how you say that?) with the gel medium. I saw some awsome tutorials on the internet on how you can transfer a picture with gel medium and I'm really looking forward to give that a try :) I even have some old HP Premium inkjet transparency film sheets so that I can use my own pictures, I think it will be fun!
Till next time
Love Susan
I love to read working instructions and yours is wonderful. I am sure I will tear the pages. It sounds so reasonable to me. Cutting the book pages is cruel, LOL.
oh such a lot of stuff to think about, I have only skimmed the reading so far, I will get back to it another day when I have more time (it's just passed midnight). Really looking forward to starting
janet
Spectacular workshop here. You put so much work into this. Thank you so very much. Going to send out a link on Tweeter so more people can see this sensational post.
I got my book finally, but the removal of pages is making my head swim, lol This is the second time reading it, maybe by the time I read it 3 times I can actually begin......or 4 times....lol!
Wow, have I learned a lot already. The history of AB's is aomething I had no clue about. I'm now back from my trip, so now I will begin. Yeah! Can't want to get started.
You so know which way I'm removing my pages! Fantastically inclusive lesson E.
What fantastic detailed instructions, I have done a bit of altered books but it's great to be following this,from Irene
Oh Bother just wrote you a long post and couldn't puslish it and PING it all disappeared into the ether! Sigh.
Anyway just to say I have found 2 more sewn books.
1) Called "The London" about the old hospital but sparked the theme of LONDON considering it is our Queen's Diamond Jubilee this year. Also a softbacked book on the London noone knows with lots of balck and white sketches in it which I hope I can use somehow.
2) Called "Garden Open Tomorrow" so a theme of Birds/Butterflies and Flowers/Plants springs to mind. Also a dictionary with a small font which should be perfect to tearing into.
Thanks for all the inspiration - can't wait fo rthe next lesson.
BJ (Billy-Jane)
excellent instructions, even for someone like me who is experienced in altering books already! I will be following you along to see if I can learn anything else from you! What a lot of work you have done, posting all of these wonderfully clear instructions!
All ready to go. I wasn't sure at first what dry glue was, I think it must be a glue or 'PRITT' stick over here. But then I read the second option, well there you go no glue for me !!!
Looking forward to next time.
janet
Okay, found the second lesson and have my book and theme. I think I already have all the supplies for my art journaling, and much of the ephemera,too, but it will be fun to search out more. I have a lot of old magazines and catalogues to search through. This is going to be fun!
Hi Elizabeth,
Finally gotten around to posting about the art book that I made for Sherry (that you came looking for)on my blog.
http://itsanalienlife.blogspot.com/2012/02/my-swap-for-sherry.html Plesse feel free to laugh histerically at my fun and games making it. I am now learning form you the correct way to do it!!!!!!! Hugs Mrs A.
Woo Hoo! So glad you have done these fortnightly as I now haven't missed anything. I will sit down and sort out my "stuff" and be ready for your next instalment. As I have a Czech book I think you may guess what my theme will be! Not difficult really, if you know me! LOL!
Going with your way of thinning the book!
OK, I've torn pages :D. Still no theme springs to mind, but I'm thinking techniques. Thanks so much for teaching this class!
OK, so it has taken me a while to get back and read through your wonderful thorough explanation of how to continue with my book. I hope to catch up and have it ready for the next bit. This is all new to me, so I have no preferences for the page removing thing...will see what my book prefers....
i like your way of thinning and I am thinning my book as I type - well, after I type... see you in two weeks,
dxxxx
well been brave and thinned my book,maybe a little too much but am sure i will get better on the second book,i hope :)
looking forward to the next lesson,x
Yeah! Mission accomplished. I know - better late than never!! Went with your second way!
I found a book, an old Danielle Steel novel so there should be some fun text in it. :) Now off to rip out some pages! I think I will do a technique book, as I might have a hard time sticking to one theme, although I have thought that "FLY" or "HOME" would both be good themes as they are quite broad.
Hi Elizabeth,
I love this tutorial class. The lessons are so comprehensive. I know I'm late to the party but have just developed an interest in altered books. I've got my book and my theme is 'favourite things'. I'm pretty sure my book is sewn but it's hard to tell. The stitching doesn't sit along the pages in the centre of the signatures. It seems to go side to side. I can't figure out then, where to tear the pages out. I want to do your method rather than cutting the pages and gluing. I don't have a blog so I'm happy to come back and check for a reply here or email labroderie at bigpond dot com
Your post was really helpful. Just what I needed. Thank you!
scrabble word finder
Post a Comment