I'm having a terrible time with this new blogger interface that I've
been warned was going to happen soon and now has. I've been resistant
to the change because I used an offsite (and password protected) storage
system up until now. Now I must revert to using strictly Blogger's way
of doing things, which means I have to share all my photos on Picasa.
I'm considering finding another way of blogging, although I will keep
the AB lessons here.
Since I've spent so much time trying to straighten out this blog, I'm
going to bring back a post I created awhile back. Unfortunately, I
think I spent as much time reworking this post as I would have making an
entirely new one!
I'm also having trouble with the
photos. Even though they appeared in the center of the post, when I
previewed the page, they were on the left. I have
no idea why, but I had that problem before when I used the "new" blogger
a few times. I decided to enlarge them to their original size, and that made them oversize due to the width of my blog post area. The two sidebars are the reason I have less room, but that is a moot point. The point I'm trying to make is, if you want to see the photo in its entirety, you will have to click on the image.
Last week (see
Lesson 16 of my AB lessons) I showed how to use Staz-on re-inkers which are solvent based, and 91% Isopropyl Alcohol to dye fabric, as shown above. I explained if you were using Dye or Distress reinkers, you would use water with your reinkers, and never alcohol. I thought I would reiterate that with this post in which I use dye ink and water. Although this was not created for an altered book page, the same technique could be applied using your favorite no-sew iron on adhesive. There are many brands, but Wonder Under is probably the most popular.
Now on to some shibori dyeing.
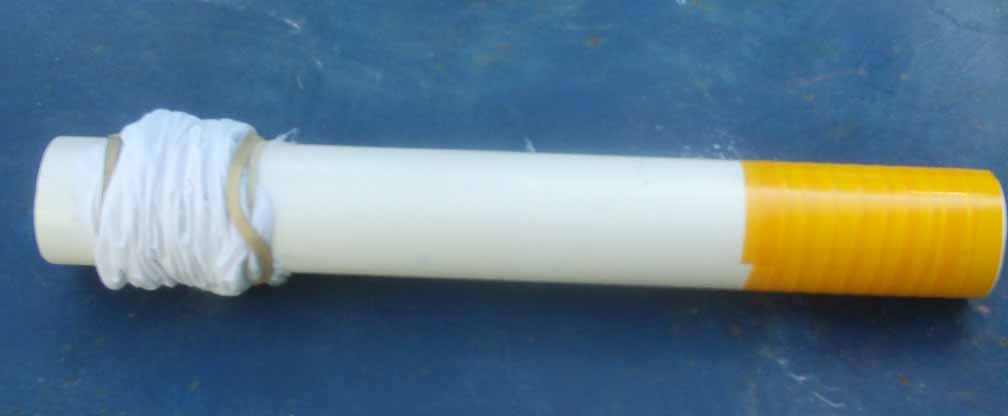
I began by placing a 10" X 18" (25.4 cm X 45.72 cm) piece of white cotton fabric (from an old sheet) that I smoothed out and wrapped at an angle to a 2 inch (5.08 cm) PVC pipe. Smaller pieces of fabric are easier to handle, really large ones can be doubled. Begin by placing your fabric at an angle to the pipe of your choice.

Wrap the fabric at least once around the pipe. At this point, you can add your first string (or as shown in this photo, a rubber band).

As you continue to role your fabric on the PVC pipe, you will want to scrunch it toward one end.

If it's a really large piece, you can scrunch both ends toward the middle by pushing as tight as possible. For the second pipe, I didn't use a rubber band, but tied waxed linen thread around the piece and tied tightly. You can see how small this piece is relative to the other (below).
Your scrunches don't have to be evenly pleated, but you should wrap waxed linen thread or heavy string around the piece now, beginning on one end, working your way down the piece and back. End on that same end and tie off. Now that the fabric has been wrapped and tied, it's time to add some color.
It's time to finish the tutorial now that the poles have been wrapped.
Please note that my coffee mug (on the extreme left) and my art doll
Wendy, play no part in this tutorial.
Note also the pole closest to the camera is the one with the rubber band and waxed linen thread, and the one furthest is the one with only the waxed linen thread.
Supplies clockwise from top left:
Dye reinkers, colors of your choice
Distilled water in a spray bottle or mister
Cotton fabric wrapped onto 2" (5.08 cm) PVC pipe and tied with waxed linen thread
Cotton fabric scrunched and tied with waxed linen thread or rubber bands and waxed linen thread
Strip of cotton, approximately 3/4" (1.91 cm) wide to be turned into tag ribbon, wrapped with thread
Cotton fabric folded into a triangle and held together with a clothes pin
White thread
The longer fabric is 18" X 24" (45.72 cm X 60.96 cm). It is also a piece of white
cotton fabric (from an old bed sheet) that I smoothed out and wrapped at an
angle to the PVC pipe.

I ran dye ink (reinker ink) the length of the fabric on both pieces. I continued adding ink until I felt I had enough color on the pieces, including the one in the foreground with waxed linen wrap that fell apart on me.
When I originally posted this tutorial, several people asked what dye reinker ink is. There are as many brands as there are dye ink pads. They are the ink refills that rejuvenate your ink pads when they begins to dry. I can't tell you all the brands, because I only buy reinkers, never the ink pads and I buy them on clearance because I don't care about anything except the color and how I can use them to color fabric.
One thing you should know is, although some dye inks may be labeled "permanent," do not use them when coloring fabric that will be used for clothing, or that will be used in art flags, or when making resists. They simply won't hold up to prolonged exposure to water or the elements.

I should add that if you don't want dirty fingernails and dyed hands, you should wear gloves. However, hindsight is always 20/20. Of course, if you are like me, your hands are constantly a different color.
So without further ado, I began spraying the distilled water on the fabric.
You do NOT really need distilled water, but it was in the sprayer, so that's what I used. Remember, this fabric started out
dry, something you normally wouldn't do when dyeing fabric. But since I used concentrated dye reinkers, I waited until I had the ink in place before adding water. And I like breaking the rules to see what I can come up with, too.

This is the piece that was in a ball that fell apart on my table earlier. You can see I added too much water, then hung it wet, which caused streaks in the fabric due to gravity.

When you have sprayed the pieces to your heart's content, you can stand these up on your work surface. It's always nice to have a bit of extra fabric out to collect the excess drips. Being a frugal person, I wiped up the excess ink using the fabric strip I will use for tag ribbon, as well as the thread, which I am collecting and saving for another project. Now is also a good time to put your supplies away.
When the fabric is dry to the touch, remove your wax thread (and/or rubber bands) and finish drying on a clothes line.

Here are the finished pieces late in the day when dry. The two pieces in the foreground are the ones from the poles and the one in the back is the same one I showed hanging on the clothes line. The colors are no longer as pretty as they were when they were wet.

Here is a close up of the longer piece of fabric from the pole (PVC pipe). Although I love the technique,

and the results (I swear these ridges were made by the process because the fabric is laying quite flat and smooth in this photo), I am not crazy about the finished piece. These new colors, although from the same manufacturer, don't play well together, are not really vibrant when dry, and turned into a bit of a disappointment for me. Of course, that only means I can play at this technique again until I am happy with my color choices.
And remember, any dye based reinker will work. Just be sure to use DYE ink and not pigment based ink reinkers. Also remember that you must use only alcohol with solvent based reinkers.
I hope this relieves some of the possible confusion I may have caused when I dyed fabric last week, and I hope you will try this technique, too. After all, I'm sure most of you who are still playing with your ABs have at least one reinker!







.jpeg)





.JPG)


 This month, I thought I would experiment with fasteners, rather than the wax linen thread I used last month.
  From back left clockwise, 1) a fan fold turned into an accordion fold and held together with clothes pins, 2) a flag fold with large paper clips, 3) another flag fold with binder clips, and 4) a fan fold rolled up like a jelly roll and secured with a thick rubber band.
 I used these greens for both flag folded fabrics.
  I changed to pinks and lavenders
  with the accordion fold.
  This one is still wet. I wish you could see the shimmer I got. Even though it was quite warm in my craft room, it took these three an entire day and night to completely dry. I fear I got a bit more overenthusiastic with the sprays this month, although I once again used a small brush to add the sprays (which never want to spray).
 For the first flag fold,
  I got this. The paper clips didn't leave the marks on the edges that I expected.
 Next were the binder clips.
  They also didn't leave many marks, although there is evidence of them in the folds in the center.
  This is the accordion fold
  that produced this. I fear I got overenthusiastic with the mists.
  Here are the three together. I believe they may look better once I iron them. Hopefully, they will make great backgrounds on various art quilts.
 I have to admit, this one is my favorite.










 Dollar Exchange Rate



