Showing posts with label Guest Designer. Show all posts

Saturday, April 19, 2025

Guest Desiger Mia from Craftartista


I have one final guest designer and host.  Today it is my dear friend Mia, who is also one of the moderators at Art Journal Journey.  She recycled a very different project.

Mia, who many of you know as Craftartista, recycled an old vinyl disc record and turned it into a bowl.  She also told me she added patterned paper in the center.  I tried to make one of these bowls years ago and mine turned out deformed and didn't look like a bowl at all.  Mia's turned out great.

This is Day 19 of 22 and my friend Mia is the guest host and designer of a recycled project.  Thank you for your visit and thanks to Mia for her contribution today.


Wednesday, April 16, 2025

Guest Designer Erika N. (aka BioArtGal)


Today I am thrilled to have another guest designer, this time my dear friend Erika, who many of you know as BioArtGal. 

Erika sent her entire project, but I decided to start with a bit of a tease.

Of course, I couldn't leave you hanging, so I am also sharing this image of these "used craft colored envelopes with clasps."  Erika glued some of the folders shut, but left some open in order to add tags or other ephemera. 
 
To see the entire project, please visit Erika's blog
 
This is Day 16 of 22 and my friend Erika is the guest host and designer of a recycled project.  Thank you for your visit and thanks to Erika for her contribution today.


Tuesday, April 15, 2025

Guest Designer Elle (eotc)


Today we have another recycling queen offering to share her latest project.  Most of you mixed media artists know Elle who is also known as EOTC, which stands for Empire of the Cat.

I asked for a teaser photo from Elle and I got an overload of fun.  Squiggles thinks the cat in the photo looks like him and I agree.  Elle explained this is one of four photos, and nearly everything she used was recycled.  I see a teabag, a chocolate wrapper, book paper, tickets, and fabric scraps. Please visit her blog to see everything she has recycled for this project.

This is Day 15 of 22 (also known as Tax Day) and I was fortunate enough to have Elle as my guest designer today.  Thank you in advance for visiting today and thanks to Elle for guest hosting.  Please visit her blog and thank her, too.


Tuesday, April 8, 2025

Guest Designer Alison Hall


Today I am privileged to have a guest designer.  Many mixed media artists know Alison as Craftytrog and her blog Crafytrog's Arty Adventures.  Although she fell and fractured the top of her arm recently, and won't be able to make art for at least 6 weeks, she still didn't let me down.

Alison created this in a junk journal.

She made a pocket with the teabag.  I love how she used staples and other recycled materials, too.

Thank you beyond belief, Alison.  Please don't forget to visit Crafytrog's Arty Adventures and thank her for recycling and being today's guest designer.
 
This is Day 8 of 22 and I welcomed my guest host and designer, Crafytrog.


Tuesday, September 3, 2024

Live your life in color


Today you will find me at Try it on Tuesday, where I have been invited to be this fortnight's guest designer.  As I'm sure you can tell by the title, this post is about color.  Those who frequent my blog have read many times how I am driven by color.

I give you Live Your Life In Color.  I have a few close up shots, too.

Live is colored in a deep lavender watercolor pencil.  The font is Tiffany Black.  The letter is outlined in a deep lavender dye ink.

Your is also outlined in the same dye ink.  The font is Rubber Stamp.

Life was smudged with the dye ink.  The font was Scrabble Tiles.  In was outlined in the same dye ink and colored with a deep purple watercolor pencil.  The font was Mona Lisa Recut.

Color was created using stencils, felt tip markers, and two color wheels printed from the internet.  The stencils were outlined using a black Posca pen.  The L was intended to be blue, but I didn't realize the yellow paint beneath it would turn it turquoise.  I kept adding more and more marker ink, which eventually bled under the stencil.

I fussy cut the two color wheels, but I am not very good with cutting circles.

I needed more lavender because I had none in the background colors.  I used two types of punchinella (sequin waste), one of which were the stars you see above.

The other were circles that took the dye ink better.

When I placed the page on the scanner, it curled and distorted the box of crayons I so carefully fussy cut. I originally considered using the phrase "Color your world," then decided on the one I later chose.  I decided to use the box of crayons I printed from my color laser scanner, anyway.

I started by dry brushing Golden fluid acrylics on my sheet of 110 lb cardstock.  I began with yellow, then worked my way to the top of the page with orange and red.  I didn't clean my brush until I got to the cool colors.  You can tell I ran out of room before I got to purple, which is why I used that color on the accents and words.

Thanks for joining Bleubeard and me at Try it on Tuesday.  We look forward to seeing your own interpretation of Make it Colorful.  You can make any type of entry you choose, such as cards, bookmarks, ATCs, ATCoins, paintings, even 3-D items as long as you follow the theme.  Thanks again for this true honor.


Monday, June 12, 2023

Birds and/or Feathers: The Quirky Bird


 Bleubeard and I give you one of my quirky birds I like to create.  However, I have never created one with real feathers before.

If you have been to the Try it on Tuesday blog you have already seen this journal page.

That's because I have been asked to be the guest designer this fortnight.

Let me start at the beginning.  I used black Staz-on to color the lid I cut using a safety cutter from a can of green chilies.  I also thought I might use this background I created using two colors of Staz-on and 91% Isopropyl Alcohol.  In the end, I used the black lid, but not the background.

I fussy cut the bird from an old calendar page.  Unfortunately, I was unable to remove the glare on the bird. 
 
There are real feathers and sterling silver feathers, both of which were from two different dream catchers.  Sadly, the black Staz-on didn't fare too well on the bird's body.
 
The real feathers had minds of their own
 
and decided to point both outward and inward.

The quirky bird is resting on the branch of the tree.
 
It definitely feels safe among the beautiful flowers.
I tried to show how dimensional this bird is.


Bleubeard and I appreciate you stopping by and hope to see or meet you at Try it on Tuesday for this next  fortnight.


Tuesday, December 13, 2022

It's all about Santa


Today I have the honor of being the Guest Designer at Try it on Tuesday.  And what could be better to end 2022 than to make it all about Santa.
 
I suspect some of you are here because you saw this on Try it on Tuesday's blog.  I imagine you want a closer look at How Santa spends Christmas eve.


Santa was part of a napkin I found in my stash.

Santa is still in his pajamas at 6:00 a.m..  After all, he needed a good night's sleep because tonight and tomorrow will be his busiest day of the year.  After Mrs. Claus fixed him a cup of hot chocolate, 

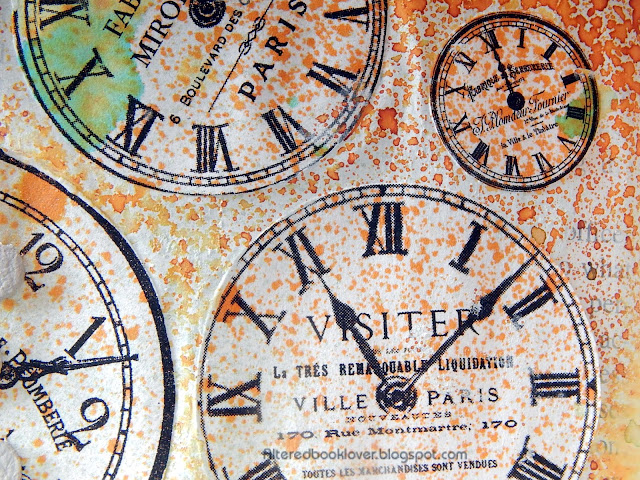
he searched for the perfect tree to decorate.

By 10:00 a.m.,

the tabletop tree was decorated.
 
Santa loves Mrs. Claus, including her baking skills, and the way she keeps their home so warm and loving.  Their photos sit proudly above the table in the foyer.
 
Of course, it wouldn't be Christmas in Santa's home without a rocking horse!

Looks like Santa forgot his hot chocolate mug.  Not to worry.  Mrs. Claus will refill it and take it to him.

After a good lunch, Santa contemplated a short nap.

Rested and refreshed, by 1:00 p.m., it was time to get dressed.

It didn't take Santa long, and by 1:30 p.m., he was dressed and looking good.

Then it was time to load his sleigh and take off delivering all those toys, clothes, and food baskets around the world.

When I was asked to be the Guest Designer for this theme, I looked for any and everything Santa I could find.  I found two cards, one envelope, and two napkins I felt I could use.  The story came after I had everything in hand.

I started by covering the words on the page with pale green latex paint.  As an aside, latex (sometimes known as house or wall paint) is actually more supple on paper than acrylic.  Once I had the story in my head, I computer generated the words, which I cut and outlined with black dye ink.
 
I fussy cut the clocks I had in my stash. I fussy cut the gifted Santa in pajamas, which had been a Christmas card.

I created the table because I like making quirky furniture I first created from a free taster lesson on shapes.  Santa and Mrs. Claus were from my stash, as was the rug on which the table sat.  The tabletop tree was a gifted sticker and the striped base on which it sat was created from a gifted Christmas envelope.  The rocking horse was stamped by me and fussy cut.  The other hot chocolate mug was also from the inside of same gifted Christmas card.

I hated to deconstruct the beautiful card I received with Santa's outfit, but I needed something in that space.  The rocking horse postage stamp was in my stash, probably from a Christmas card.

The final two images of Santa were from two different napkins.

Thanks ever so much for joining me today, and thanks to all the Design Team at Try it on Tuesday for bestowing this Guest Designer honor on me.


Tuesday, October 26, 2021

It's Time


Today Bleubeard and I have been honored to be the Guest Designers for Try it on Tuesday.  We consider it a fabulous honor and look forward to sharing our entry with you.

I'll start at the beginning, because you may have already seen the completed entry if you have come from the Try it on Tuesday blog.  The first thing I did was fussy cut many clocks.  Once cut, I laid them down using pale mint green house paint.  I had no gesso and didn't want to use my gel medium, so paint was my alternative choice.

In addition to the clocks, I also included two old calendar pages from years past, three fortunes referencing time, and two postage stamps with clocks on them.

For once I was smart and tested all the shimmering mists before I added them to the page.  Some were too dark and would have obliterated the clocks.  You can see I used both commercial and my handmade shimmer mists.

I masked some of the embellishments because the clocks were all I wanted to color.

I added the various spray mists

and took a few photos so you could see the results of misting.

Here is the completed entry.  Not the best photo in the world, so I will provide lots of close-ups.

I wish this had shown up better in the final spread.


As I explained above, I began by laying down pale mint green house paint, over which I placed the fussy cut clocks, fortunes, and postage stamps.  
 
After masking and spraying, I added the computer generated words, the lovely Memory Makers clock (upper left), and real clock hands, over which I covered with a gifted gold circle.  The die cut letters (T, M, and E), created from various leathers, were chosen for their texture.  The "I," created from a wood mounted red rubber stamp called Pocket Watch, was stamped on paper, then adjusted in Photoshop to fit the size of each of the words.

Thank you for joining me today.  Bleubeard and I are delighted you stopped by and are very grateful to Jo and the wonderful design team at Try it on Tuesday for inviting Bleubeard and me to be their guest designer for Time.