


.jpeg)


.JPG)


Several years ago, I joined a group who altered two playing cards a week. Before we could create the art on the playing cards, we had to sand them, then gesso the fronts. I wish I knew then what I discovered recently. I might have enjoyed altering these playing cards a lot more.
I don't know about you, but if you have become interested in altering playing cards, or want to use them in junk journals, this will save you a lot of time.
 Supplies from back clockwise:
Computer/printer paper; Cardstock; Edges of old carriage driven printer paper
Pie tin
Instant coffee
Cup of boiling water
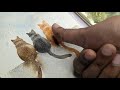
Playing cards
This first step is not necessary if you just want to alter the cards. I want to use them for a theme junk journal, so I will show my process.
 Add the instant coffee and water to the pie tin. It's obvious I got too much coffee in relation to the amount of water I used. Dunk your playing cards in the coffee water.
 Add printer paper and cardstock to the coffee bath.
  Place something waterproof under your pie tin. DO AS I SAY, NOT as I
DID. Thankfully, I refinished this table myself, so I know how many
layers of varnish are on it. I also suggest you wear gloves, which will save your hands (and my camera).
Place something waterproof under your pie tin. DO AS I SAY, NOT as I
DID. Thankfully, I refinished this table myself, so I know how many
layers of varnish are on it. I also suggest you wear gloves, which will save your hands (and my camera). Allow the papers and playing cards to sit in the water for as long as you like. I left mine in for two hours, but I should have pulled them out sooner.
  Be sure to separate all the papers so they don't dry stuck together.
They won't come apart if you don't. No need to ask how I know this!
Be sure to separate all the papers so they don't dry stuck together.
They won't come apart if you don't. No need to ask how I know this! Now that your cards and papers have dried, begin altering the playing cards.
Choose the same number of used and opened tea bags as playing cards.
 You will also need backing papers. I'm using the coffee dyed papers, but you can use cardstock, scrapbook paper, old wallpaper, or book pages. You will further need ribbon and a hole punch.
 Playing cards and empty tea bags are all you need if you are just altering the playing cards. The good news is there is no sanding and gessoing these cards. The teabags will take care of those tedious tasks.
 To adhere the teabag to the playing card, you will need water and white glue in a 2:1 ratio of water to glue.
 Use a brush to mix the water and glue.
 Be sure to mix well, then adhere the mix to the top of the playing card.
 Adhere the teabag to the playing card with the inside of the teabag against the front of the card.
 This is another do as I say, not as I do. This is the only card I didn't remove the ends. I learned my lesson rather quickly and the other five cards didn't have all that excess build up.
 Adhere the backing paper of your choice using white glue. Do not use the watered down glue on this side.
  Allow both sides to dry overnight.

 Using a ruler, mark an erasable line at the 3/4 inch, 1 3/4 inch, and 2 3/4 inch lines along the length of the long edge of the playing card. If you prefer, mark two lines at 1 inch from each end.
 Using a hole punch, cut three holes in your playing card. I considered using my Crop-a-dile, but I wanted a larger hole than my Crop-a-dile afforded me.
 Punch identical holes in all but one of the remaining cards, then cut from the opposite side for the back of your journal.
 I auditioned two different types of ribbons/fibers and decided on the one on the right.
 If you have been around my blog for any time at all, you know these buttons are NOT my style, but since Bleubeard and I are hosting Art Journal Journey this month, we need to ask What's Your Style.
  Believe it or not, these NOT MY STYLE buttons were the inspiration for this junk journal book. I added these buttons to the ribbon I chose and tied them in place.
 Make sure you allow enough "give" in the ribbon so the pages can lie flat when open.
 I only had time to decorate the covers. I hope to have a few pages finished in time for T Stands For Tuesday.
 I colored each of the cups and mugs using my gel pens. Some were very glittery, but they don't show well on camera. I colored inside each of the handles using brown gel pen because I knew I would never be able to fussy cut the tiny handles properly.
I want to give a shout out to two artists who have inspired me to create this little book: Debra at The Feather Garden and Sirkkis at Korttipaikka. Although my little book is not anything like either of their junk journals, their art is what inspired this book and this tutorial.
Bleubeard and I are delighted you chose to join us today for my monthly tutorial. We both hope to also see you at Art Journal Journey where we're celebrating What's Your Style. When this post goes live, you'll find it on my tutorials page. I will also update it as I finish the pages in the book.


22 thoughtful remarks:
What a very. very.... very cool big mess - I love it!
So cool!
Maybe I (sadly) will have time on my hands soon and copy you, if I may?
We played cards so often when traveling throughout Australia - it would be a perfect pressie for Ingo!
Yes, that's you with your creative, imaginative vein of art objects!!!
I was so excited to see what you make of it and looked and was amazed at what wonderful things came out. respect from me!
Have a good day, hugs, Elke
Looks like a fun project. Love the teacup theme which makes Tuesday my favorite day of the week, thanks to you.
This looks a realy fun and dare I say messy experiment. I am smiling at the thought of coffee bath, the pages made with the cards looked fantastic.
Stay safe .
Yvonne xx
I haven’t seen that huge-format punched computer paper in years! I assume it’s still used somewhere, but not in my environment. The recycle rooms used to have mountains of it — so it would have been good art material to look for. Interesting project.
best… mae at maefood.blogspot.com
Soon I will make a junk journal for a swap. The idea of using playing cards is perfect, Elizabeth. Thank you for the inspiration, my friend.
What a fun journal idea. I love the theme and those cte little buttons/charms. I also like how you covered the card so it just peeks through. You can do a lot with cards like that, as I am sure you already know. I haven't coffee or tea dyed anything in years, but you have inspired me. Thanks for this fun post. As I said, it is inspiring. hugs-Erika
Wow what an awesome tutorial Elizabeth. one of my slow mail friends and I were just discussing about how to dye papers with coffee or tea. we thought one needed to iron these, one site we read said to put them in the oven for a bit. Love your playing cards junk tutorial too thanks much Kathy
I love how this turned out. This would make a great T Tuesday post!
I love this idea! Your little book looks amazing Elizabeth.
Fascinating - and I really appreciate the 'warts and all' tutorial. Thank you.
I found your book! It's fascinating, so creative and lots to look at. And thank you for mentioned mi, I don't have any credit for your own creativity, Elizabeth. I'm sure you will make them more 👍💐
Those cards became grungy which is a neat effect. I enjoyed the tea cups. Really cool
Good job, thanks for showing your process!
Hi Elizabeth I have a question maybe you would have some ideas. I want to figure out how to use up the handmade sealing wax I have, that is very brittle. do you know anything about rubber cement or another product that I could put over this stamped wax that would protect it from cracking off the paper? thanks
I LOVE this. Your little book is beautiful, and I am going to make one-now I have an excuse to buy some playing cards!
Ohhh this looks like so much fun. Messy and fun with great results.
Thank you for that excellently detailed method of doing this. I don't think I have anjy playing cards in my stash at the moment but if I get some I will definitely have a go - got lots of tea bags ready.
Hugs, Neet xxx
I had to close my eyes when I saw they stain splats on your lovely table, so glad you've made it waterproof with your varnish. What a super alteration, don't they look splendid all made into a mini junk journal. I really do love this, well done Bleubeard and Elizabeth (I do help Bleubeard helped clean up after..!!) Hugs Tracey xx
P.S Playng catch up after a busy week.. off I go peeping x
I loved this tutorial - got a bit worried about your table until I read that it has a good protective coat! Your little junk journal looks amazing! Hugs, Chrisx
f323t9drifq179 vibrating dildos,anal toys,horse dildo,penis sleeves,fantasy toys,male sexy toys,vibrators,prostate massagers,Clitoral Vibrators y760r7twfxp714
kb740 hanwag suisse,new balance chile,xn--dopetrkiye-eeb,xn--vejaespaa-s6a,veja slovakia,panama jack hat mens,vincibelgique,nobull ireland,lotto ropa tenis vu111
Post a Comment