


.jpeg)


.JPG)


 Today I'm going to share how I made my Christmas tip-ins and cards I sent this year. For my tip-ins, I started with a Staz-on reinker I mixed with 91% isopropyl alcohol.
 When the sheets of card stock had been colored, I created a template for the tree I would eventually add.
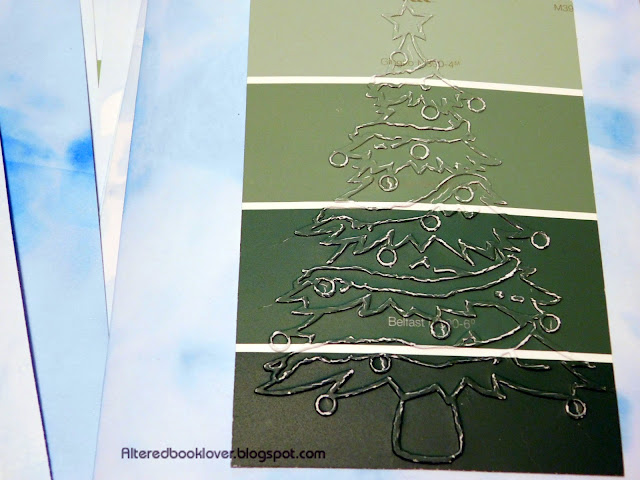 This was the first time I had ever dry embossed anything, so it took some work getting the right number of shims in order for the embossing to be successful. Gotta' love those large Behr paint chip samples.
 I fear a few got debossed, rather than embossed, though. The tree took up the front side of my tip-in.
 Now let's head to the back side. It reads:
This 19th annual tip-in is sent with love by
Bleubeard, Squiggles, and Elizabeth
Christmas, 2021
 Of course, there was a part that was originally hidden by the small tree tied using my handmade baker's twine. It reads:
Here is a TREETto place on yourTREE
I'm not an eyelet person. Even with a crop-a-dile, my hands cramped and cramped as I was assembling eyelets on both the trees and the tip-in bases. I tried to make the eyelets look nice on both sides, but that was sometimes impossible, as I had a finite number of trees.
 After I completed and sent my tip-ins (because several had to go overseas), I started on my cards. It was finally time to cut these dies apart. At least I have the tool for it. I do love my tools!
 Now a different set of shims and tools required for my Big Kick. I was on my way at last. There were a LOT of "firsts" in both the tip-ins and the cards this year. And my friend Sharon wondered why I made them all the same! I believe in assembly lines.
 Once all the dies had been cut, I got out these gifted note cards my friend Kathy had given me years ago. For some reason, they weren't large enough for her. For me, they were perfect. Had I chosen, I could have printed sentiments. There were even instructions for how to create the writing in WordPerfect, my writing software of choice. As an aside, when I learned a client insisted on Word for documents, I found I could create the document in WordPerfect, which would then allow me to save it in Word.
  Back to the cards, though (have I never mentioned I'm easily distracted?). It was time to color them using pumpkin Staz-on reinker and 91% isopropyl alcohol. Excess cardstock I laid under the card bases can be seen drying on my craft room floor.
  Looks like I'm ready to start stamping, something I am NOT good at.
 And then I did the most ridiculous thing. I inked everything using PIGMENT ink. For those who aren't familiar with a pigment ink pad, the ink doesn't dry quickly, like solvent or dye ink does. These took overnight and needed heat to help them along. They are sitting on my cracked and dirty craft floor antistatic mat near the heater.
 A new day, different challenges. Since the design of the die cut reminded me of a postage stamp, I got the idea to add a cancelled postage mark that read SC for Santa Claus and north pole. Thankfully, I got smart after three of these cancellation marks.
 It was now assembly time. First the front,
 then the inside sentiment,
 and because I was afraid the ink might bleed through to the back, I added my "handmade by" stamp to the back of the sentiment. It looks like Bleubeard can stamp his name better than I can stamp mine!
I want to wish everyone who celebrates it, a joyous, safe, and healthy Christmas. See you tomorrow, folks. I'll be gone all day today.
I also decided my card (and probably my tip-in, too) fits nicely with this month's Country View Challenges, so I'm joining them, too.


15 thoughtful remarks:
WOW. You do SUCH beautiful work.
Merry Christmas, have a great day, hugs, Valerie
Wow. So much beauty, so many new ideas and techniques and the anti-bleed-through idea is so clever, too!
Have a Merry Christmas!
This was so fun to watch you make and to receive. Merry Christmas! 🎄
The end result is beautiful! Thank you for the tutorial. Merry Christmas!
I hope you have a wonderful day.
best... mae at maefood.blogspot.com
Your talent is wonderful Elizabeth! Wishing you and the family a very Merry Christmas!!! ♥♥
Merry Christmas 🤶 and thanks for showing us your process with the cards. Lovely work! Hugs, RO
Good afternoon and happy holidays. New friends and bloggers will be welcome in 2022, I'm Brazilian from the city of Rio de Janeiro. I would like to invite you to meet my Blogger.
Merry Christmas!
Very nice. I hope you had a very nice Christmas.
Love the backgrounds and the cards you made. Merry Christmas
I'm glad you showed this as I had wondered how you did the green tree! I'm all for production lines although I only usually do 5 or 6 of the same design at a time. Hope you enjoyed your Christmas with Scott, Hugs, Chrisx
These are so pretty, Elizabeth! I hope your Christmas was merry and bright!
Lovely cards Elizabeth! I hope you had a wonderful Christmas.
Alison
Post a Comment