


.jpg)


.JPG)


This year, I'm sharing a tutorial I've posted twice before, and it's one of the most requested posts ever. I show how I make my handmade shimmering mists. Each time I post it, I learn something new and find new ways to improve it.
 In fact, here is the opening shot from the first time I created the tutorial. I've definitely improved the photography, since I now have a much better camera.
 Also, this time, I have limited the number of supplies to one handmade shimmering mist.
Supplies I used from back clockwise:
Distilled water*
Mica powders (the type that DOES NOT have a binder), colors of your choice
Small refillable spray bottle that has been washed and cleaned**
Elmer's Glue-All or any good PVA glue***
Small bead (used to mix the glue and mica powders in the bottle)
Stick or spoon for mixing (not shown in this shot)
*A note about distilled water. Distilled water will last forever in these bottles, while tap water will cause the mists to get moldy over time. Although I have shown this water in a container that did not originally hold distilled water, I assure you, this is distilled. If you plan to use the entire container immediately, or in one sitting, you don't need distilled water. However, if you plan to let this product sit for any length of time, distilled water is the only way to go.
**A note about the refillable bottles. I had some spray mists that I used, then cleaned after they were empty. Later, I found some after-bath spray at the Dollar Tree (in US, where their slogan is "Everything's a Dollar") that was in a package of two for $1.00. I emptied the bath spray and used the bottles. Much cheaper than going online to find these really pricey spray bottles. I've also been told you can find empty bottles at some drug stores in the US for about a dollar.
***A note about Elmer's glue. Any good PVA glue will work, since many who live in areas other than the US don't have access to this glue. If using Elmer's be sure you use the Glue-All because their "school-glue" brand is watered down.
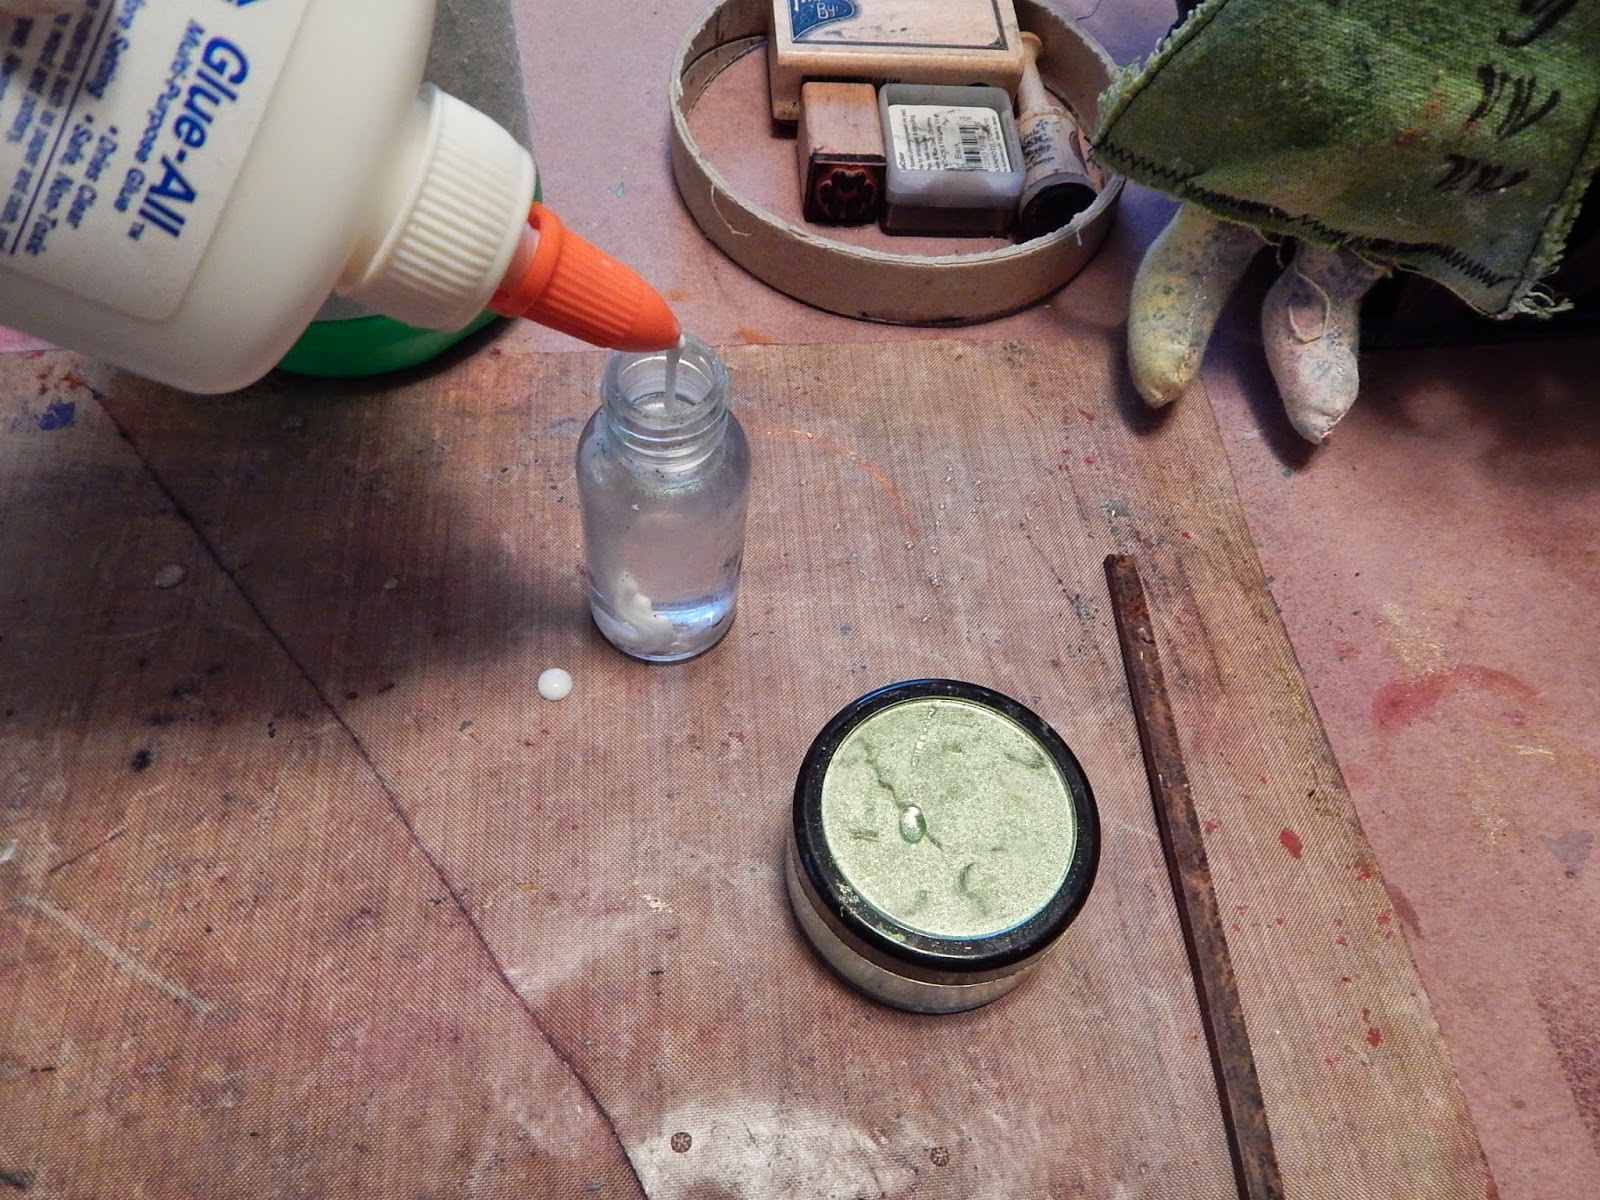 Now that we have all the essentials out of the way, begin by pouring distilled water into the spray bottle. Try not to
fill over 2/3 to 3/4 of the way. You'll need air in the bottles so the liquid
can be shaken each time the mist is used. Next, add glue.
Now that we have all the essentials out of the way, begin by pouring distilled water into the spray bottle. Try not to
fill over 2/3 to 3/4 of the way. You'll need air in the bottles so the liquid
can be shaken each time the mist is used. Next, add glue. 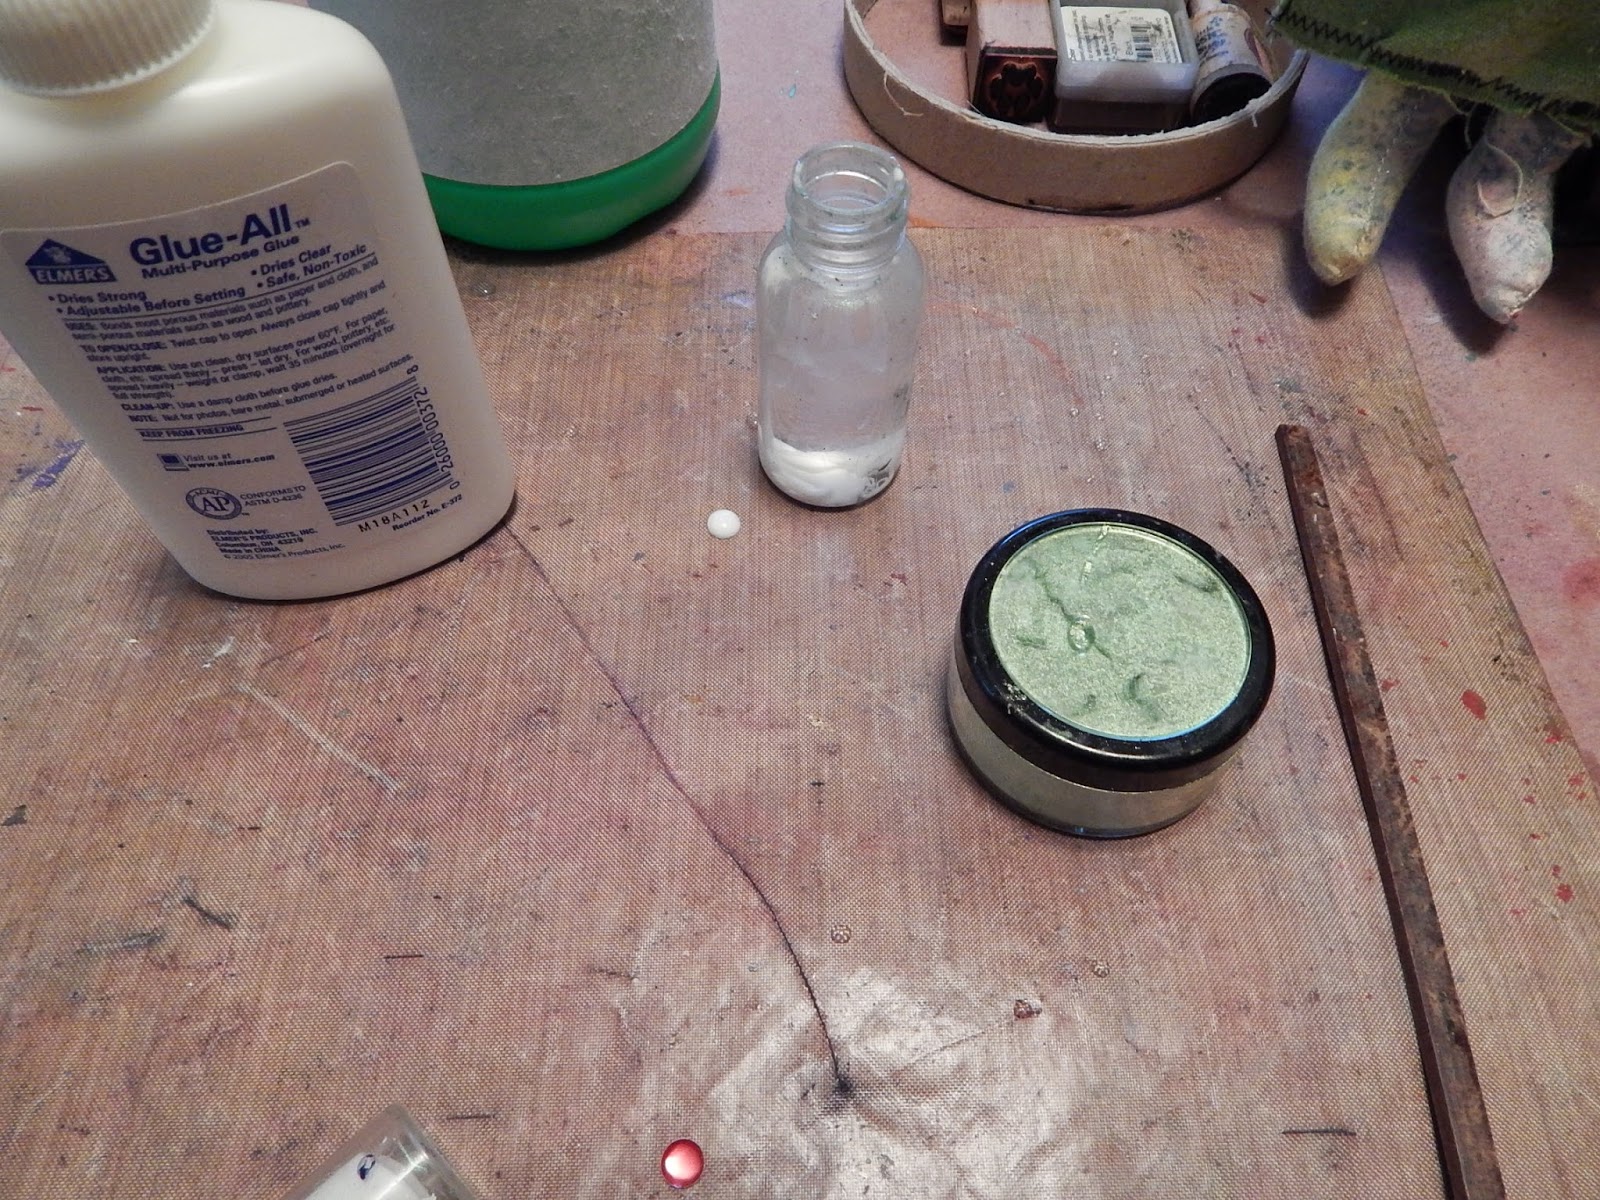 Originally, I wasn't sure how much glue to add,
because I had never made these mists before. But I squeezed and counted
to five
(5) in each of the bottles. As you can see, some of the glue has
already started to settle in the bottom of this container. And it
didn't matter what size bottles I used (some were larger than the one
shown in the photo, but none were smaller), I still counted to five (5)
each time I added glue.
Originally, I wasn't sure how much glue to add,
because I had never made these mists before. But I squeezed and counted
to five
(5) in each of the bottles. As you can see, some of the glue has
already started to settle in the bottom of this container. And it
didn't matter what size bottles I used (some were larger than the one
shown in the photo, but none were smaller), I still counted to five (5)
each time I added glue.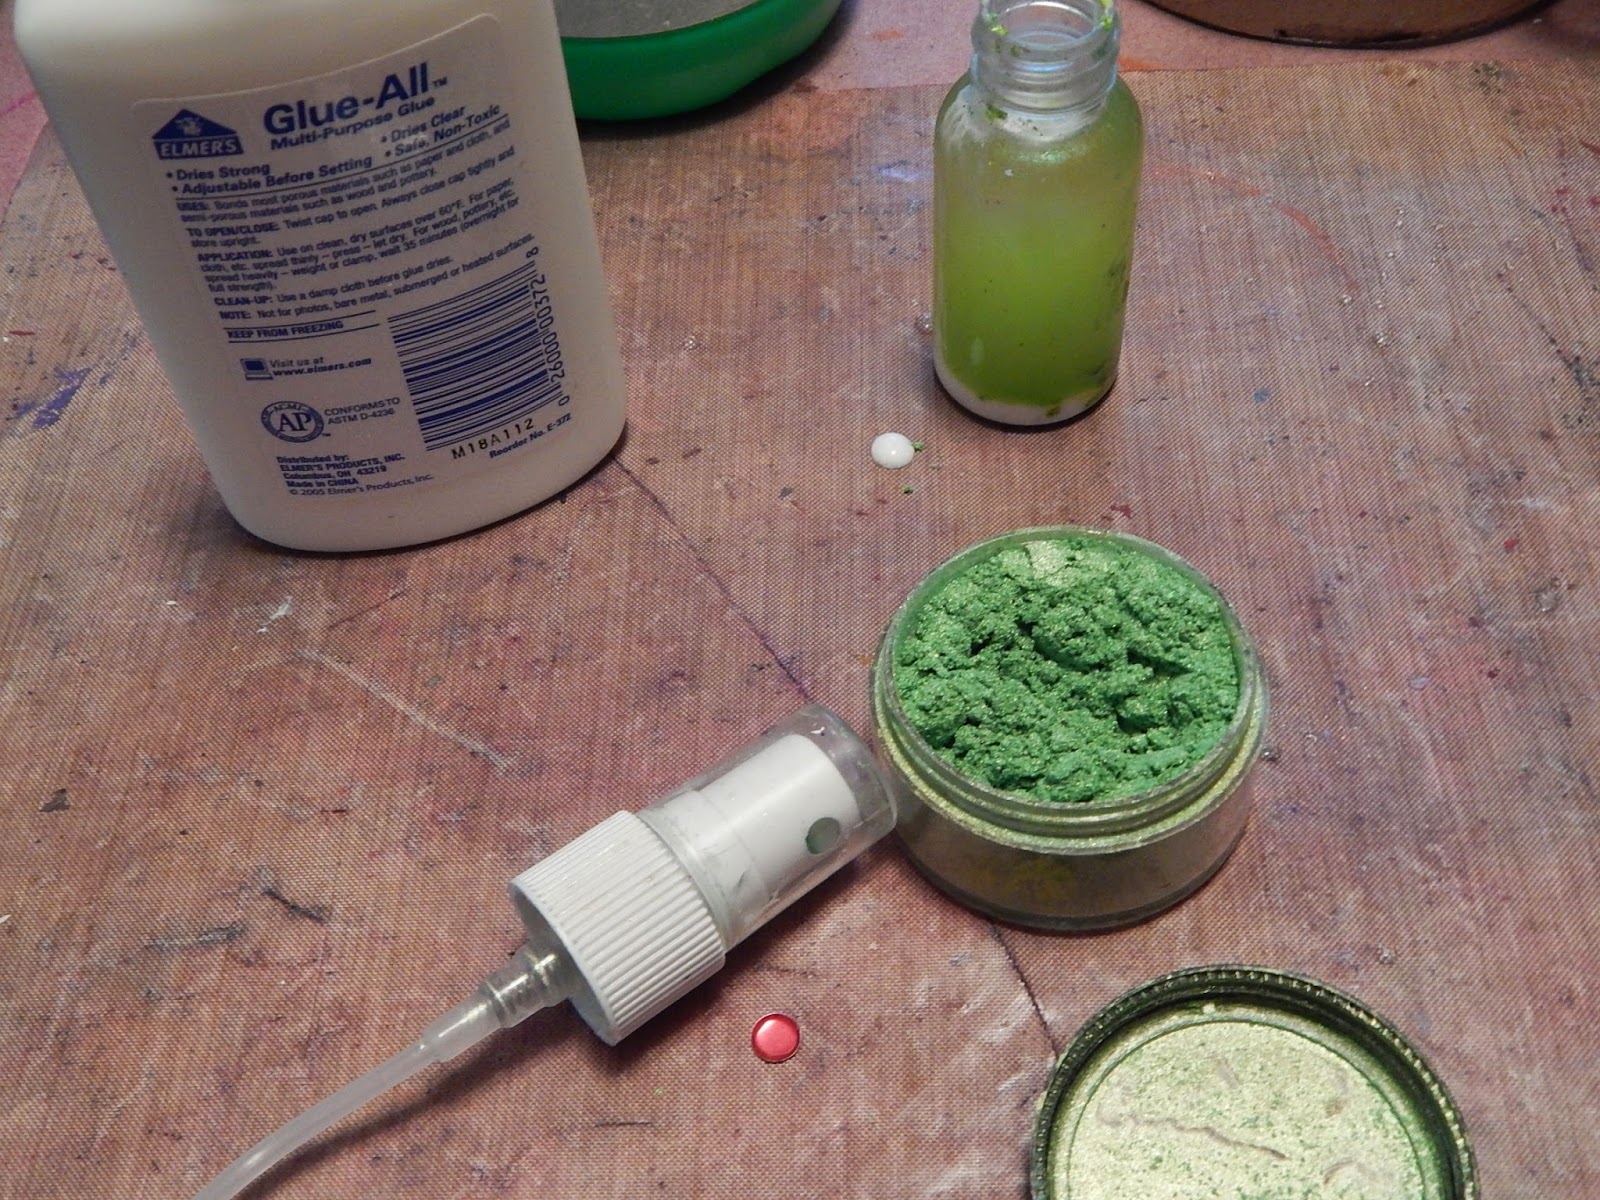 Use a stick or small spoon to add some mica powder to the
container. I have seen where Tim Holtz made something similar with his
product that has the binder in it. He suggested using no more than a
tiny amount, but I'm actually hoping to make a dent in this product, so I
used anywhere from two to three times what he would have used. Holtz
also started with silver mica powder and added different color distress
inks. My mica powders were already colored and didn't need any
colorant. I have made this specific shimmering mist at least six time, and you can see how little mica powder I've used, even though I add at least three heaping scoops to the bottle each time.
Use a stick or small spoon to add some mica powder to the
container. I have seen where Tim Holtz made something similar with his
product that has the binder in it. He suggested using no more than a
tiny amount, but I'm actually hoping to make a dent in this product, so I
used anywhere from two to three times what he would have used. Holtz
also started with silver mica powder and added different color distress
inks. My mica powders were already colored and didn't need any
colorant. I have made this specific shimmering mist at least six time, and you can see how little mica powder I've used, even though I add at least three heaping scoops to the bottle each time.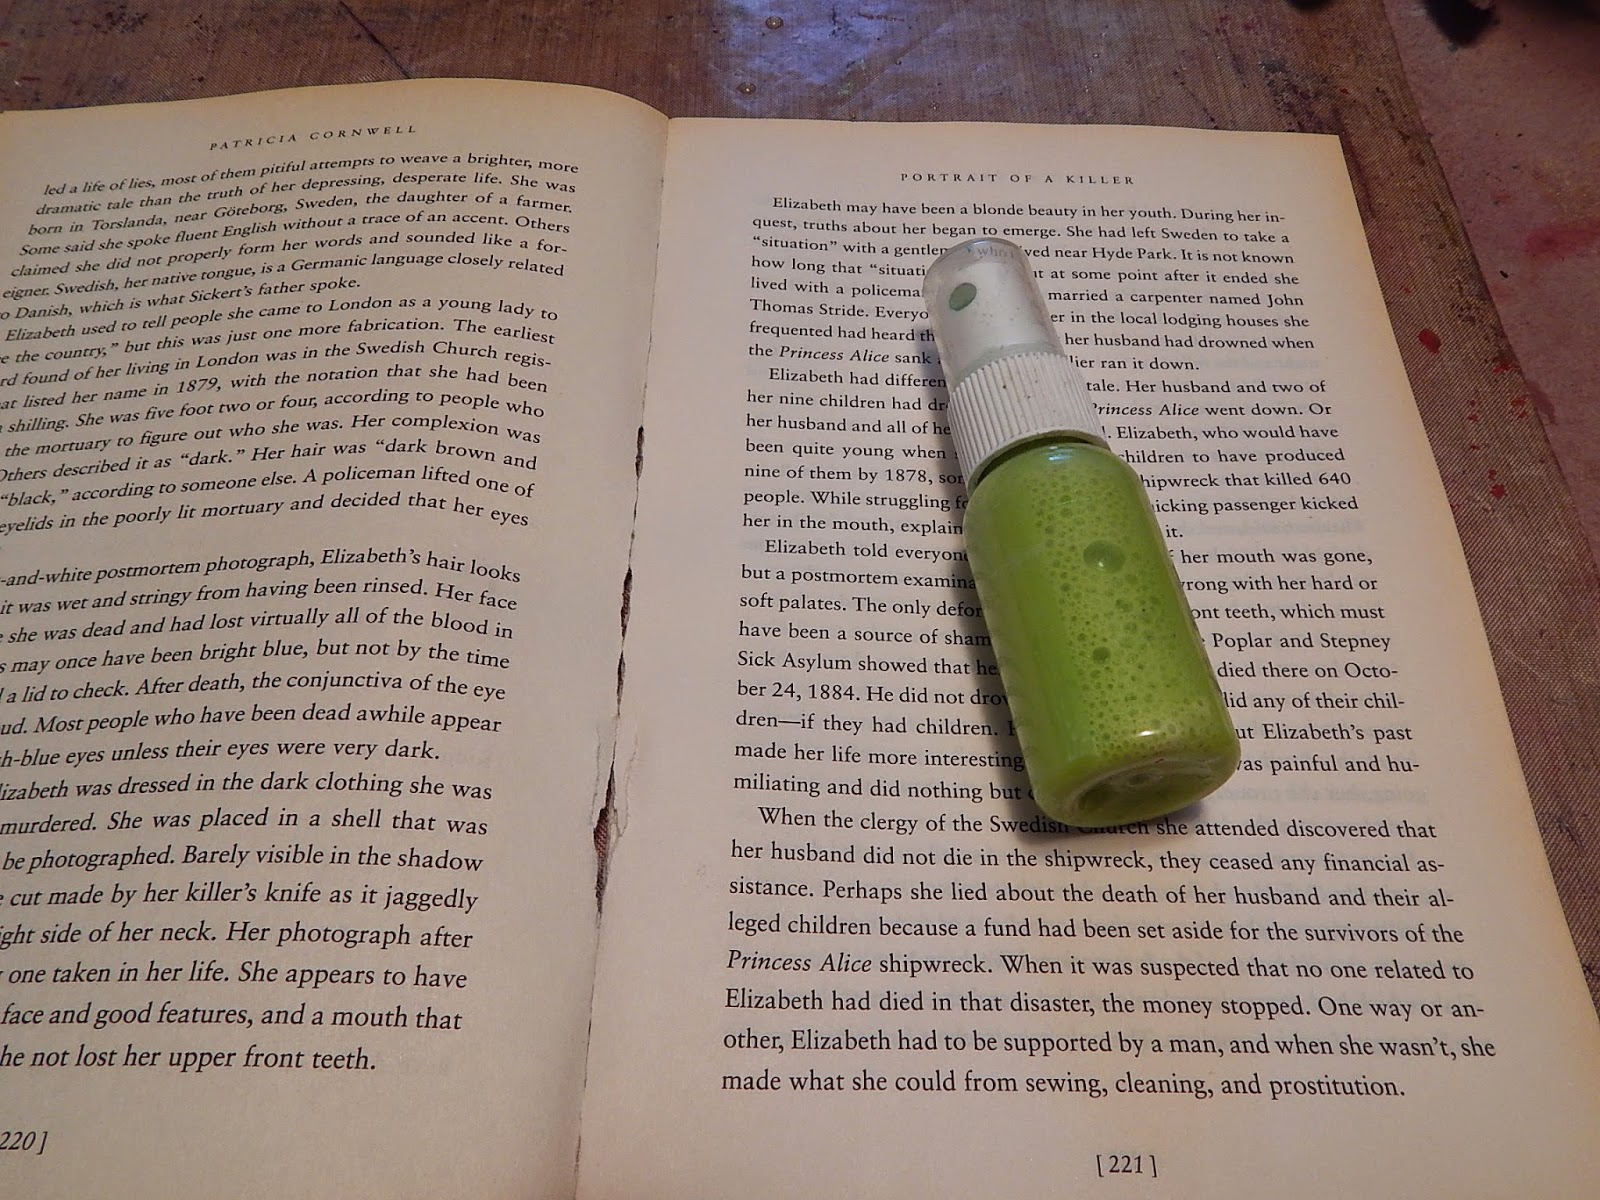 Add the bead to the container, then place the cap and mister on the container and shake, shake, shake. Shake your
  Next, it was time to test these misters. And yes, it worked! I was
thrilled, although I got a bit carried away with the misting, as you can tell when I accidentally sprayed the craft mat that protects my work table.
Next, it was time to test these misters. And yes, it worked! I was
thrilled, although I got a bit carried away with the misting, as you can tell when I accidentally sprayed the craft mat that protects my work table.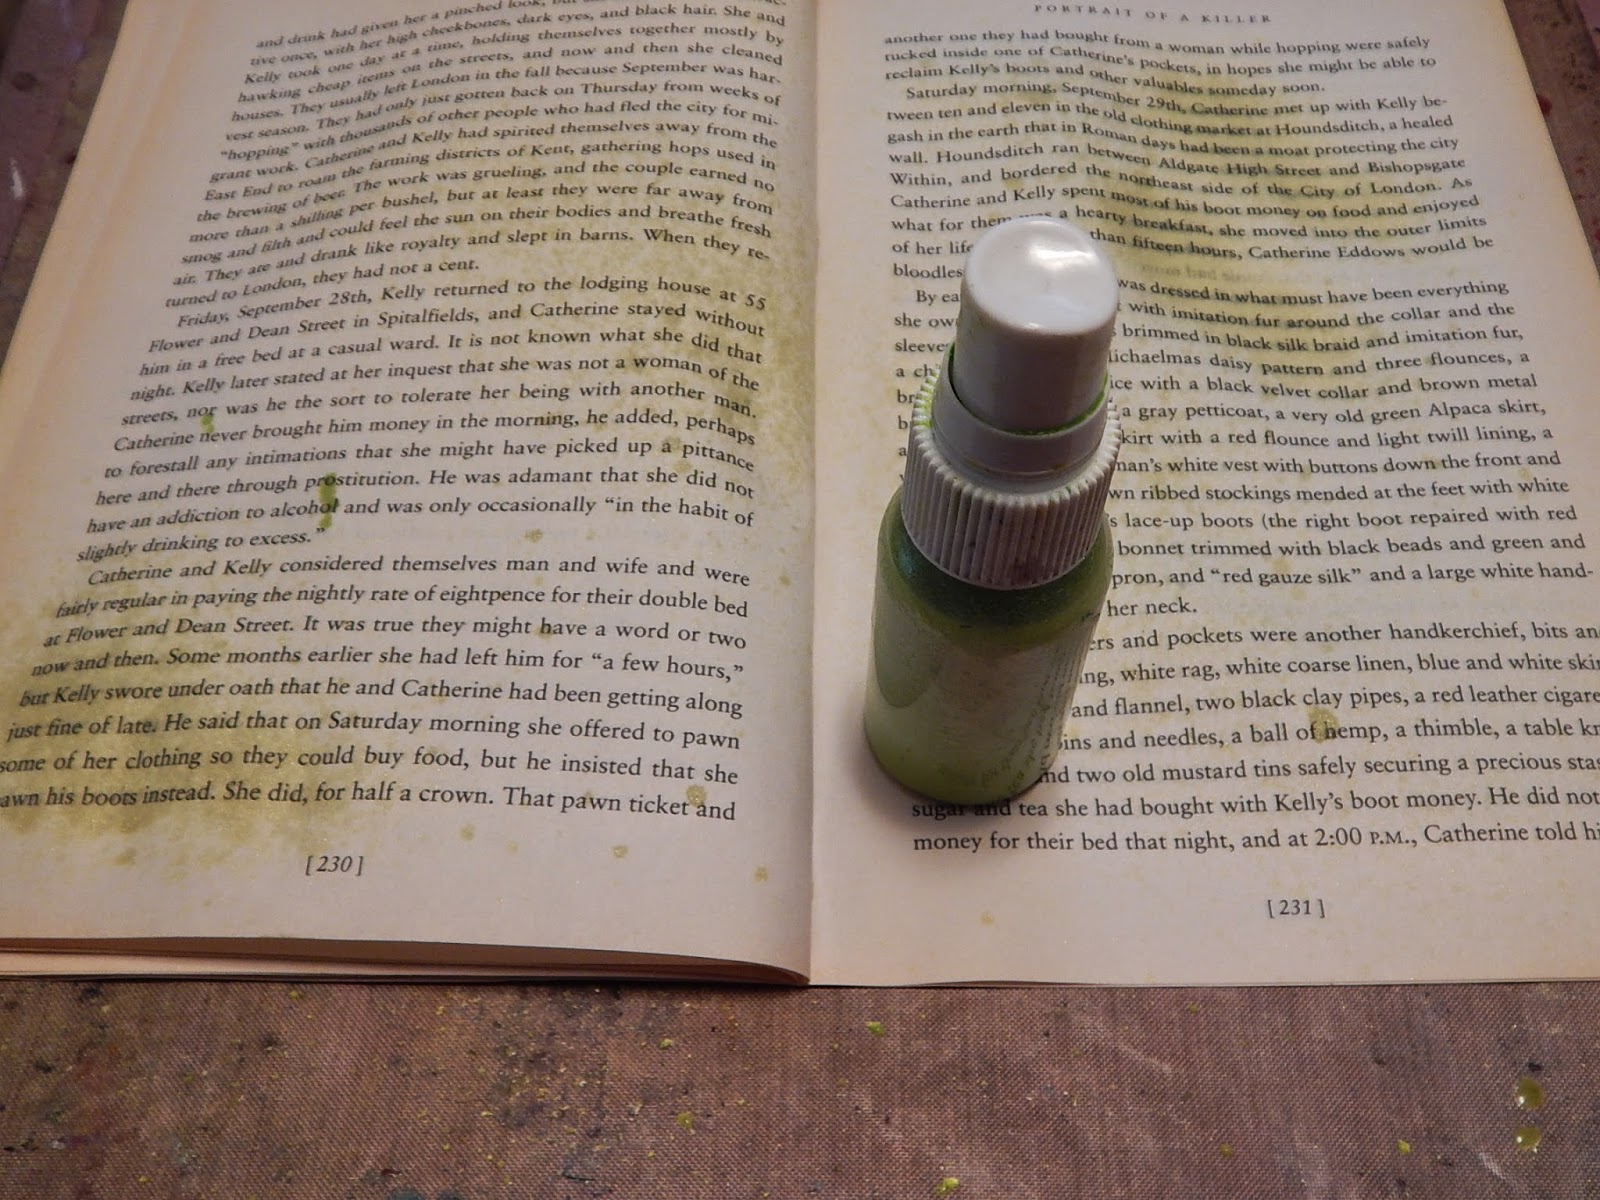 I allowed these to dry
awhile and sprayed a bit more. I didn't want to muddy the paper with
too much water and spray mist. I was also able to tell that I got
enough binder in the mists, too. Once dry, I ran my hand over the two pages and noted the mica spray
stayed perfectly in place.
I allowed these to dry
awhile and sprayed a bit more. I didn't want to muddy the paper with
too much water and spray mist. I was also able to tell that I got
enough binder in the mists, too. Once dry, I ran my hand over the two pages and noted the mica spray
stayed perfectly in place. How will you use these spray shimmering mists? They can be used in the same way you would use the pricey sprays.
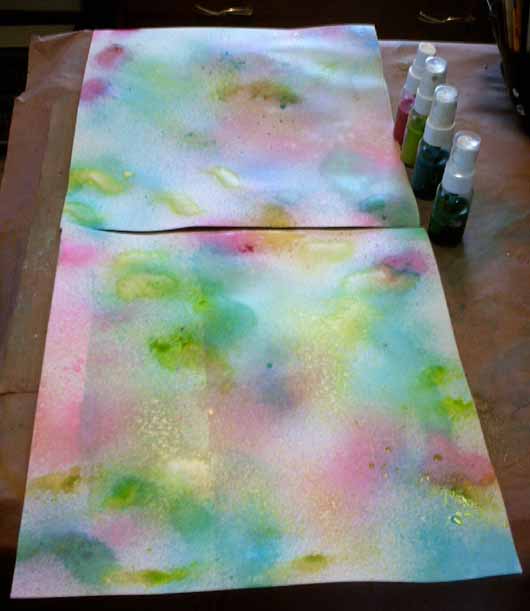 Here are the first ones I made. If you need examples of how to use them, the internet and YouTube are full of examples. You can use them to make backgrounds, cut into ATC or
postcard sizes, or turned into tags. You might even want to create a
design using a mask or stencil with the mica sprays. Of course, you can
always use your imagination and make something special with your mists! Think of the possibilities, such as old book pages like the ones in the sample I made above, or ugly scrapbook paper you want to jazz up. I hope you will try this, too.
Here are the first ones I made. If you need examples of how to use them, the internet and YouTube are full of examples. You can use them to make backgrounds, cut into ATC or
postcard sizes, or turned into tags. You might even want to create a
design using a mask or stencil with the mica sprays. Of course, you can
always use your imagination and make something special with your mists! Think of the possibilities, such as old book pages like the ones in the sample I made above, or ugly scrapbook paper you want to jazz up. I hope you will try this, too. Thank you Seth for once again allowing us to spotlight a buried treasure. I hope you enjoy this fun and easy way to make your own shimmering mists. And please let me know if you try this project, too.


20 thoughtful remarks:
I have watched some of Seth's videos, but was unaware of his blog. Re your comment. I have all those pincushions, but usually cannot find a pin when I need it!
i enjoyed re-reading this tutorial. thanks for reposting.
also, because of this post, i was reminded to create my own buried treasure post, and email seth.
whew! i almost missed out again!
Elizabeth, this is beautiful! I'm excited to see how to make these sprays - very cool! I confess to owning more than one of the purchased type and I haven't run out of any yet, but when I do I think I'll try this instead of running out to buy more.
You inspired me to make my own little tutorial using today's ICAD. Per your comment on my previous post I think you will be surprised how few stamps were used in this card!
Thanks so much for taking the time to comment on each of my posts - I really appreciate it!
This looks great fun Elizabeth but I can only find mica powder with binder - what difference will this make? I'm not sure what the binder does anyway???
wow great tutorial thank you so much!
I remember this post, and now that I am getting more in the "paper world" will really make use of your tutorial, so thanks!
I think you are right about my AB that it is more difficult without a specific theme. When I reread your course, your suggestion of picking a theme that you had lots of ephemera etc. for resonated with me. I don't have tons of supplies so I will work with what I have for now!
Always enjoy your tutorials. One of these days I'll try the mists, don't have any mica powder at the moment.
Darla
Great tutorial, Elizabeth! Thanks for the step by step pictures.
Hope you are doing well and having fun creating.
Gaby xo
Great post!!!
Great post!!!
this is definitely a keeper - thanks for reposting this very useful tutorial
Super tutorial! Wow!
Looks fun to try!
Wonderful Buried Treasure!
All the best,
Mary
Mixed-Media Map Art
Super tutorial right down to your tip to add a bead to the spray bottle...
You got fab results too...
Thanks for digging for this one and sharing it again E!
oxo
Here I've been running around looking for some glycerin to bind all of the mica powders and I see I can use the Elmers sitting on my desk! So glad you posted this one!
Elizabeth! What a great tutorial! thank you so much for reposting this Buried treasure!
Jackie")
I still need to try this...esp since I've been using mists mush more and I really don't want to purchase them if possible. :)
That's a great project from the past, and still so relevant and current today. I know what you mean about the photos improving over time!
thank you for your comment.....& sharing this mist, something new for me to try!
Thanks for reposting this diy tutorial! I can see why it's popular.
Thank you for your lovely comment on my buried treasure post.
a cool tutorial and i will definitely give it a try! i´m spraying a lot and i also like a shimmer here and there...
and thanks for your comment on my blog, i really appreciate it!
Post a Comment