


.jpg)


.JPG)


Thursday, December 31, 2009
Accountabilty: how well did I do?
At the beginning of this year, I made some resolutions and spoke of the accountability that must accompany those resolutions if they are to succeed. You can see my resolutions in this post I made on January 1, 2009.
In reviewing, how well did I do?I'll let you, the reader, judge. Here are the resolutions and if I kept them or not:
Below are the resolutions in black and their outcome in green.
Make art every day and post to my art blog
I have to admit (and delighted that this was the first resolution on my blog) I was able to make and/or post something each day. Some days I worked on more than one piece, but always had something to show on my blog. Luckily, I have been able to post every day on this blog.
Complete my Seven Continent Swap (7-C) AB and post it on a blog as one complete unit when finished
Sadly, I have only created two or three spreads in this book. However, the really good thing is, I was able to get the pages and decorated spreads out of the book that was falling apart, including the tip-ins I had already glued in. Luckily, all pages, although not all together, were all intact. I also was able to use my friend Kathy's husband's drill press to "punch" the holes in the pages, after I decided that I would use a 3 ring binder for the completed pages. I had started punching the pages using my crop-a-dile hole punch, which took forever. Not sure if this is a realistic goal this year, either, but I'm sure going to try to get this book finished, now that the bugs of how to store the pages once they are finished are worked out.
Use only items I have already
Like most answers I write, there's usually a qualifier. The simple answer is the bulk of my art was made using what I already have/had. The only items I purchased this year are thread, material, and fusing, all of which were on sale. I've also purchased paint, but I figure that's something people actually have to replace once it's used. If I haven't gotten it on sale, on clearance, with a coupon, or free, I didn't buy it, including the items I bought for my new basement studio. The one splurge was whenever our We3 art group get together. I often found myself buying things I would never have considered and oftentimes never using them again. The one good thing is, I always buy these on sale or with a coupon.
Make paper every day it is nice outside
This resolution needs no qualifier. The answer is I didn't make ANY paper this year. None, nada, zip, ziltch. So this is one resolution where I failed miserably.
Begin and finish my Hands AB (and post to a blog as one complete unit when finished)
Little did I realize when I posted this resolution, or considered starting my Hands AB, that I would be offering a free beginning altered book class which would incorporate the theme Hands. If you follow my blog, you know I have been working on this book since February. I have never taken even a few days to make several spreads in a row, thus the reason the book is not yet finished. However, it won't be much longer before it's complete, since I am quickly running out of pages to alter in it.
Begin a Houses AB
Didn't happen!!! Even though I don't mind multitasking in my art, I can't seem to start another AB before one is finished. I can work on other types of projects and other people's ABs, but not two of my own ABs at once. Analyze that one, Freud!! That could be why I haven't been working in my Seven Continents AB, too.
Concentrate more on assemblages
Thanks to Seth Apter at The Altered Page, I was able to make a couple of assemblages this year. Not as many as I would like, but they were enough to allow me to know how much I prefer working with three dimensional art than flat art.
Recycle, reuse, repurpose even MORE in my art
If you look at the number of posts that use recycled materials, you will see that I have truly lived up to that resolution.
Learn no less than one new technique each month
The adage "Learn it, do it, teach it, has certainly been true this year. Not sure if I learned a new technique EACH month, but I've learned many, as can be seen in the sideboard listing called "Tutorials."
Organize my craft room and make a diagram of where everything is located, then post to my personal blog
I got rid of my personal blog, so it is no longer there. However, my basement craft room became the subject of many posts on this blog and I now have a functional, efficient, and well organized basement studio where I can work and entertain art friends.
Clean up the water damage in my basement, with the hope of getting my art room back down there, and post the progress to my personal blog
I guess the craft room I was referring to above is the one on the main floor of my house. The nice thing was, I was practically forced to rearrange and organize both rooms at the same time. So both can now be called completed resolutions. Thankfully, the insurance company helped clean up the water damage in my basement, so I had a bit of help on that front.
Devote no more than one hour a day to the computer
I knew when I wrote that resolution that it would last possibly a week. When I had my old computer and still running Win 98, it would take 5 or more hours just to post the AB lesson of the week. I also had to prepare the lesson and create art examples, keep up my blog, scan or photograph everything, so that was a really, really, really unrealistic goal. Now I have more time with a better graphics card, but I still spend a lot of time on the computer, often going to my favorite blogs and leaving messages.
Sell my first art piece
Sadly, that is also something I also haven't done. Nor have I had a show, but I do have a place lined up where I may get some exposure after I have no less than 20 pieces completed.

How did I do? Better in some areas, not so well in others. However, I hope that tomorrow's post, where I become accountable for 2010 resolutions will show how much thought has gone into each resolution and how I truly intend to be accountable to each and every one on December 31, 2010.
Wednesday, December 30, 2009
A bit of Good Luck for the new year (Hands AB)
Can you believe this year is nearly over? It's really hard to fathom. It has gone by so quickly. Even more unbelievable is, I am still working on this Hands AB. I put all other projects aside yesterday and created this spread specifically for today, so you will feel luck and good fortune before the new year hits.
 The Hamsa Hand is supposed to ward off envy, bad luck, and the "evil eye." That is why an eye (a good eye) is sometimes drawn into the hand. This is the stylized Hamsa Hand. It has two symmetrical thumbs. I made the background using a technique I will post next year (grin) and the hand from polymer clay. I free handed the Hamsa Hand design on copy paper, cut out the pattern, then used it to cut out the clay. I used dental tools to cut around the clay, since I'm really quite craft knife challenged. I was going to put some decorations in the hand, but once I got the outline finished, I was a bit afraid to make a mistake, since I didn't really have time to start over.
As for the background, this is a single piece of cardstock I scored in the middle and glued to the pages. I then cut the pages to the size of the cardstock and that is why you see other pages peeking out of the book.
I hope this image (and spread) brings you luck in the new year.
Tuesday, December 29, 2009
Revised pages in my Hands AB
A couple of weeks ago, I started this spread. You can see it here if you missed it before.
 You cannot believe how happy I was when I was going through my scraps a few days ago and found this paper. I thought I had used it all previously on this three page spread. I was practically jumping for joy and finally finished the six pages that this spread encompasses.
 I used an Ott light to light these revisions, so it may be a bit hard to see. I removed some of the German text, because it was so brittle, it tore at the book seams when I closed the pages. To coordinate all the pages, I added some of the bubble paper and a painted red circle.
 Here is the finished spread. I used more painted German text, bubble paper, and painted circles to lend cohesion to the piece. I lapped part of the image and bubble paper onto the back side.
 Since I now had more of the bubble paper, I added it to the extension page. I also added some painted red circles to the extension and far right side, too.
 Here is the extension page closed.
 In case it was hard to see before, here it is when I scanned it. If you look closely, you will see all kinds of people like police, firefighters, teachers, etc, who are willing to lend a helping hand. When I saw the image, I knew it was right for the spread. I added the words "In the beginning" for a bit of cohesion to the story. I am calling this six page spread complete.
Monday, December 28, 2009
X-rays (hands)
 I started this spread last week and learned a LOT.
1. Never use a "wet" glue like Twist & Glue under an X-ray (used in spread) or a transparency.
2. If you haven't completely covered the page or X-ray, the glue or lack of it, will show through.
3. When using buttons to lift something, be sure they are all the same thickness.
4. If the fact that the "screw head" brads are mixed in the photos bothers you, it would not be a problem. Wait until you have lived with the layout for awhile before you decide to make the embellishments permanent.
5. When you want to make the page permanent, cover your mechanics on the back of both pages by gluing a facing and opposing page to each side.
5. Decide in advance if you want a title for your pages so you can plan for them during the design process.
Sunday, December 27, 2009


Saturday, December 26, 2009
Hands and snow
 I usually post my blog entries before this, but I wanted to wait till the sun came out to show the snow we got. Pretty disappointing, considering what I've seen on many blogs these past few days, but I'm tickled that it was a white Christmas, at least. Don't let the lovely photo (well, not that lovely with my neighbor's vehicle nearly in my drive) deceive you, though. It is bitterly cold and the wind is still blowing at somewhere between 20 and 30 miles an hour. In fact, as I was taking the photo, I saw the evergreen tree in front (peeking out from the front of my house) flapping in the wind. I figure today will be a great day to get into the studio and get some real arting accomplished.
 I've had this spread finished for awhile and was surprised when I looked back on some posts and didn't see it. So here it is. The backgrounds are some I used for my scraps ATCs. It is nail polish dripped over a pan of water, then printer paper laid on top to accept the nail polish. At one time I considered using these images (which cover corrugated cardboard) on the front and back of my book, but decided they would make a better spread than a cover.
I hope everyone has recuperated from yesterday and are staying warm (unless you live in the southern hemisphere, of course).
Friday, December 25, 2009
Christmas eve celebration
OK, it's a day late, but I finally got around to getting these off my camera. These are the photos I took on Christmas eve at Dana's.
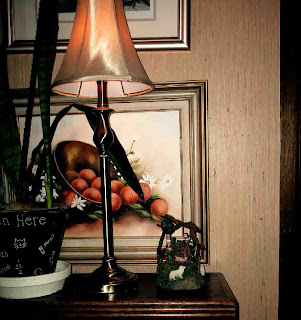
 I think I mentioned how much she loves Nativity scenes, and she has tons of them. This is in her entry.
 This is in another room.
 I forgot to take a photo of what Dana calls her kitchen table. Yep, I decorated it.
 It didn't take long to fill it with all kinds of appetizers. You would have thought an army was coming.
 Dana made her own marshmallows and she was in the process of cutting the rest of them when I got there.
 Here she rolls them in powdered sugar and begins cutting.
 I had a hard time getting the right lighting in her kitchen, but I think you can make out the process.
 There were snacks and goodies
 everywhere you looked.
 As Dana's MIL
 and daughter ate their snacks,
 Dana's husband and dog took a well deserved nap.
 I worked on setting the table,
 then Dana took a few minutes out to pose with their dog, whose red eye I couldn't get corrected.
 Dana made her dress, including the cross stitch.
 She also made her darling earrings.
 Dana's husband woke as we were taking the photos.
 Next came the ritual of the tree topper. It was made years and years ago by Dana and this year it was her daughter's turn to put it on the tree. It's too bad you can't see her cute face.
 Here is Dana's daughter climbing up to reach the top of the tree.
 Now the topper is in place. What a wonderful ceremony on Christmas eve.
 Late in the day, Dana removed the homemade cake with homemade marshmallows from the fridge and set it on a cake plate to warm.
 Dana's husband watches as she places it in a warm spot in her kitchen,
 then takes time to give her a hug.
 I really messed up with the dinner photos. I somehow thought I was naming them, then deleted them, only to learn I had named the same photo something different each of six times. So, Dana's daughter is the only one whose photo actually survived the dinner.
 After dinner we relaxed and Dana and I exchanged gifts. Her beautiful cat Whisper watched. What a fun day and night.
Subscribe to:
Posts (Atom)


