


.JPG)


I was so pleased and honored to be chosen by all the wonderful ladies as this fortnight's guest designer at Try it on Tuesday (TioT). When Avril contacted me, I could not say no, even though I admitted powders are not what I normally use in my art. However, I seem to have gone all out on this post, and as promised last Thursday, this post replaces my Second Thursday Tutorial. Therefore it will be on my Tutorials page as soon as this post goes live.
 This is the finished piece I created.
 You can see it over at the Try it on Tuesday blog for the next two weeks, too. Let me take you through how I created it.
 As I do with all my tutorials, I begin with the supplies I will be using. The substrate is 90 lb cold press watercolor paper. You can see the size in both inches and centimeters shown on the cover. In hindsight, I should have purchased 140 lb watercolor paper, but I used what I had, since I had to buy VersaMark. The black card stock is 110 lb. It is close to A4 (8,3 X 11,7 cm), which is letter size in the states (8.5 X 11 inches).
  For the powders, I will be using (from left clockwise):
Embossing powders
Eye shadow
Baked texture
Baby powder (large and small container)
Handmade shimmering mist*
Mica powder
Not shown UTEE (ultra thick embossing enamel)
*If you have never seen how I make my handmade shimmering mists using mica powders that do NOT have a binder, feel free to go here for the tutorial.
 These are the items I intend to use to adhere the various powders. I used matte gel medium, but any gel medium will work, glycerin, and VersaMark. Since I had to buy the pad, I also wanted the reinker for when this sticky pad starts to dry.
 I was looking for talcum powder at the dollar store, but was surprised to learn any baby powder is mostly talc. Please be aware, this is the same powder that has been shown to cause ovarian cancer in females.
  I was determined to make my own anti-static embossing pouncer. Not only does it help control embossing powders, calligraphers can use it to control static and so the pen nib will glide better on their smooth paper or vellum.
I tore the rectangle and added the powder. I used all that was left of the small container and opened the large one to get an adequate amount of baby/talc powder.
 I found a piece of yarn I was planning to throw in my scrap pile, but used it to tie my anti-static pouncer. I checked by pouncing a few times to make sure the fabric was not too thin or too thick to allow the talc to keep the embossing powder where it belonged. It works especially well in winter when simply walking across a carpet can cause a mild static shock.
 Next it was time to head to the basement
 to use some of my embossing powders
  with polymer clay. I certainly misjudged how much polymer clay I would need, though.
 When I opened the copper embossing powder (EP), I accidentally dropped the clay into it. Since the EP acts as a resist to clay, I knew this would never stick properly.
 I used the copper EP to coat the bottom of these candy molds. Let me be clear, these are never to be used as candy molds once they have been used in clay or paper making art.
 It took awhile, but I finally softened enough clay to make five more roses, this time from a full package of white clay. I got a bit carried away with the copper EP, though. I could have used mica powders, Armour All, or water instead of the EP, but the Armour All and water wouldn't have given the beautiful shine I got from the EP.
 I even had enough clay left over to stamp, cut, and color this rubber stamped image. Although I don't show the containers, I used mica powders on this. You can see how the mica powders glow.
It was time to bake these at the temperature on the package (I always use 265 F) and after the clay is baked, I leave it in the oven to cool down slowly, instead of immediately removing it from the dedicated toaster oven.
 While the clay was baking, it was time to head back upstairs to use more baby/talcum powder to create my own molding/modeling/texture paste. The first time I made it, I made two huge batches using baking soda in one batch and baby powder in the other batch. I followed the recipes exactly. After two years of allowing them to sit, one was unusable, but the other batch was still in decent condition.
 However, I realized I don't need to make a huge batch, but can make exactly what I need by using fractions of the original. Isn't math fun? To begin, you need one part paint. I chose white with a touch of copper. For this I added the copper to two spoonfuls of white paint. I used craft acrylic white and metallic copper.
  I mixed the two colors together.
  If your paint is thick, you can use a spritz or two of distilled water. DO NOT use tap water, or mold will soon set in.
 I then added 1/2 part white glue. Any full strength PVA glue will work. I thought the liquids should be mixed together before the dry was added. The amount of water you add will determine the consistency.
 This is where it got a bit dicey. Getting the baby powder out of the bottle with all those holes caused the powder to go everywhere. Remember, regardless of what measuring instrument you used (mine was the plastic spoon), it takes 1 part paint, 1/2 part glue, and 1 part baby/talc powder, or in my case two spoons of paint, one spoon of glue, and two spoons of baby powder.
  Now that everything has been thoroughly mixed, which can take awhile,
 place the paste in an airtight container until it is ready to be used. Be sure to thoroughly clean your mixing containers immediately, and it is best to do so in a container of soapy water that can be thrown outside.
 Next, it was time to find four identical sized brads. They don't have to be the same color, but the heads need to be the same size and shape.
 Using something to keep your fingers from getting burned (I used a tool with a rubber handle, but you might be able to use tweezers), heat your brad head
 then dip it directly into the EP.
  Heat it until the EP melts
  then immediately dip it in EP a second time. Be sure to turn the brad from side to side, so the EP doesn't accumulate on one side of the brad head.
 Two of my brads came out smooth and two were a bit craggy. I actually liked them better than the smooth ones.
 Now it was time to get out the die cuts which were cut from the black card stock along with your favorite stamps. I actually prefer wood mount rubber stamps, but the choice is yours. Use the anti-static pouncer you made earlier to completely cover the die cuts. Stamp the die cuts using VersaMark and your chosen stamps. I'm sure I don't have to explain this, because most of you can stamp far better than I.
 Once stamped, place your die cuts on a sheet of paper or, as I did, on a used file folder and add some EP. Be sure to tap off any excess EP from the back of the die cut, and place the rest of the EP back in its container. I used copper for this step
 and verdigris for the second step, using the same process (minus the stamping) I did with the copper.
 Once your EP is in place, use your heat gun to add a dimensional coppery, patina to the flowers.
 I realize I caused more work for myself, because in hindsight (which is always 20/20), I could have created all these pieces at the same time.
 After using the anti-static pouncer, add VersaMark to the entire large stamp. This time, I found it easier to press the die cuts onto the inked rubber stamp.
  Add the two different powders as before (see what I mean by hindsight?)
 and heat until the embossing has been completed. I have two different copper powders, and like this second one better, even though there is less glitter and roughness.
 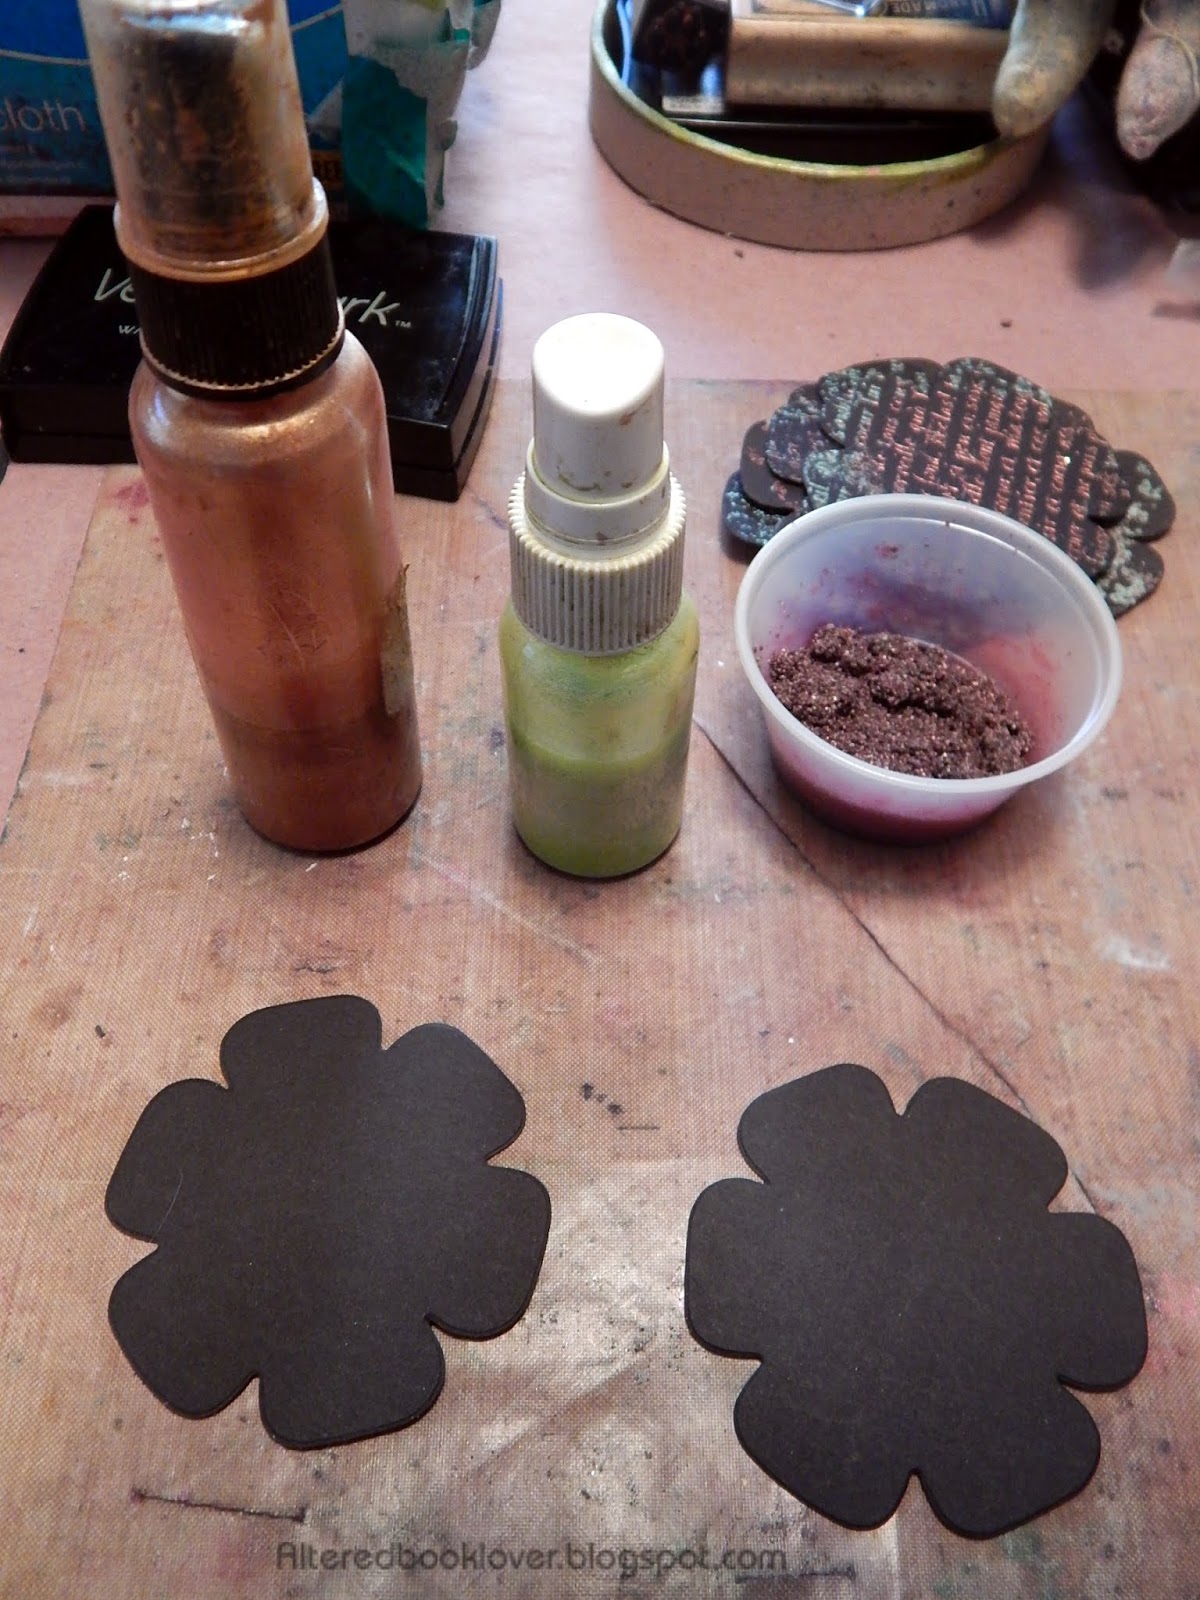 The final two die cuts did not need the anti-static pouncer, but I think I used it anyway. I colored some clear UTEE using copper mica powder. I did this off camera and forgot to show how I mixed the two powders.
 For this technique, I applied my handmade shimmering mists to the card stock using a brush, since I wanted more complete and controlled coverage than I would get if I spritzed the mists.
 I added UTEE, catching the excess in my file folder. I then heated these die cuts, a step I failed to show.
 After searching high and low for the final four small flowers, I realized I hadn't cut them, and I had no more black card stock. In desperation, I outlined one of the larger flowers
 and cut four a bit smaller from 110 lb white card stock.
  Pounce, pounce, pounce!
 From what I've read, VersaMark is equally good at creating watermarks like these that were evident before I added EP.
 I decided to use my mists on these white flowers. Note the small black die cut flowers have been embossed. Have I not mentioned hindsight and not thinking ahead?
 Once the mists were on the flowers,
 I added the EP
 and embossed them.
 I decided to add these buttons to the center of two of these flowers, but thought the white was too stark.
  Making a big mess with my eye shadow, I colored these using the VersaMark as "adhesive."
 Next it was time to add VersaMark to the leaves and get out my Seth Apter Chunky Rust baked textures.
 Seth suggests creating two or more layers, but I was simply thrilled with the single layer of EP this baked texture gave me after one heating.
 For my final embellishment technique, I added a "glop" of gel medium to the center of the other two flowers. You need gel medium for this, because PVA glue simply won't work. After the gel medium was as smooth as I could get it, I added the rust baked texture and allowed the gel medium to dry. No need to heat using this technique, but patience is needed (like allowing the gel medium to dry overnight).
 After sharing over 50 photos of prep work and embellishments, it is now time to put it all together. Using VersaMark, and after having used the anti-static pouncer on the substrate, I began with this foam stamp I chose as a frame. In hindsight, I probably should have avoided this step.
 Here is the VersaMark stamp
  and here is it colored using powdered eye shadow. Let me be perfectly clear. There is powdered eye shadow and creamy eye shadow. Never use the creamy because the oils will be bad for your substrate. The powdered eye shadow worked very, very well.
 The second side stamped better.
  It also colored better.
  Even the close-up looks good.
  The copper shimmering mist came out again,
  and so did my brush. I had planned to stop there, but after it dried, and upon reflection, I didn't care for the white center.
 That's when the idea
  to make a "grassy area" came about. My shimmer mists came in quite handy. Is it my imagination, or can you see the glow?
 I'm sure it feels like forever since I made the texture paste from baby powder, and it actually had been days because this didn't come together as quickly as it appears in this post. I also grabbed my new brick stencil and my largest plastic palette tool.
 You can't imagine how happy I was to see this brick wall come together using my home made texture paste. I held the stencil in place using two pieces of washi tape.
 Now it was time to assemble the flowers
 using E6000, a silicone adhesive and my choice for adhering these very different weight pieces. On one hand I was delighted they were assembled, on the other, I was almost mortified I had created an even number of flowers. What to do, what to do?
 I decided to split them into five on one side and three on the other. At least that took care of the even number.
 However, they looked rather naked
  and floating on the wall.
  That's when it was time to add the stems. Although I took several photos of the products I used, including eye shadow, a plastic card, and my brush to spread the eye shadow, I failed to get the glycerin in the photo. I used the plastic card to add the glycerin to the page. You might be able to see it is still wet in spots.
  Next it was time to decorate my quote, "The earth laughs in flowers" by Ralph Waldo Emerson. I colored it using a shimmering mist, ran VersaMark around the edge of the quote, and powdered it using eye shadow I applied with my brush.
  I added the leaves with glue dots
  and used them to hold the brads in place. When I was adding the copper headed brads, I realized I couldn't add all four. Had I been thinking ahead, I would have placed the brads in the center of each side, but again, hindsight is always 20/20!
  Here is what I have been leading up to. The completed page.
  A few close-ups


 and this page is complete.
Ruminations:
As I mentioned earlier, I wish I had thought of stamping and embossing all the die cuts at the same time. It would have saved a lot of steps. Even though I was worried I might overheat my heat tool, once the embossing powder has been added to the stamped element, it can sit for days on end before heat turns the EP into molten goodness. However, as I've said for years, you can't unwind the day, or the tutorial, so I hope you learn from my mistakes.
I chose copper and rust because of the colors. I have coordinating EP, mica powders, and shimmering mists. It was easy to color UTEE and the texture paste with copper, too. That is why I didn't use pan pastels, even though I considered trying to find a way to mix the few colors I have.
I tried to use as many techniques as possible, but, because these powders are not my usual fare, I'm sure many who actually stamp and emboss on a regular basis, are far better at this than I.
Once this tutorial goes live, you will find it on my tutorials page.
If you made it this far, I applaud you and am grateful for any remarks or suggestions you can offer. Additionally, thank you in advance for visiting today. Don't forget to see what the team at Try it on Tuesday came up with to powder their * * *. I can't wait to see what you create, too.


34 thoughtful remarks:
Hi Elizabeth, this is a fantastic tutorial, full of useful information and awesome techniques. The photos you shared made each step so easy to follow.
Thank you for creating this fabulous page for the Try it on Tuesdays theme and sharing all your tips and hints.
We are thrilled that you are our Guest Designer for this challenge.
Yvonne xx
W-O-W!!! So pleased to have you at TIOT as our Guest designer and haven't you done us proud!!
I loved every part of this tutorial and this project! Of course the flowers are most impressive - and the rusty leaves, but the whole page is so absolutely wonderful! Hope you are continuing to improve your health! Hugs, Chrisx
Wonderful page, have fun as guest designer! Valerie
You went powder it crazy Elizabeth. These are gorgeous. What a great assortment of powder it designs and techniques. I am thrilled you are guest designer this challenge and so happy you got to join us. You did yourself proud with this one. Hugs-Erika
OMG, this is absolutely gorgeous artwork, Elisabeth.
So glad to have you as Guest Designer at TIOT
Have a wonderful week
Wow Elizabeth, I love your page and I really enjoyed your fantastic tutorial. This is really inspiring for me, an amateur in journal pages. Be sure that I will try to make my own texture paste and my own mists. Just one thing I did not understand (I told you that I still consider myself an amateur). Why did you apply glycerine on the page? For shining, for stabilizing the colours, or for what?
Hugs, my dearest friend, and take care of yourself.
(I am so glad that you used your new bricks stencil!!!)
wow this was an amazing tutorial-Loved it and thanks for all the detailed steps-I had no clue about using embossing powders so this was interesting for me I have also never worked with the clay either-
Gosh, you are patient, Elisabeth - so much work, but it was all worthwhile. It's gorgeous. Love the texture (I make my own too) and the flowers look great. I'd forgotten about the mica on black but now you've brought it to my attention, I'll have to give it another go and I probably have some in my background box! There's so much detail here, I could be here all day and find some new little detail to rave about, but I want to play...you inspired me :-) I remember trying eyeshadows, too - those were the days!
Hope you're feeling much better now.
Thank you so much for being our honoured guest designer at TIOT.
Cath x
Thank you so much for your reply, Elizabeth. Hugs, my friend.
Love the way you showed all the different things you can do with the powders we all have in our stash ... thanks "E"
Great tutorial, and the end result is beautiful.
Gorgeous page and I enjoyed your process. As to static for calligraphers, not really an issue. In my experience, calligraphers use gum sandarac as a pounce on paper or vellum (animal skin) The gum sandarac prevents inks and other fluids from feathering or bleeding. It also gives some "tooth" to slick papers.
I am totally impressed with your fantastic tutorial, this is so full of great information and super techniques.
Thank you for this fabulous phot workshop and for sharing all your tips and helpful hints.
I am so pleased to have you as our Guest Designer for this fortnight at Try It On Tuesday!
Big hugs, Susi
These are amazing Elizabeth and such a wonderful tutorial showing how we can make them. Congratulations on being chosen of guest at TIOT. Well deserved
Love Chrissie xx
Wow, what an amazing make! You really went all out using powders on your beautiful page, the flowers are stunning and I loved following along on your tutorial 😁. Thanks so much for all the inspiration and for joining us as Guest Designer at Try it on Tuesday! Wishing you a happy new week too! J 😊 x
Fascinating! Except for buttons and white glue I don't have a single thing you used roflol! I see this art "thing" might be an expensive hobby, and I better understand now why people are careful about budgeting their art/craft store buys. Thank you for sharing this :)
A great tutorial and a beautiful finished piece. Lovely to have you as guest designer on TIOT
Joan
Fab tutorial, love the flowers you created.
Elizabeth; this flower piece is AWESOME ~~~~~ 984 pawz up as da tabbies say N we all hope you're feeling 100000000000 purrcent better ☺☺♥♥
How to contact Wave Home Solutions for the basement system.:
Yes, I answered you on your blog. But again. You have 2 ways to contact them to purchase the system:
1. Got to the website and the Contact Us link. Fill out the form. A salesperson will contact you: https://www.wavehomesolutions.com/contact-us/
2 Or you can telephone 800-293-9577 the company is located in Oceanside, NY
If you're handy you can install yourself. You will need to drill a dryer vent size hole through your siding as the unit vents outside. If you're not sure, they will recommend an installer in your area.
Hi Elizabeth, a fabulous tutorial and I loved reading your various steps, especially using eyeshadows, which I've never done - yet.
A fabulous piece and I love the different textures and the clay roses are gorgeous and make a lovely centre for your flowers.
Lovely to have you join us at our Guest Designer this time, Thank You.
Avril xx
p.s. the 2nd generations stamping - the stamp has a crackle pattern, it was inked up, stamped on scrap paper before stamping on my background for a feint worn look. Hope that helps.
Amazing workmanship! I love your step by step approach and the faux pas in between:) You put in a lot of work and it shows. I love the powders but i never worked with clay to make roses or even the rubber stamp "E" (I have that stamp). I love the saying and this would make a great gift for someone to hang up in their home
This was fun to see all your steps! I love that quote and the flowers turned out great. :)
What a lovely creation, beautiful background and flowers.
Wow Elizabeth you certainly went to town with all those various powders - so many techniques - fabulous photos and instructions - what an amazing project!
My messy anti-static powder is using cornflour with a cotton pad or cottonwool ball but I think I should do what you did and make a little bag as much cleaner results :)
So sorry to hear the latest news :( I hope you are back in bed again, taking care of yourself.... get well soon xxxx
Wualaaa Elizabeth !! This is a so so so GORGEOUS page !! I really love the flowers, they are wonderful, love the little clay flores, the leaves, the lovely background and the quote !! Congratulations for been Guest Designer for Try it on Tuesday !!
I wish you a very nice day, and send you big hugs,
Caty
A lot of work went into this piece of art Elizabeth.
Love the clay roses, I made soaps with a similar rose mold.
oh wow- I am so impressed with how you managed to take photos of every step along the way. I love your handmade anti static pouch- very clever. And your rusty 3D flowers are spectacular! Well done!
And now I will answer your comment on my post. Thank you first of all. And about the abstracts- they are my own design (at least that i am aware of) but they do follow a popular design element which is the "cross/crucifix) pattern. I am self taught- have not taken any abstract online classes although I do have one or two in mind to better educate myself. i do have some books on abstracts bet they don't show anything like mine. My favorite books are by Rolina van Vliet. her books hold LOTS of information on line, composition, color, and she offers many practices and techniques. Again, her work is nothing like mine. The blue paper you asked about- i believe it is a kind of mulberry paper. It's a hand painted paper I bought at Dick Blick some years ago. The main purpose of my abstracts is 1.to try to be more minimal, 2. to use up paper bits in my bins of ephemera, 3. to work quickly and intuitively.
Sorry for the long explanation but I hope I answered all your ?. Ask away anytime my friend. Hope you are feeling much better!
Wow this is really impressive! Not just the finished product, but all of the steps and information. Beautiful results too! And yes I am a big fan of Sade - now I’ve seen Stevie Wonder live I’d like to see Sade!
wow this post is AMAZING step by step and that result, oh my gosh, I am mind boggled and love your fabulous tutorials.xx
As always, your tutorials and step outs are really terrific. It's been a long time since I worked with embossing powders. Your results are wonderful and you are a marvelous teacher.
Thanks for your visits and really nice comments! Always so happy when you come by! Hope you are much better by now.
This absolutely knocks me out, Elizabeth. If I want to use powders in my art I know where to come for advice. I've already read it three times and am astonished at the amount of information you give and the photos to illustrate. As always I am amused by your side comments, not because I like seeing something going awry but because of your honesty and because it adds to the knowledge of how to or not how to do something. I've never used powders in my art, except for dye powders and they are dissoved in water before using, so all of this was a mystery before and now it is not, thanks to your excellent tutorial.
Oh my Elizabeth this looks like fun. Happy creating, Angela xXx
My goodness, your flowers are so fabulous, and I can't believe you achieved this beauty with eye shadow, glue and more! I looked at every step you did to achieve this, and I'm still shocked at all the work you put in to achieve such lovely flowers. You mention that this took several days, and I just have to applaud your patience, despite not feeling well. Truly phenomenal work!!!! Happy Friday and Hugs...RO
Post a Comment