Since I don't have a search function on any of the Blogger blogs and don't have access to my very own Linky Links, I have gone to all the blogs I know participated in even a few assignments. If the blog showed a blog archive, I went to each month and looked for specific posts. It was long and tedious, but I was determined to share these awesome photos. Unfortunately, if the blog archive was like mine with the drop-down menu, I couldn't access the months. Ironic how every choice I've made to help save space on my blog, set me up for failure.
After searching month by month on some blogs, I noticed there were more
niches:
Ann B. added this gorgeous dragonfly to her niche.
Ann B.'s front reinforcement was beautiful with a decidedly butterfly theme.
Fairy Thoughts used a US map and added coins and a keepsake she got in Arizona when she visited the US.
This is where
Fairy Thoughts started her journey with her front reinforcement pages.
Susan (from the Netherlands) created three niches, which she admits she had to change blades twice.
That's when I realized there were
TWO Susans playing in my AB class:
Susan of
Susan's Art and Inspiration is from the Netherlands, while
Susan of
Paper Art Team lives in the US.
Susan (from the USA) created this niche which reflected her theme of "fly."
Paula came to the party late, but was able to catch up quickly. She began with the niche.
Dawn posted her niche last, but I was still able to find it and show it here.
Karen's glue and gesso lesson included her niche. This made a great transition to the lesson on
Glue and gesso:
Karen used gesso as the background for this spread.
Elle used gesso to lay down an image, then
used gesso as a background over which she (
Elle) created a very unusual tree made from white glue. What a bonus page!!
Paula's theme is Christmas, and she plans to have the book completed in time to use it on her coffee table during the holidays. This is her glue and gesso spread.
BJ showed how she used tags to create pages with various glues.
BJ then used those same tags to separate and signify the four seasons.
BJ used gesso as the background for this winter spread.
Susan (from the Netherlands) not only created her various glue pages, she also created two really awesome images made of glue.
Susan's (from the Netherlands) tags were to dye for (couldn't help the pun)!
Sandee used tags to demonstrate her glue choices.
Sandee then used gesso wisely in her underwater spread.
Ann B. used tags to document her glue favorites.
Fairy Thoughts used train tickets to document her glue choices.
Principles of Design (Part 1)
Elle created a design hub she could refer to.
Susan (from the US) was one of few who showed radial balance with the above spread.
One of
Dawn's first posts was to demonstrate this lovely spread for Lesson 5.
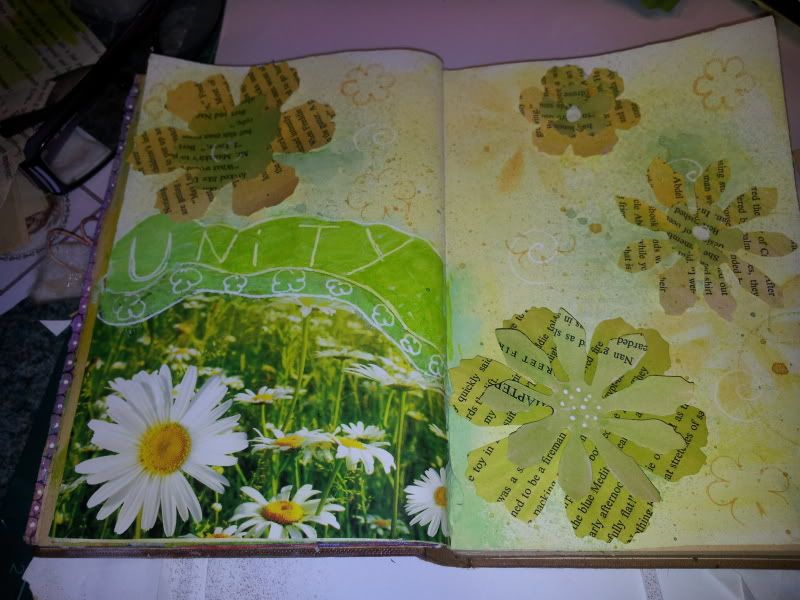
Jacqueline started with the above spread on unity, which I thought was super.
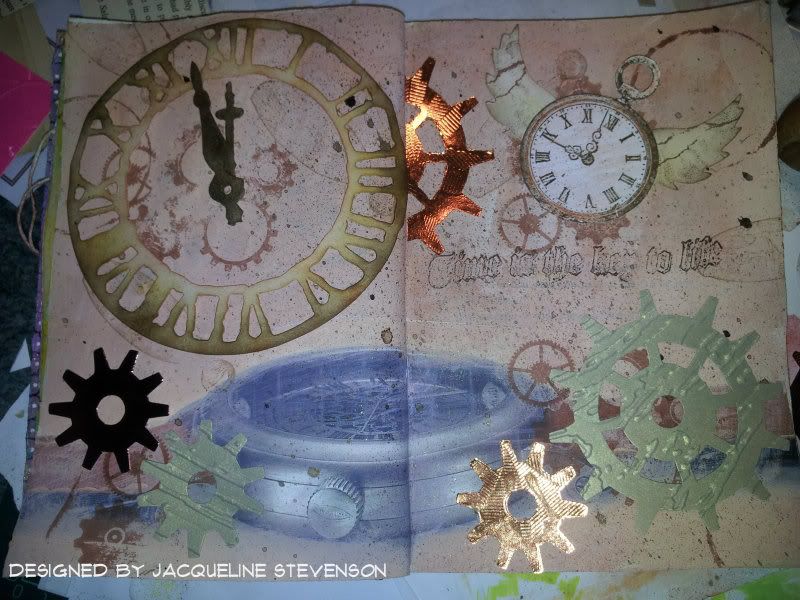
Then
Jacqueline read and re-read Lesson 5 and decided all the principles I covered sounded like a Swiss watch, so that's what she created.
Paula showed all the design principles we covered in this lesson with this simple, yet effective (and gorgeous) spread.
Since
BJ had limited book space, she created this spread to also illustrate the first five design principles I introduced everyone to in Lesson 5.
Debbie found a perfect way to show radial balance, among other principles by also showing the countries and places she has visited.
One of
Fairy Thoughts' spreads for this lesson was quite colorful.
Susan (from the US) found it harder to separate the various elements, so show several in each of her spreads.
Ann B. wisely used her adhesive pages to show her part 1 design principles.
One of several spreads created by
Sandee for the first five Design principles. Don't you love her humor?
An example of
Karen's first design principles.
Debbie's colorful fish captured everyone's attention and illustrated harmony and proportion.
I couldn't decide which of these two spreads
Susan (from the Netherlands)
created I enjoyed more, because both spoke to me.
Susan had a good grasp of these principles.
Principles of Design (part II)
Susan (from the US) shared this lovely spread on movement, which she felt was her favorite. I love it, too.
Karen's second set of design principles followed her theme perfectly.
Susan (from the Netherlands) showed contrast with these two images, which she placed side by side.
Susan (from the Netherlands) showed both pattern and rhythm in this spread.
On another of her travels,
Debbie shared and showed repetition.
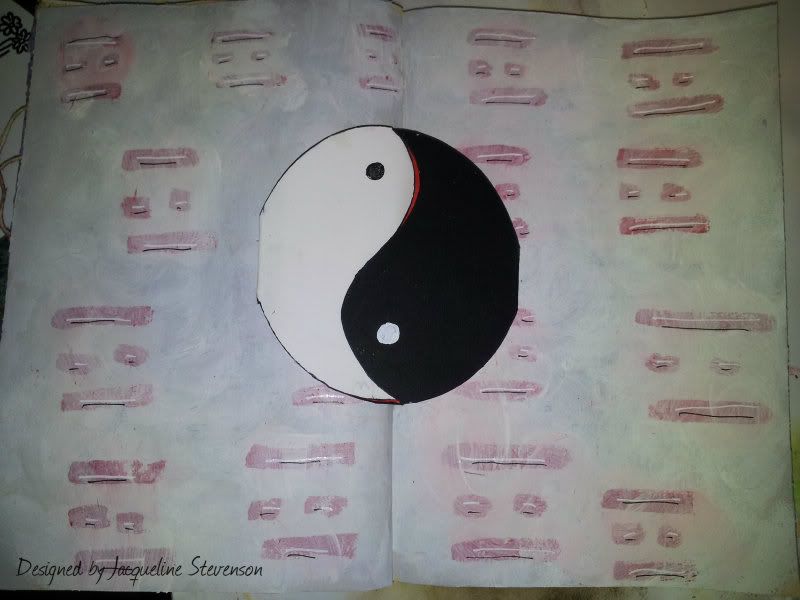
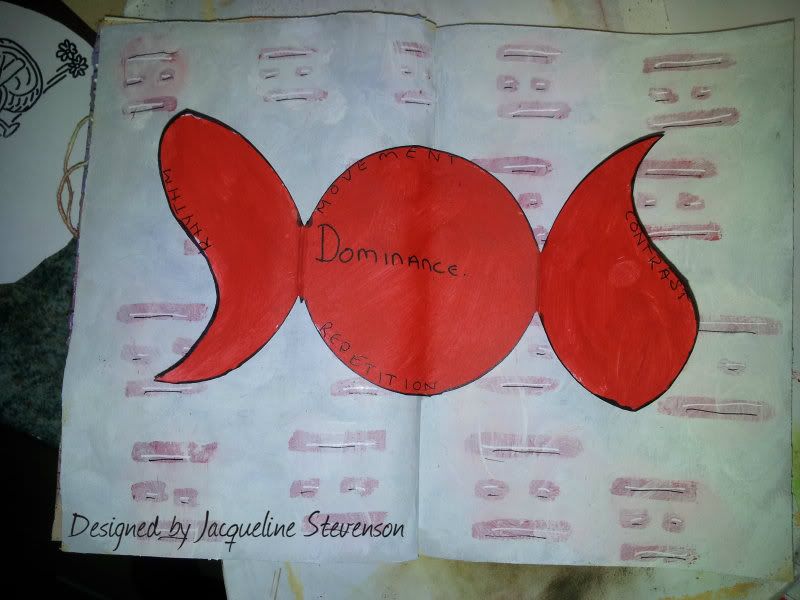
Jacqueline created this piece which opened to this:
Jacqueline was right when she noted she had covered all the Principles I talked about in this lesson.
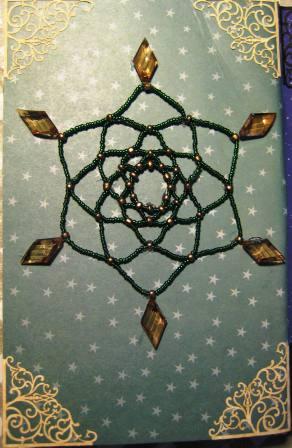
Paula created this spread beading a star, while showing pattern, repetition, and movement. It is gorgeous.
Dawn showed how one bird dominated the others. She must know how much I love birds.
BJ chose April in her Seasons AB to show texture.
Elle seems to be "getting it" (her words) with this spread. Me, too!!
Elle also shared this spread which used several Principles.
Sandee created a six page spread showing her Principles. I show all of them below:
Sandee showed an excellent grasp of all these Principles and created some truly fantastic art, too.
Elements of Design
Susan (from the Netherlands) showed how she dealt with space in Lesson 7.
Debbie used a trip to Venice to show her design elements.
This was one of
Elle's spreads for Lesson 7. I love that texture!
BJ used a May Pole to demonstrate her elements.
Susan (from the US) showed form in its truest form.
Paula illustrated line in two ways in this scene.
Then
Paula showed form and shape here, all the while keeping with her theme.
Susan (from the USA) used this spread to show several elements.
Dawn who lives in the UK, gave us this beauty to not just show the elements of design, but also to show her doodling skills.
Sandee's understanding of the Elements of Design are shown here.
The above show all the students' work I could find. Some were harder to find than others, because they added other photos or content along with their book page(s). Some didn't tell the AB Lesson number, while some showed the lesson number in their post title and highlighted my name or blog name with each post. Sandee made it the easiest because she dedicated an entire page (located at the top of her blog) to the AB. She showed photos of what she made and left links to each lesson under the appropriate lesson number.
Dianne (Art Beneath the Cottonwoods) suggested I break these up into several weeks. I have decided that some of you still need time to finish your pages, so here's what I'm asking:
Please, share your links by posting one lesson per link. I already have Sandee's, so that leaves everyone else. I don't think I'll be able to see them, and not even sure I'll know if a link has been created, since I have trouble seeing links on any blogger blog. I learned I could see both my blog (in whole, just as others have said they could see it) and blogger blog links if I use the translator on my blog (which is powered by Bing), but I can't access any blog translator that uses the Google translator.
I also can't leave comments to Elle or Paula, although I have been following their latest entries. My apologies, but it's a blogger thing.
Today is Day 4 of AEDM and is my scheduled Sunday homework.
Please leave links to Lessons 8 through 18, but NOT 19. I'll ask for it when we make our covers. One link per lesson, please.


.jpeg)


.JPG)


11 thoughtful remarks:
Beautiful, heartfelt work from all of your students. I really enjoyed all the individual creativity shown by each and every one. I am always fascinated by how we each "see" the world and this was a round the world tour! Thanks for sharing it all and yourself. xox
Wow...some great work from your students!!
Wow, how wonderful to see everyones work, some amazing pages all round, thank-you so much for taking the time to do this sweetie.
All my links on for you now too, I hope this makes things a lot quicker and easier for you my lovely.
Huge hugs x x x x
What a great recap! Thanks for the mention. This has been amazing and if I can figure out how to change the imbedded thing, I would/will. One other regular visitor mentions your issue. I'll try to post links.
I really enjoyed looking at everyone's work. Great stuff! Thanks for taking the time to gather these samples together.
Darla
Wow so many altered books. I loved viewing them all.
Nice recap of everyone's work thus far! It is so much fun to see how everyone interpreted the lessons & all the different themes. You are a good teacher and should be smiling very wide!
Love the recap, especially as I think I must have missed some later entries. Just added all my links. I won't have anything to add next time as I haven't done anything for lesson 19 as my book is full - waiting patiently for the cover lesson. BJ (anything arrived yet???)
I hope this helps, Elizabeth. I am working on my recap and found most of my links. Labelling things isn't as easy as I thought it was. lol
BTW, pockets has windows and folded pages as well but it got away on me before I could fix it. ;^)
Hi Elizabeth,
I've updated my lessons on my blog. I'm still working on lesson 18, it will be on my blog tomorrow. (I hope)
It's half past five in the evening here and I've been up and running since five in the morning.
I really love to see all the work the others put in there book! So many different ways of working out the theme's.
I hope you'll have a nice weekend.
Love Susan
Post a Comment