


.jpeg)


.JPG)


I suspect everyone who has made their own backgrounds has already made these cling wrap backgrounds, but I never had. I even have an unexpected recycling element. What I got were some of the most beautiful backgrounds, although they did curl a bit when dry. This post was originally published in September, 2009.

Substrate (I used 12 X 12 heavy white cardstock)
Craft sheet and/or plastic to protect your work surface
Plastic cups (shown with paint in one, water in the other)
Cling wrap
Cheap acrylic paint
Mica powders (optional)
Foam brush
Not shown: rubber gloves and paper towels

Cut
a piece of cling wrap about 1 1/2 times the length of your substrate.
Since mine was square, I ended up using two lengths to cover each sheet.
Crumple the cling wrap.
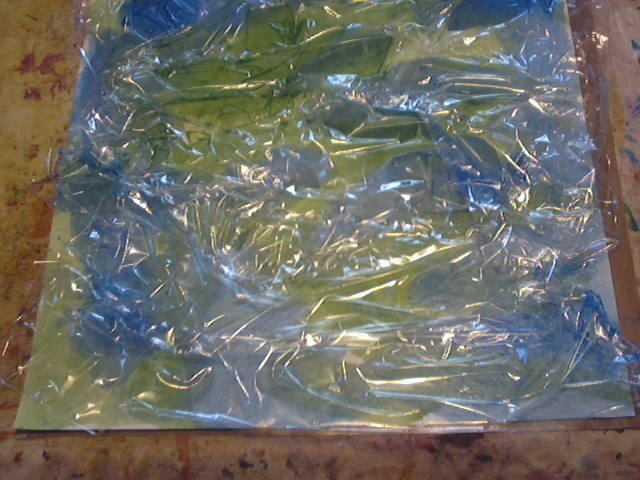 Lay the cling wrap on the wet paper.
 If you haven't crumpled it enough, you can still push and twist the cling wrap at this point. Set aside to dry. Walk away until you are sure the page is dry.
 You can also press the cling wrap with your hands to assure good coverage.
 One of my two favorite pieces happened by accident. This background
was made using pink paint and water only. I reused some of the cling
wrap and thought I had used the clean side, only to find out that the
copper paint from the previous background had transferred to the page.
What a gorgeous accident I created. If only you could
see the true beauty of it.
One of my two favorite pieces happened by accident. This background
was made using pink paint and water only. I reused some of the cling
wrap and thought I had used the clean side, only to find out that the
copper paint from the previous background had transferred to the page.
What a gorgeous accident I created. If only you could
see the true beauty of it. My other favorite background used green, blue, and copper colored
acrylics. The colors sort of bled together in the process and created
this stunning piece.
My other favorite background used green, blue, and copper colored
acrylics. The colors sort of bled together in the process and created
this stunning piece.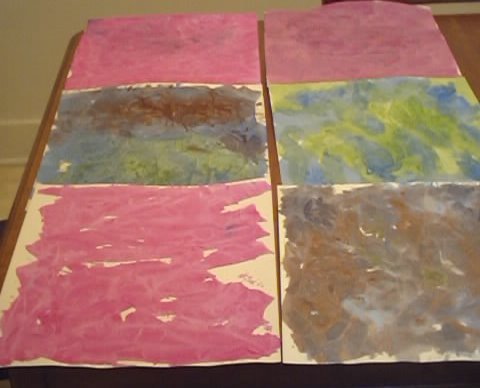 Here are all the pieces I created using this technique. I could have
made more, but I ran out of room to dry them. It's a small craft room
and I had no place to put them outside to dry. The scanned images above
are the top and middle pages in the left column of this photo. The
middle and lower pages in the right column are the ones I demoed above.
Here are all the pieces I created using this technique. I could have
made more, but I ran out of room to dry them. It's a small craft room
and I had no place to put them outside to dry. The scanned images above
are the top and middle pages in the left column of this photo. The
middle and lower pages in the right column are the ones I demoed above.


9 thoughtful remarks:
Well done. As always, on both the recycling and creative fronts.
I haven't done any cling backgrounds, but they look cool. I've read about them though. Happy Wednesday. hugs-Erika
...an interesting use.
Always wanted to try this Elizabeth... thanks for the nudge... i think the grandkids will love it.... I'll do it during a sleepover ... that way it can dry overnight... :) Hugs! deb
Good texture
I've never used that technique with acrylics. I've always used it with watercolors. Might have to try this one day. :)
Thank you for sharing this technique and process.
All the best Jan
OOh, I like those!
They work very well with watercolor, too!
Post a Comment