


.jpeg)


.JPG)


As I promised last week, I realize I'm late sharing my Second Thursday Tutorial. Although I had planned to share this on Friday Smiles, I decided to share it today instead.
Today we are dyeing fabric. I know several of you like to dye fabric using natural materials, and that is the only way I dye. I use NO mordants I can't pronounce and no caustic dyes that require using a mask. And I don't mean one of those Covid masks like those we wear when we go outside, either. I mean a respirator mask with filters on both sides of your nose!!
 As with all my tutorials, I'll begin with tools and materials I will be using. It doesn't take a rocket scientist to see I'll be dyeing fabric using onion skins. Before we begin, I want to reiterate, please do NOT use these tools in food preparation. Even though the tools I am using hold kitchen ingredients, please, please use these only in art and dyeing projects.
 From left, fabric, strainer, glass bowl, fabric.
 Cheesecloth will be dyed, too.
 I added copper and white paint to the blue fabric, but thought I would turn it a bit more vintage by dyeing it with the onion skins. I've been saving onion skins for about a year. It takes a lot in order to dye just these few small bits of fabric.
  Most of the fabric is poly-cotton, but the white fabric is 100% cotton.
 Place onion skins in the glass bowl.
 Add enough preferably hot water to cover the onion skins. Adding more onion skins will give you darker, richer color. Microwave for eight (8) minutes.
 While the onion skins are cooking in the microwave, soak your fabric in warm water.
 Carefully remove the glass bowl from the microwave.
  The bowl will be extremely hot.
 Using a strainer, remove the spent onion skins from the liquid.
 Make sure you have removed all the skins before proceeding. Place your spent onion skins in your compost pile.
 Add your still wet various fabrics to the dye bath. Notice how some of the fabric is already starting to take on the color.
 Return the bowl to the microwave for four minutes. If the color isn't deep enough, cook for an additional two minutes. At some point, no amount of microwaving the fabric will make it any darker. Note how hot the dye bath was. You can see where my camera steamed over.
 You can leave the fabric in the dye bath until it cools,
 or you can remove it immediately for a mottled or lighter effect.
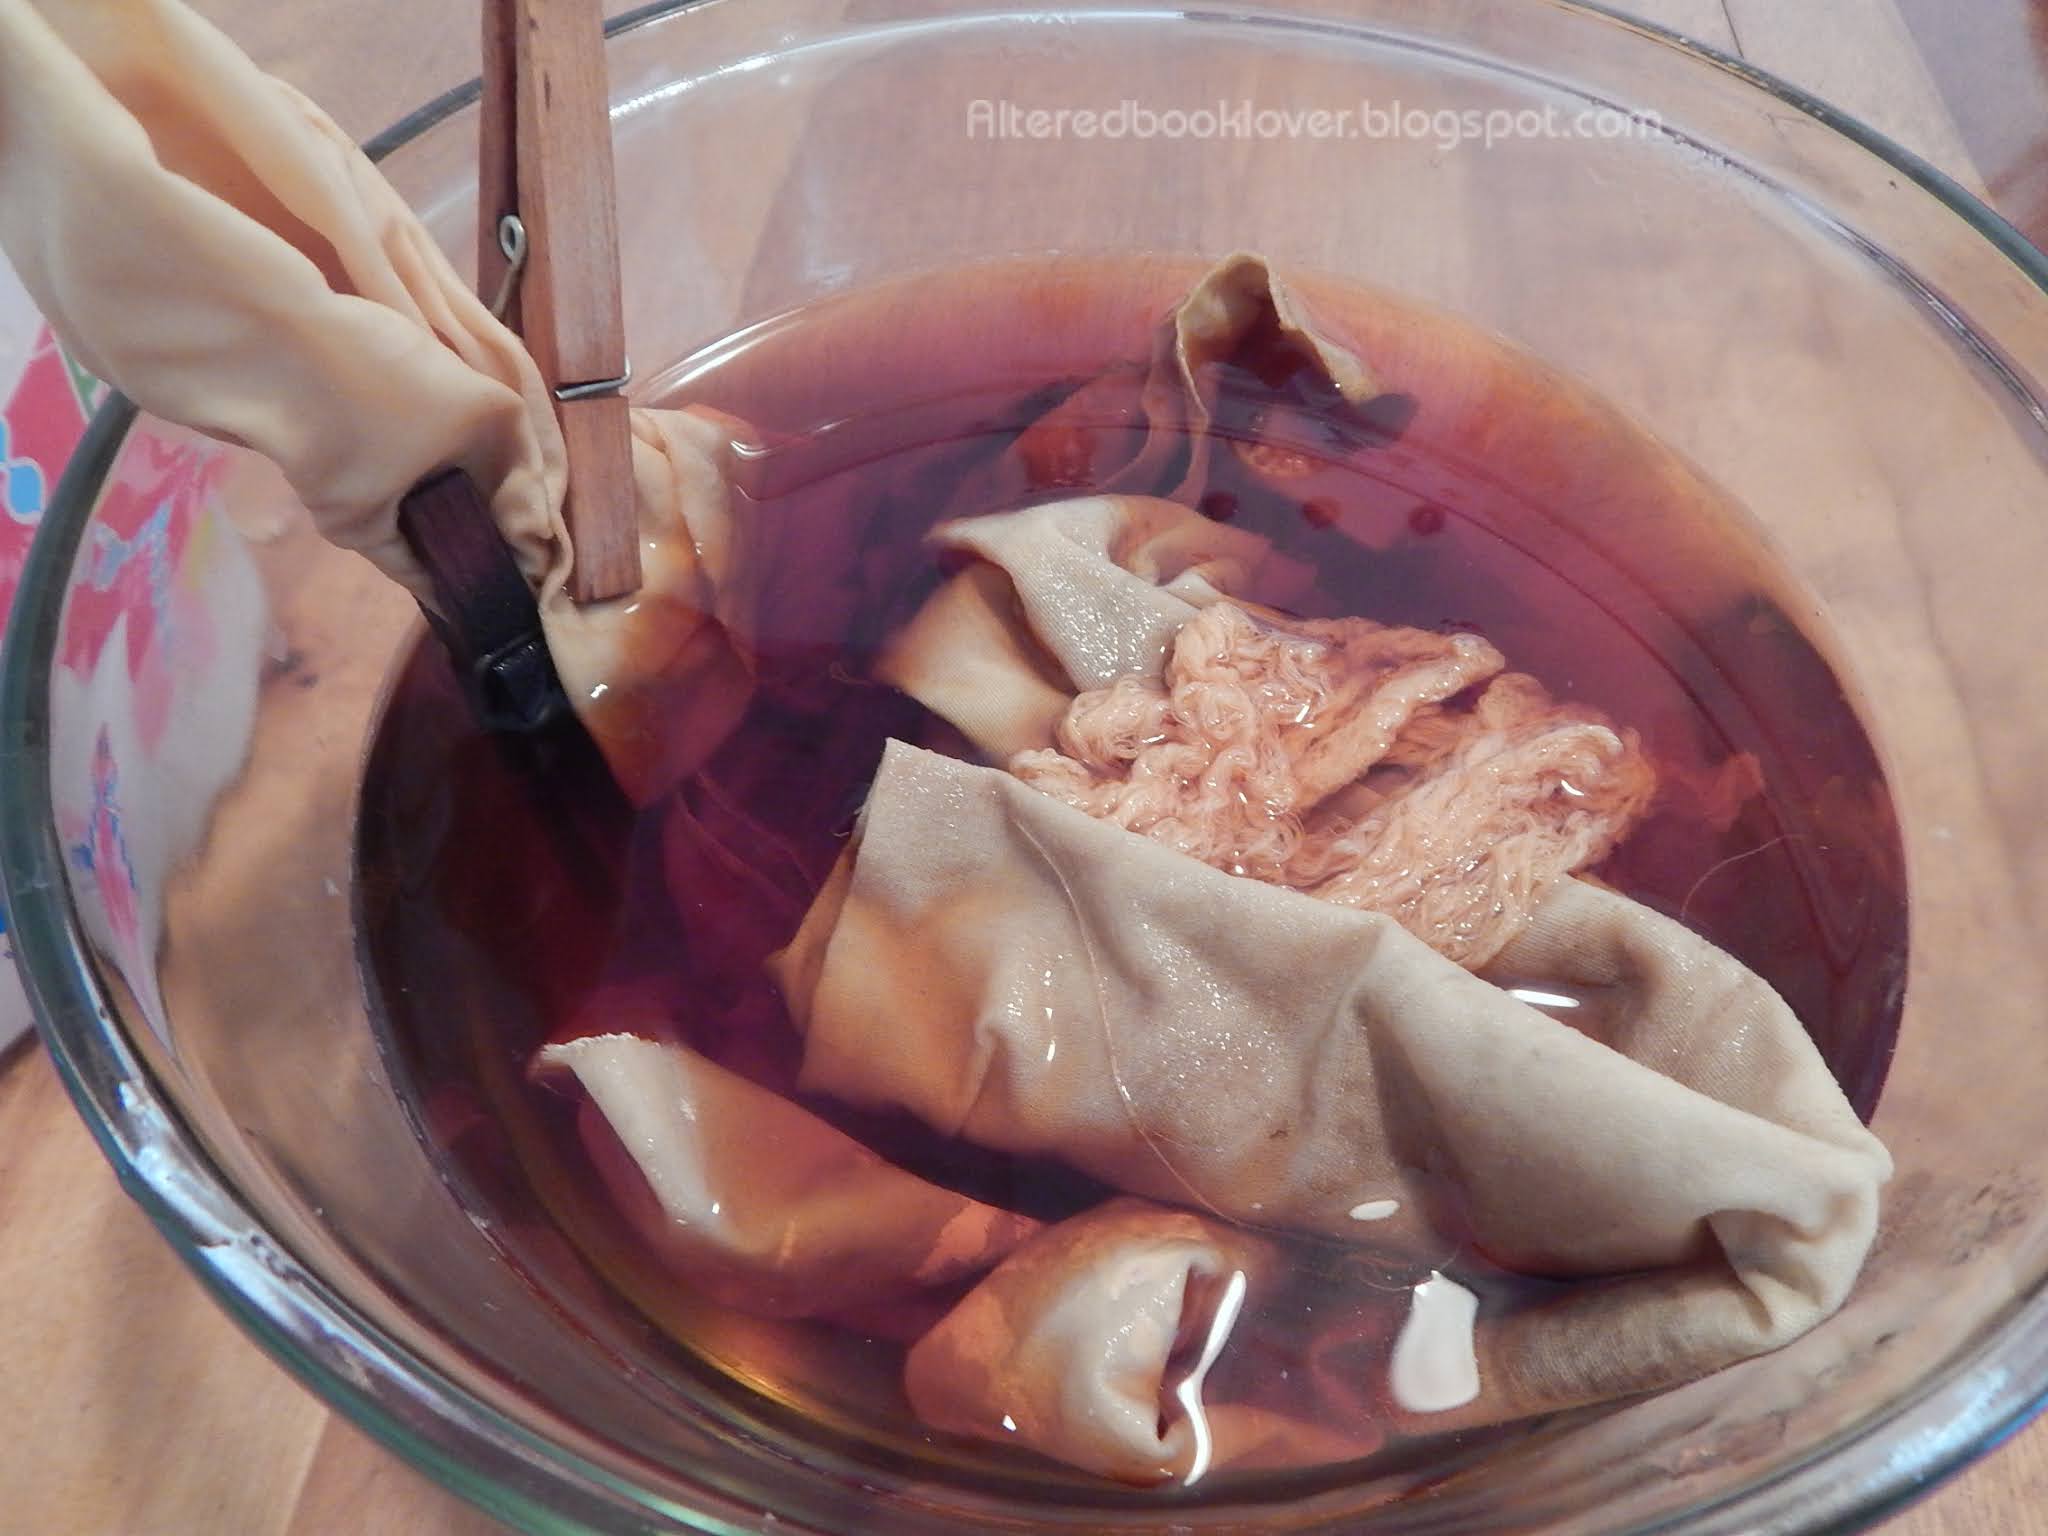 You can even leave it overnight.
 Here one batch is drying, while the other is soaking up more dye bath.
 Now it was time for the reveal.
 I used no mordant, only onion skins and water, and got these very vintage looking fabrics.
 I really liked the cheesecloth, but was disappointed with the fabric that had copper and white paint on what was originally blue fabric (on the left in the photo). I think I liked it better before I dyed it.
 The painted fabric in the back that I over-dyed turned out well. You can see how the paint resisted the dye. I actually like it better now.
 I'm not sure I improved this fabric much. It was already rather grungy looking when I added it to the dye bath.
 Even though this piece was still quite wet, I didn't have time for it to completely dry.
 Even though it is still quite wet, I think this is going to be one of my favorite pieces. I like how the clothes pins resisted the dye bath.
 Then I remembered the two pieces I had immediately removed from the dye bath. By now, they were also completely dry.
 It's sad that you can't see the lovely pattern that was actually enhanced by the dye. It's my inability to get a good shot in this very late night photo.
 Here the two fabrics are side by side. The fabric on the left is the 100% cotton king size pillowcase.
 No amount of color adjusting helped.
 However, you might possibly be able to see the diamond design on this fabric that started out as a king sized light blue sheet.
Ruminations:
I love the mottled look, but had a hard time achieving that with the fabrics I chose.
Some fabrics took the dye bath better than others.
Surprisingly, the poly-cotton accepted the dye better than the 100% cotton fabrics I chose.
If you start with grungy fabric, no amount of dyeing will turn the grunge to vintage.
Leaving the cheesecloth in the dye bath overnight turned it a gorgeous deep tan.
If for some reason, you don't want to use your microwave, you can cook simmer your onion skins for an hour on the stove, then, after the skins have been removed, add the wet fabric and simmer for another hour on your stove.
Thank you for joining me on this journey the first month in 2021. I hope this gives you ideas of what you can achieve using nothing more than onion skins and water. As soon as this post goes live, you will be able to access it easily on my Tutorials page.


13 thoughtful remarks:
You can save onion skins for such a long time?! I never knew!
Always careful with "hot" here, LOL.
Now I really wonder what we used in school when did batik.
Thank you for explaining. Sadly, apart from two shirts, I have no white clothes/fabrics, can you believe that.
Fascinating - and I love that soft colour.
That is very interesting. I love indigenous textiles and art works made with organic dyes, though they seem to fade more easily than chemical dyes.
Onion skins do produce an interesting color: the other day, I left a few of the inner, cleaner ones in the stock pot to make my stock a prettier color. But I throw away most of them.
be safe... mae at maefood.blogspot.com
Brilliant idea for winter dyeing. I should try this. The diamond pattern old sheet looks great and seems to have some texture to it. I wouldn't use any chemicals inside even with the respirator as I don't like the idea of powders getting on things in the house and the air being more closed in during the winter. But I do miss play. So thanks for this post. Have fun playing. Hugs-Erika
Now,this is MY kind of dyeing. I’ve avoided dyeing fabric because of so many extra steps, perhaps this would be fun to try! It’s surprising that the poly-cotton took the dye better than 100% cotton. I use onion skins in my hand-made paper, but this is a new use for me. Thanks!
Really wonderful tutorial. I like the way the colors came out. Well done my friend.
bleu N squiggles; at furst we thinked Elizabeth hada sack oh po tay toez, then we started reedin.....we waz hopin her waz gonna fix sum friez !!! :) ♥♥
elizabeth; the diamond design is AWESOME ~~~~~ well done !!! ☺☺☺♥♥♥
Thanks for sharing, you got great results. Sorry I am so late, we have been kept very busy! Hugs, Valerie
Very nice results. You have a lot of patience. :)
What do you do with them after they are dyed?
I am so fascinated with your process - I don't think I have ever seen onion skin used in tie dye ... likely all sort of chemicals we used previously!
Love the subtle patterned effect! What are you going to use your fabric to make?
Ju-Lyn
https://purplepumpernickelblog.wordpress.com/
Must show this to Miriam. She might be interested in trying this process.
I like your results. Colors never turn out as dark as I expect.
I've never dyed fabric before but every time I peel my red onions, I think about making that as an experiment. Your instructions and step out pix are terrific. Thanks for this!
Post a Comment