


.JPG)


For this month's tutorial, we will be making fabric paper. You may have seen this technique before on the internet, because it's a great way to combine paper and fabric. I have no idea who invented this technique, but I am certainly grateful.
 We will begin with fabric on the left and tissue and dress pattern tissue on the right. Originally, I had forgotten about the four yards of leaf print I purchased one year at a thrift shop, but now I realize it will be far better than the blue I had originally intended to use. The idea is to pick very thin cotton as your background fabric and tissue paper, dress pattern tissue, or napkins for your paper. Do not choose anything heavy for either the paper or the fabric.
It's wise to wash new fabric to remove any sizing, then tear the fabric to size before you begin. There is no need to iron the fabric.
 Now it's time to pour all purpose PVA (white glue) into a cup. As an alternative, you may use mod podge, or tacky glue.
Add an equal amount of water and stir thoroughly.
 You will also need a sheet of plastic. This can be a plastic bag, sheet of plastic, or, as I have chosen, an old plastic sheet protector, which must be cut open.
  Affix the plastic to your table using low tack tape.
 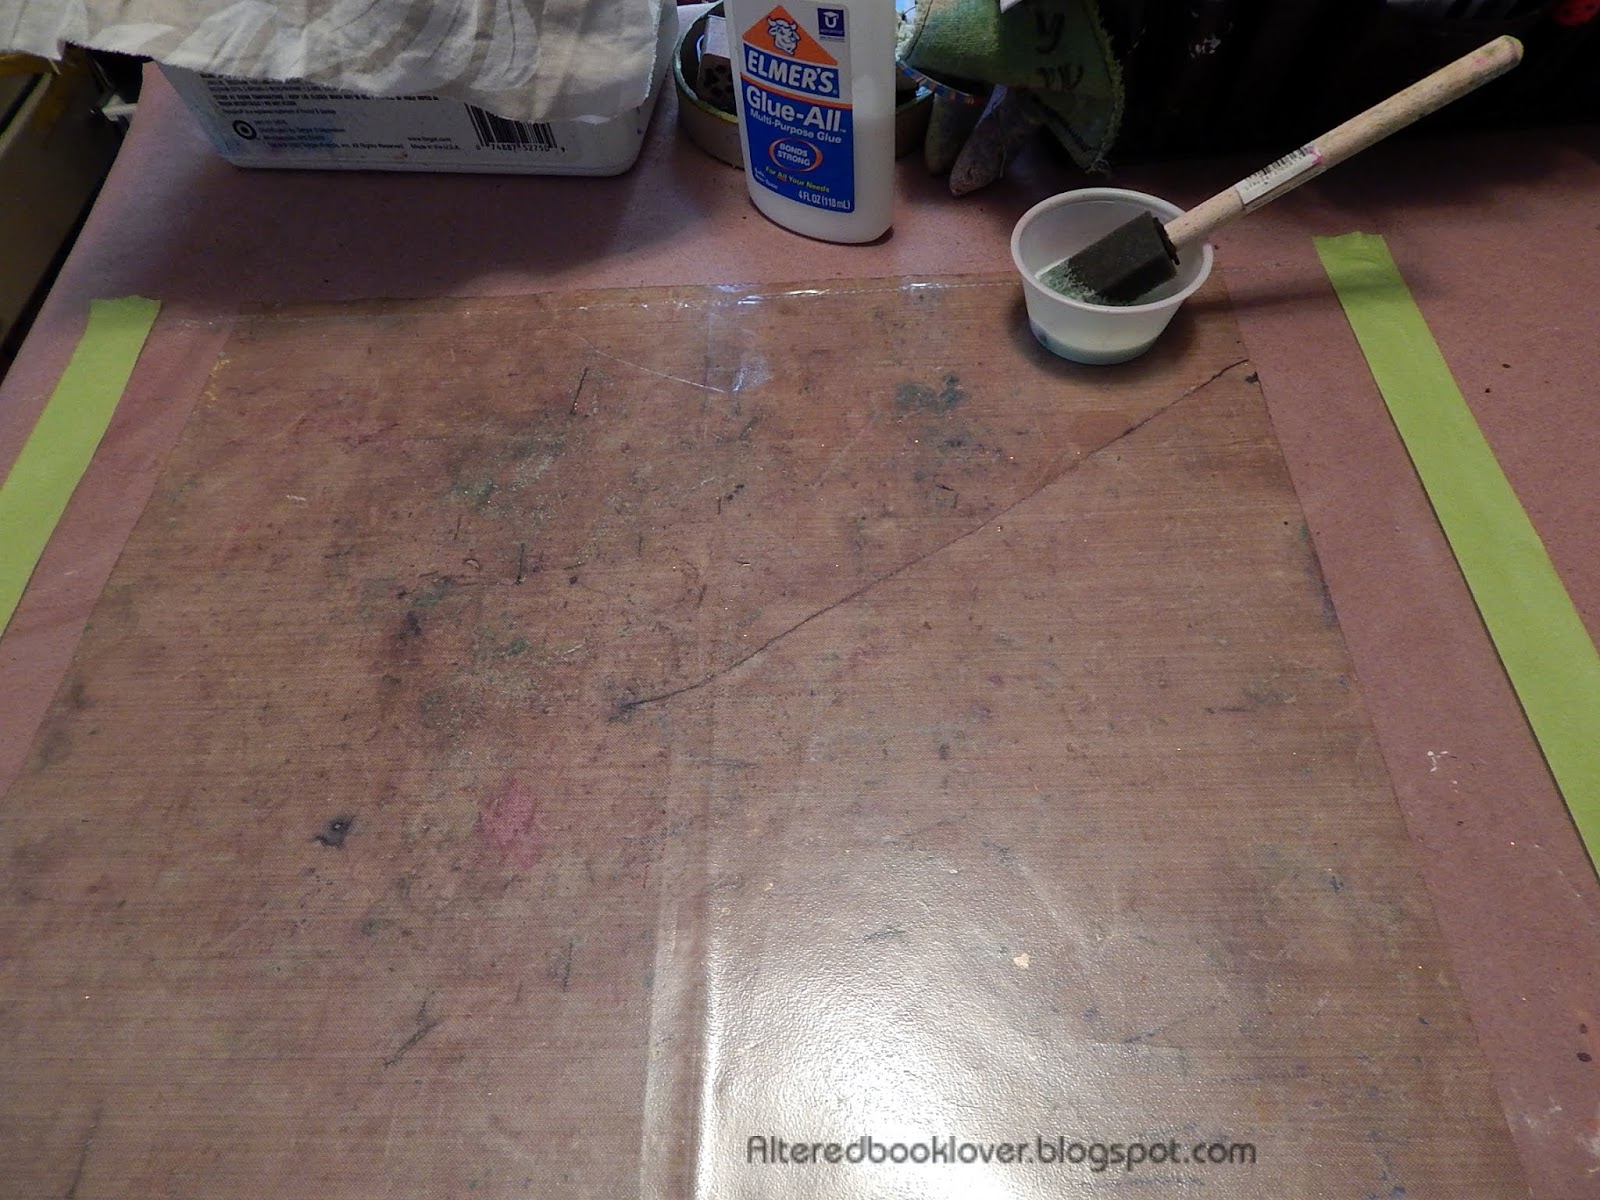 Be sure your glue/water mix is completely mixed using a brush. I used a foam brush, but I'm not sure that is the wisest choice, since the foam brush soaks up a large amount of the mixture. As an aside, be sure you start with a new brush and not one that has been used with ink in the past!
  In a way, I was glad the glue had been tinted with green because it made it easy to see where I missed spots on the fabric. Saturate your fabric with the glue/water mix.
 Add your first layer of tissue paper and gently cover with more glue/water mix.
  Gently add additional layers of tissue and gently cover with glue/water mix. Please do as I say, not as I do! You can see I got overly enthusiastic and tore through two layers of tissue in a few places.
 I found when I tore the tissue it was because I hadn't wet it enough. Once I added more of the mix, I had less trouble.
 Add as many or as few layers as you choose in the colors of your choice. Tear the tissue, or leave whole, it is your choice.
  It's at this point, you may add paint, inks, mica powders, or leave plain. Allow the fabric paper to dry, preferably overnight.
  Once dry, the fabric paper is easy to remove from the plastic backing. Now it's time to trim the tissue to the size of the fabric.
  Fold your fabric paper in half, or leave flat to be used as the beginning of a collage.
  Sew around your images, or sew straight lines. The fabric paper is now
very pliable. The longer you work with it, the more pliable it becomes.
Sew around your images, or sew straight lines. The fabric paper is now
very pliable. The longer you work with it, the more pliable it becomes.  Using variegated thread is always a nice touch.


 I love how the three layers show through.
 Although the back will not show in my fabric paper, it is still quite lovely, especially since I have no way to drop my feed dogs.
  Once folded, this is the size the paper fabric will be for a book I intend to create.
I am so happy you joined me today. Be aware, each piece takes forever to dry, so plan ahead if you need to make something for a gift. I had intended to make three of these using different tissues, but I didn't account for the amount of drying time they required.
Thanks for visiting today, and once this goes live, it will be on my tutorials page, where you can find it anytime.


16 thoughtful remarks:
A very interesting technique Elizabeth. I like the fabric and the tissue paper too.
What an interesting post and technique...thanks for sharing your wonderful skills as always.
Great technique, Elizabeth. I have never thought of it. Thank you for the tutorial, my friend. I will definitely try it. Kisses!
Nice tutorial. It's fantastic to make different material to use in art and so exciting with all the different ways we can do that.I haven't tried this technique but I can see why you love it. Happy Thursday. Hugs-Erika
Fabulous tutorial and one I need to bookmark, as I would really like to try this.
A fantastic tutorial! Thank you dear Dr.E.! I have made fabric papers already and I know how long the drying times are, but worth the work and time, right? A fantastic journal cover already Elizabeth!I love the additional sewing! Absolutely Gorgeous!
Hugs, Susi
I've never heard of fabric paper so enjoyed your tutorial
Cool! I'm wishing now I hadn't got rid of all my fabric scraps back in the day lol I'll definitely look for remnants in thrift shops. Thank you!
Say, great idea, thanks!
thank you so much for this tutorial Elizabeth. I have not read anything about this one-and I love it-sounds very fun. on my to do list for sure hugs
A great idea and your sample looks wonderful
Love Chrissie xx
This is a super tutorial, great photos of the stages. The end result looked fantastic and it will be a lovely cover for your planned book.
Yvonne xx
Never heard of this technique! Nice to know and see the steps. :)
Wow! What a fascinating technique. I'm going to have to try this! Hugs, Chrisx
Woww that´s amazing Elizabeth !! I love this fabric paper !! I want to thank you very much for the fabulous tutorial you have shared with us, splendid !
I´ll try to do it next.
I wish you a very nice weekend,
Big hugs, Caty
Very interesting and well demonstrated, Elizabeth. I could do this, based on your images. I'm quite impressed. And it really is beautiful, too. Love the birds especially.
Post a Comment