


.JPG)


I'm so enamored by the stamps some of my friends carve. They have drawing and cutting skills I don't possess. They also have carving tools I don't possess. That's why for this month's tutorial I am making a few stamps even those of us with no drawing skills or carving tools can create. Or at least that was the plan when I started working on this tutorial yesterday. Please remember, the purpose of Second Thursday Tutorial is to have fun, experiment, and play.
 Supply list (from back left clockwise)
Carpet grip tape, with adhesive on both sides
Foam rectangle from package
Ink pen
Foam rectangle from package
Self healing mat
Fiskar's cutting knife (you could use an X-acto, but I don't have the grip for it)
Package of foam rectangles (found at my local Dollar Tree where everything's $1.00 [USD], and contains 32 pieces in various colors)
Piece of one-ply cardboard
 I removed the roll of grip tape from the container, removed the backing from one side, and adhered one of the foam rectangles to one side of the very, very sticky grip tape.
 I used my cutter to remove the grip tape and the other cover. Be sure to leave the cover intact. If you don't, the tape will stick to everything in its path. Don't ask me how I know this, please.
  The first experiment was a disaster. I am simply NO good with cutters, even this one I can at least hold onto. You can see I lost my grip and cut right through one side, leaving the "stamp" worthless.
 After cutting the part away that was now trash, I decided to design and cut the next part nearer the center of the foam.
  That tape didn't want to be cut through, so I had to turn the piece over and cut the other side.
  Good grief. I messed this "stamp" up, too. Additionally, when I moved it off the self healing mat, I accidentally removed some of the backing which exposed the tape. See above for how I know you must leave the cover intact.
  Completely flustered and dissuaded, I walked away in disgust, only to return the next day with a different plan. Please note the ugly, grungy mug above is the one I use when I'm working in my craft room.
 This time I chose to not use the carpet grip tape, choosing instead to cut the outline with my scissors.
 I was hoping I had left enough space in case my cutter slipped.
  Granted, I made a few missteps, but for the most part, my "stamp" was complete. Thankfully, it was also intact.
 It was now time to put everything away, except the foam and E6000, my adhesive of choice for the project. Note how dark and late it has gotten.
 I usually try really hard to keep the adhesive at bay, and if I can't, I at least clean it up after it has dried. However, in this case, I didn't care. I also slathered it on using far more than I would were I merely adhering an object. This time, I tried to cover every bit of the stamp area and wasn't concerned that some oozed out from underneath the orange foam.
  Next it was time to cut down the cardboard backing and adhere it to the foam stamp assembly. I wanted something I could grab onto that would not be quite as flexible as the foam, but would not flatten like corrugated would, if I pressed too hard.
 Then it was time to allow the E6000 to dry.
  Unfortunately, it was late, and I still needed to get these photos off my camera and onto my blog so I could write this tutorial before Thursday arrived.
 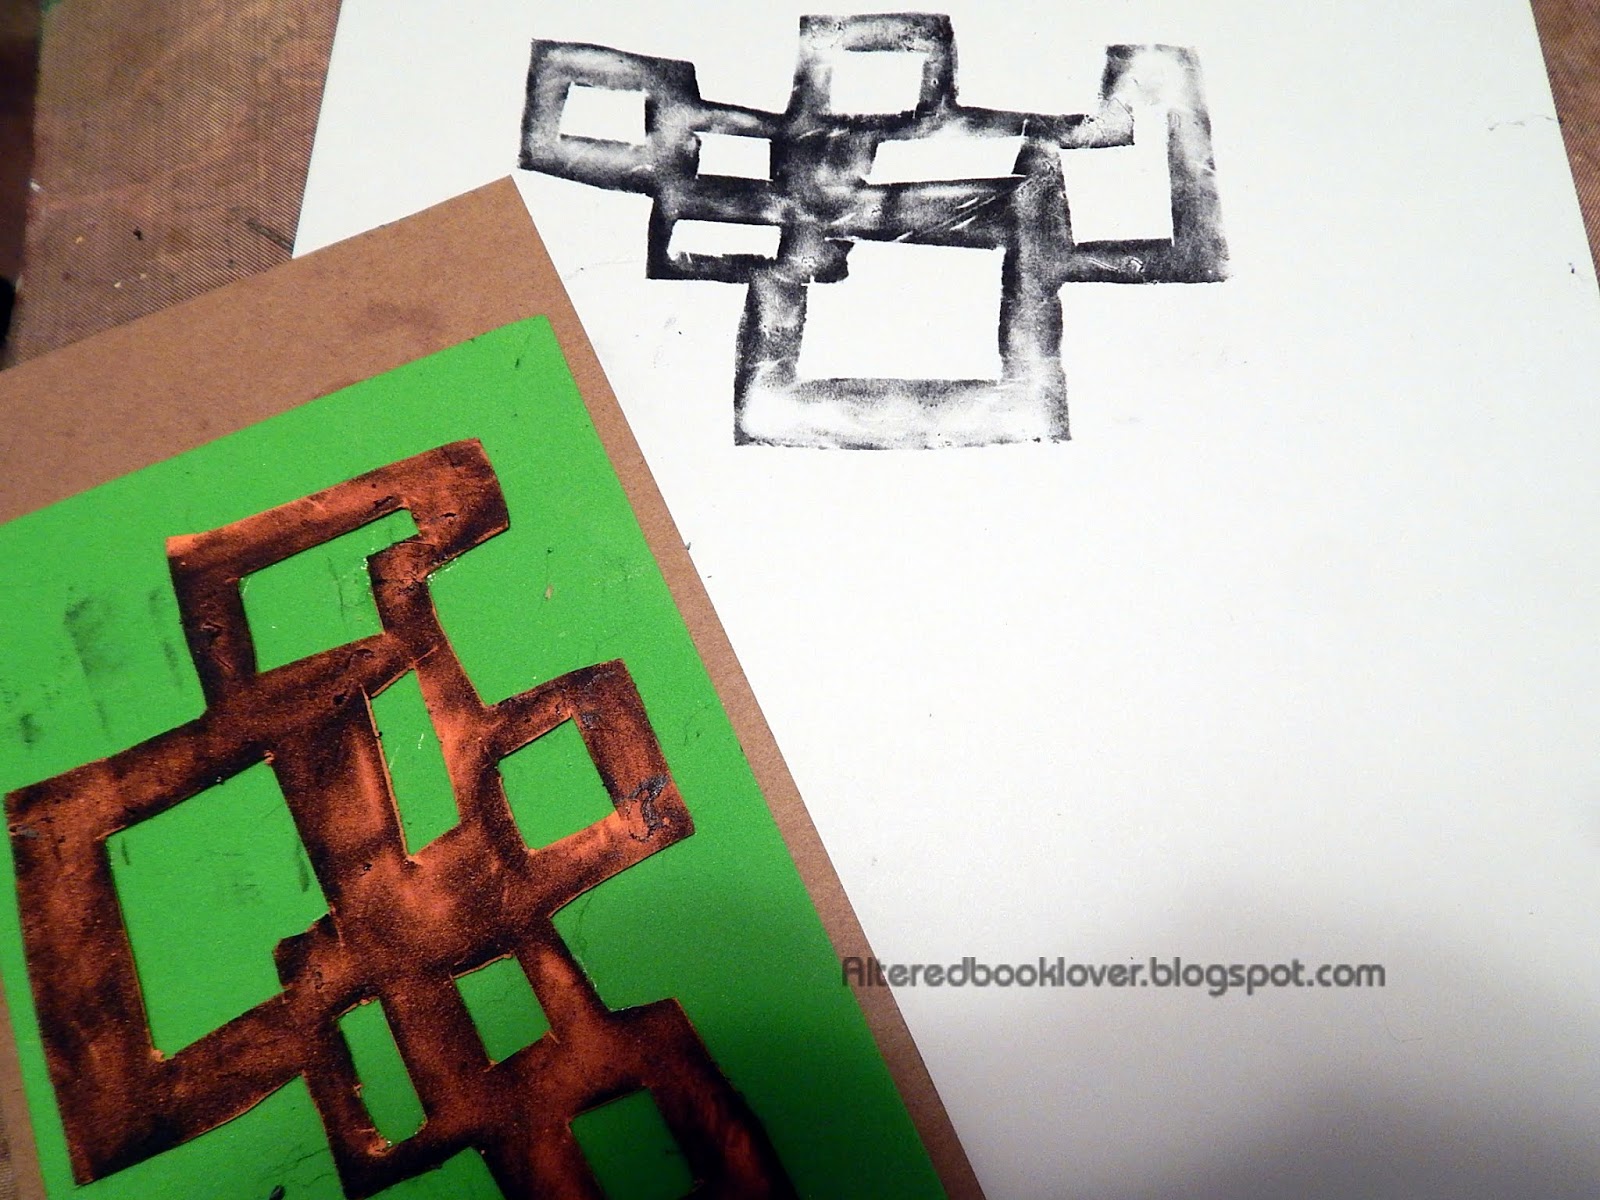 Using StazOn, I stamped the image onto a sheet of my new white card stock. One thing I overlooked was the fact the E6000 has bumps and lumps if not spread properly. I fear this may be why some areas didn't stamp as well as others. Overall, I was quite pleased with my new stamp, though.
 The second time I inked and stamped was worse than the first.
  I like how this turned out, although I'm ambivalent about the end product.
Ruminations:
1. One layer of that thin foam is not enough to create a decent stamp.
2. The stamp should not have been so large and "in your face."
3. Using an X-acto or cutting knife requires practice prior to any cutting of the actual stamp.
4. E6000 allows too many bumps, so my next stamp will be put together with its backing foam using a different glue, but one that is definitely water resistant or water proof.
5. Instead of trying to create a geometric stamp, I think I'll try to find some simple shape on the internet, print it, trace around the edges with a pencil, then turn the paper over and scribble pencil marks on the back, thus transferring the lines of the simple shape to the foam.
I fear this was not as successful as I had hoped when I envisioned it in my head. Regardless, I am happy that you decided to read this through to the very end. Thanks for joining me. Once this goes live, you will be able to access it any time on my Tutorials page. Again, I appreciate you stopping by.


20 thoughtful remarks:
Have fun with your new stamp! Have a great day, Valerie
I love the grungy look of your ultimate stamp!
I had a go at making stamps. We can get funky foam that is quite thick here in the UK, so only needs one layer. I then stuck it to some acetate - the packaging kind that it impossible to get into without a few choice words! That made the stamp easier to use.
I also found that using a ballpoint pen and drawing on the stamp allowed me to get some detail as the ink didn't touch the grooves the pen made.
Keep at it!
That stamp came out cool! I found like most thing, it all takes practice. I have done stamps that ended up in the trash or didn't come out like I hoped. And I often used scissors. I never use a knife style cutter though because I can't quite control that enough.(those are the ones in the trash). I do have a little ancient carving kit, but I cherish that kit. It was a gift for Christmas back when I was college. Somehow through all the years I have saved it, and occasionally it comes in handy. So when I carve a stamp, I think of my family Christmases. maybe that's the magic in the result. Happy Thursday. Hugs-Erika
Love how you take us through the process.
I do like how the stamp turned out though..very grungy and it has a cool graffiti vibe.
thank you!!
An interesting experiment. I love your new stamp design Elizabeth!
Your stamp turned out great. Thanks for sharing the process.
after all your frustration and work-you did end up with a very cool stamp=I did not know about this technique for making a stamp-so I love this idea-I don't think I would be good at carving something out.
glad to see your internet is back up too-we are of the age that 9 11 will always be with us as also the death of JFK
Yes I was happy to meet Kim-Happy Thursday
so many way to make your own stamps ... thanks for showing one more way ...
I am glad you had fun and created a stamp which i think turned out well for a chic geometric shape
Elizabeth; you did 10000000000000000000000000000 times better than I could have possibly done !☺☺♥♥
I like the large size, the geometric shape, and the way the color adhered. I'd have been delighted to have created this. So cool!
Good job on your stamp. The design turned out great.
Nice, thank you!
I think it turned out very well!
And yes ♥♥♥ I am always in awe of the way you take us through your process. This tutorial is fabulous again dear Elizabeth.
Even though you listed nearly all steps as failures - for me
this stamp is one of a kind Dr.E.style!
Unique!
Hugs, Susi
I really liked reading through this post Elizabeth and the stages involved in creating your stamp. Which I think looks fantastic, its a super geometric shape, also it looks a little bit industrial to me as well.
I look forward to seeing how you will use it in your art.
Yvonne xx
I do like how you take us through the process...
Thank you.
All the best Jan
I loved to read through your process and also to read about things that turned out not in such way you thought! That's (artistic) life!
The stamping result is great! I like this look because some areas didn't stamp as well as others.
Rike xx
I haven't made stamps in a long time -- it was fun. Good tutorial, Elizabeth!
You got some great results but I think I have to re-read when I get home! Hugs,Chrisx
Very cool stamp Elizabeth! looks like it was a bit of a process,but it really worked!
Jackie xo
Post a Comment