


.JPG)


This month's tutorial is how to create faux cloisonné. I'm not sure if this is going to work, but since it's a Second Thursday Tutorial, it's all about experimenting and pulling out all the stops.
 Let's begin with supplies. From back left counterclockwise:
Dimensional paint, color of your choice
Dye ink, color of your choice
Low tack tape
Rubber or acrylic stamps of your choice, not many dimensions
Sheet of copier/printer paper large enough to accept your stamp
 First, tape your paper to a surface using low tack tape. This will keep the paper from moving as you work.
 Ink your stamp with any color ink. My black was dried out, so I grabbed a pale rose.
  Next, stamp your images of choice. Make sure the images have clean lines and not too many details.
 Using your dimensional paint, outline the images you have stamped. Ideally, you should have a tinier tip than the one I have. I used the tip that came with the bottle. If you have a needle tip, you should use it. My lines were way too wide, but I persevered.
  Now it's time to allow the dimensional paint to dry. I allowed mine to dry about 24 hours.
 After allowing the dimensional paint to completely dry (I ran my hand over the paint to assure it was dry) grab some old, unloved nail polish of various colors.
 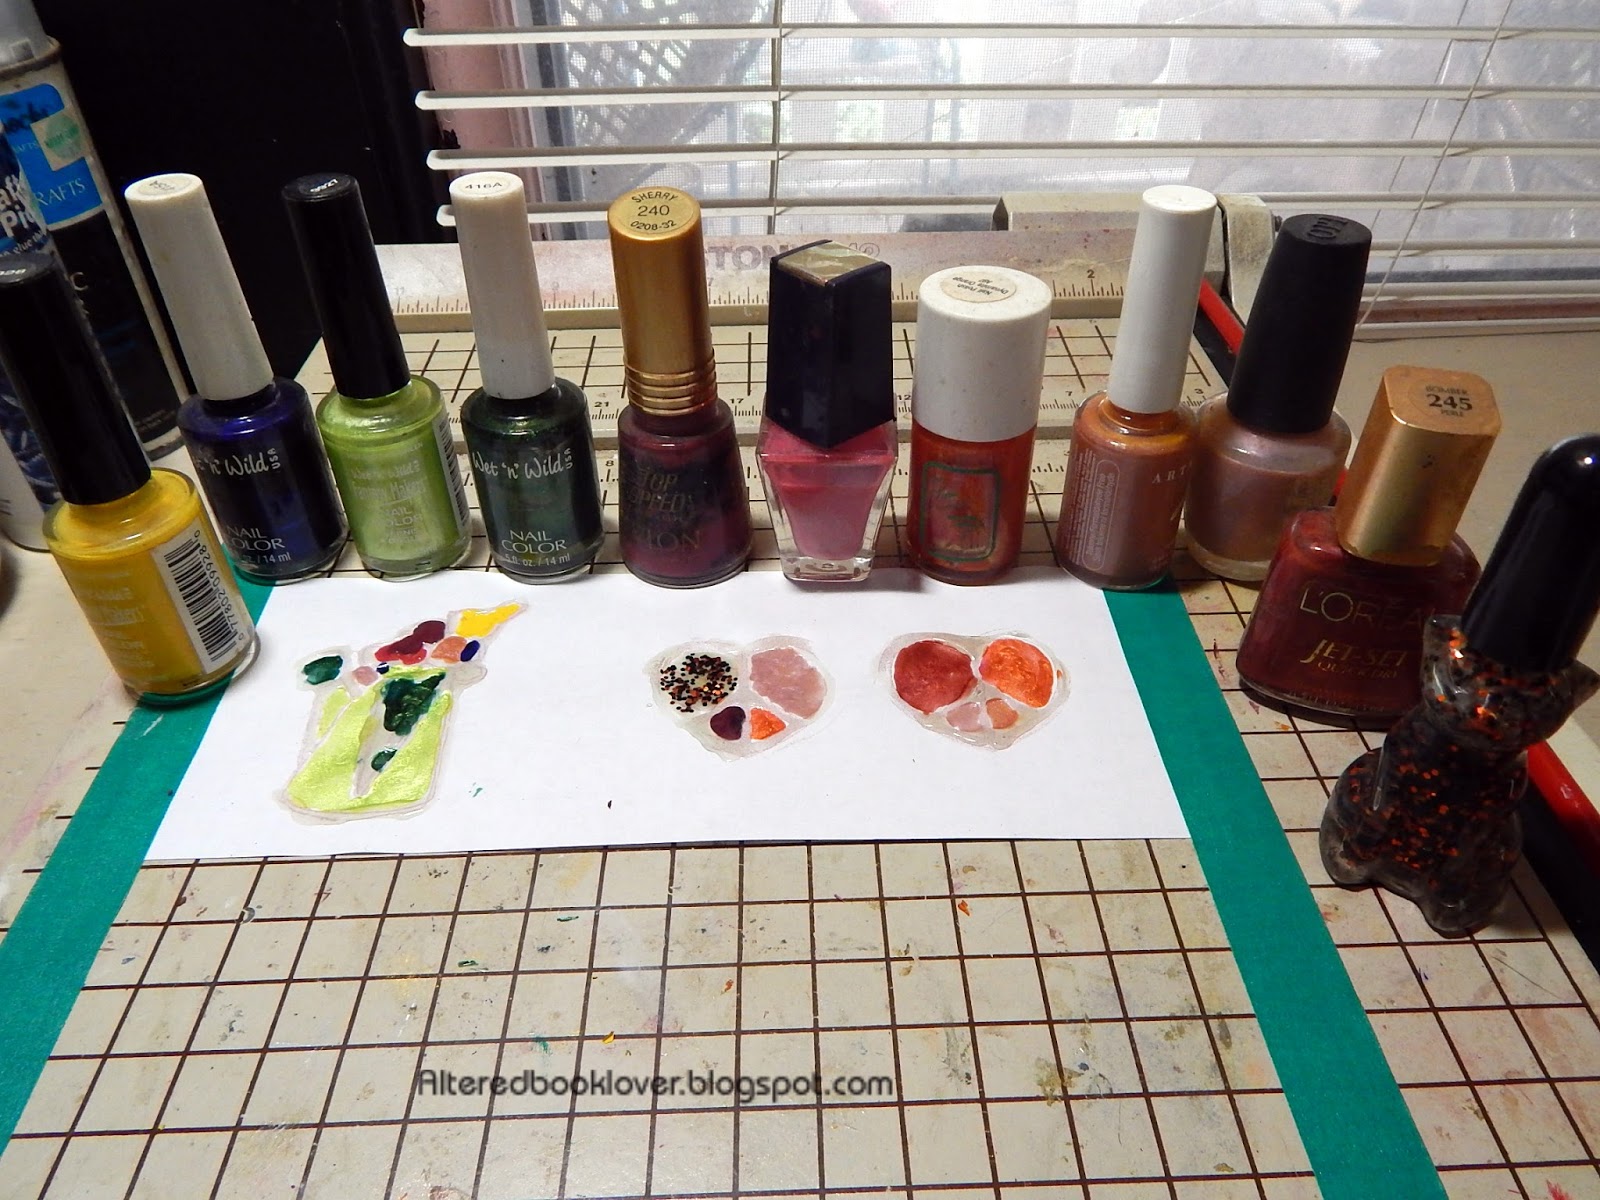 Staying inside the lines of the dimensional paint, fill in the various areas with nail polish. These were all the colors I used. I tried to use a different color for each area. I was so surprised I had so many colors. Most were new bottles I picked up at a garage sale years ago.
  Allow the nail polish to dry.
 Even though they didn't need that long, I allowed two hours drying time. If you need to clean an area, be sure you are wearing disposable gloves, or have nail polish remover on hand. Take my word for it!
 A word of advice I learned as I was adding the nail polish: if you are right handed, work from left to right. If you are left handed, work from right to left. That way, your arm won't come in contact with wet polish like mine did when I began working in the middle before working on the watering can.
  The lighting in my craft room sucks, so I didn't get the polish filled in as well as I could have. I suggest using a toothpick to extend the polish to the edge of the paint.
  I really fell in love with this bottle of nail polish.
  Not the polish, but the bottle. I look forward to the day I can use the last of the polish and clean the bottle so I can display it.
  Now it was time to remove the low tack tape and cut the images from the backing paper.
  Be aware, if you have good cutting scissors, you will not be able to cut through the dimensional paint.
  Here they are after they were cut and ready to become embellishments.
 My poor little yellow bird got too much dimensional paint and not enough nail polish. All in all, I as rather pleased with the finished project, because I wasn't even sure it would work in the first place.
 Ruminations:
1. I need a needle tip for any dimensional paint I might use in the future.
2. I don't have proper stamps for this project. I might try a magazine image in the future.
3. I need to keep my arm out of wet paint by working in one direction.
4. I need to use a toothpick to fill in places I missed or didn't make it all the way to the edge of the dimensional paint.
5. I didn't realize the drying time needed for the dimensional paint and nail polish, so be sure to leave time to make these and let them dry properly.
Once this blog post goes live, you will be able to access it anytime on my Tutorials page under Faux Cloisonné. Thanks for joining me for this month's tutorial. Your kind comments makes the time I spend on these monthly tutorials worthwhile.


19 thoughtful remarks:
Hi Elizabeth - I have enjoyed catching up with all your blogging since I've been away on a little road trip vacation for the past week or so, and have left comments on many of your older posts. This is a fun technique - I am sure I have maybe one bottle of nail polish, if that. I love the cat bottle too! Such fun.
Very interesting tutorial. I have never heard of this method before, the results were good. Glad you liked the industrial pics on my blog, I was thinking of you when I was there, and I will definitely go there again! Hugs, Valerie
Just read your comment on my blog. Well done for thinking that out yourself, that's brilliant!
I didn't know what exactly what cloisonne was, but now I do. I just called it enameling in my unsophisticated brain. Your faux technique makes some cool images. I like how they come out. Thanks for sharing. Hugs-Erika
You got some great results with that technique! Super idea !
You never cease to amaze me with your tutorials!
Happy day!
oxo Susi
Looks like an interesting technique.
Looks intriguing but for whatever reason, I can't be around nail polish. Or remover, for that matter. The smell kicks my lung crud into action. Too bad because the results are really pretty.
an interesting technique but iam sad to say not my doing..but interesting and always nice to try something new out.
These are great results, never used nail enamel, I have some thick paint I wonder if that would work. All I need is a little spare time, maybe next month.
I love reading how your experiments go, this one looks great.
Yvonne xx
Oh my gosh. How cool is this? You are a fount of information!
quite an ingenious technique... very challenging with the tiny size! Wonder how it would look with a darker 3-dimensional paint...more like stained glass?
very nice tutorial...so surprised at how many colors of nail polish you had. you are right, that cat-shaped bottle is so cute!
Really fun project. Never personally used dimensional paint, it came out better than I thought. Now to see where you use them. xox
This is really neat ! I like how the watering can turned out; you did a great job with this project Elizabeth. they would make neat magnets; da tabbies say the one looks like a cookie ☺☺☺♥♥ { middle heart }
This was great Elizabeth!! I kept waiting for you to make the dimensional lines gold ... for some reason i thought thats the way cloisonne looked?? ... Hugs! deb
Intriguing idea. Looks like fun and a way to use up some wild nail polishes, too. Fun! :)
Love reading your tutorials, and this is a great idea, and I admire your collection of nail polishes - think I have about 4 different ones, all very boring colours!
I'm going to have to give this my full attention on a bigger screen than my phone when I get home - looks fascinating!Chrisx
I'm going to have to give this my full attention on a bigger screen than my phone when I get home - looks fascinating!Chrisx
if that. I love the cat bottle too! Such fun.
jav
Post a Comment