


.JPG)


Today is the second Thursday in July, so it's time for my promised tutorial. I had a different one planned, however, due to the problems I'm having in my basement, I'm unable to create it this month. I have decided to share a few tips for making pages in a scrappy journal because I have been making these for years.
 Originally I planned to take you through the entire process, but time got in the way, as did the excessive number of photos I've already taken.
  There are a few things to keep in mind when creating one of these scrappy journals. Decide in advance if the journal will have a theme.
 I create a large pocket in the front so you can place various items you have found that you want to add to the journal. Although I don't show it in this journal, I also create a pocket in the back that holds two pens, pencils, or other writing utensils.
 If you have a theme, you will want to coordinate both your scraps and the color of your pages. Try not to put two same-color pages together.
 Create lots of pockets for tags or hidden notes. Although I love to use lots of scraps in my pages, I also make room every few pages for lots of note taking.
 This is the center page of one of the signatures. I create two in each journal. You can see I don't hand sew anything, instead I use my sewing machine to sew all the pages together, then into the book.
 Find interesting items to add to the journal. Vary the stitches and the colors of thread. Use a different top thread than your bobbin thread. After all, both will show in the end. More on placement later.
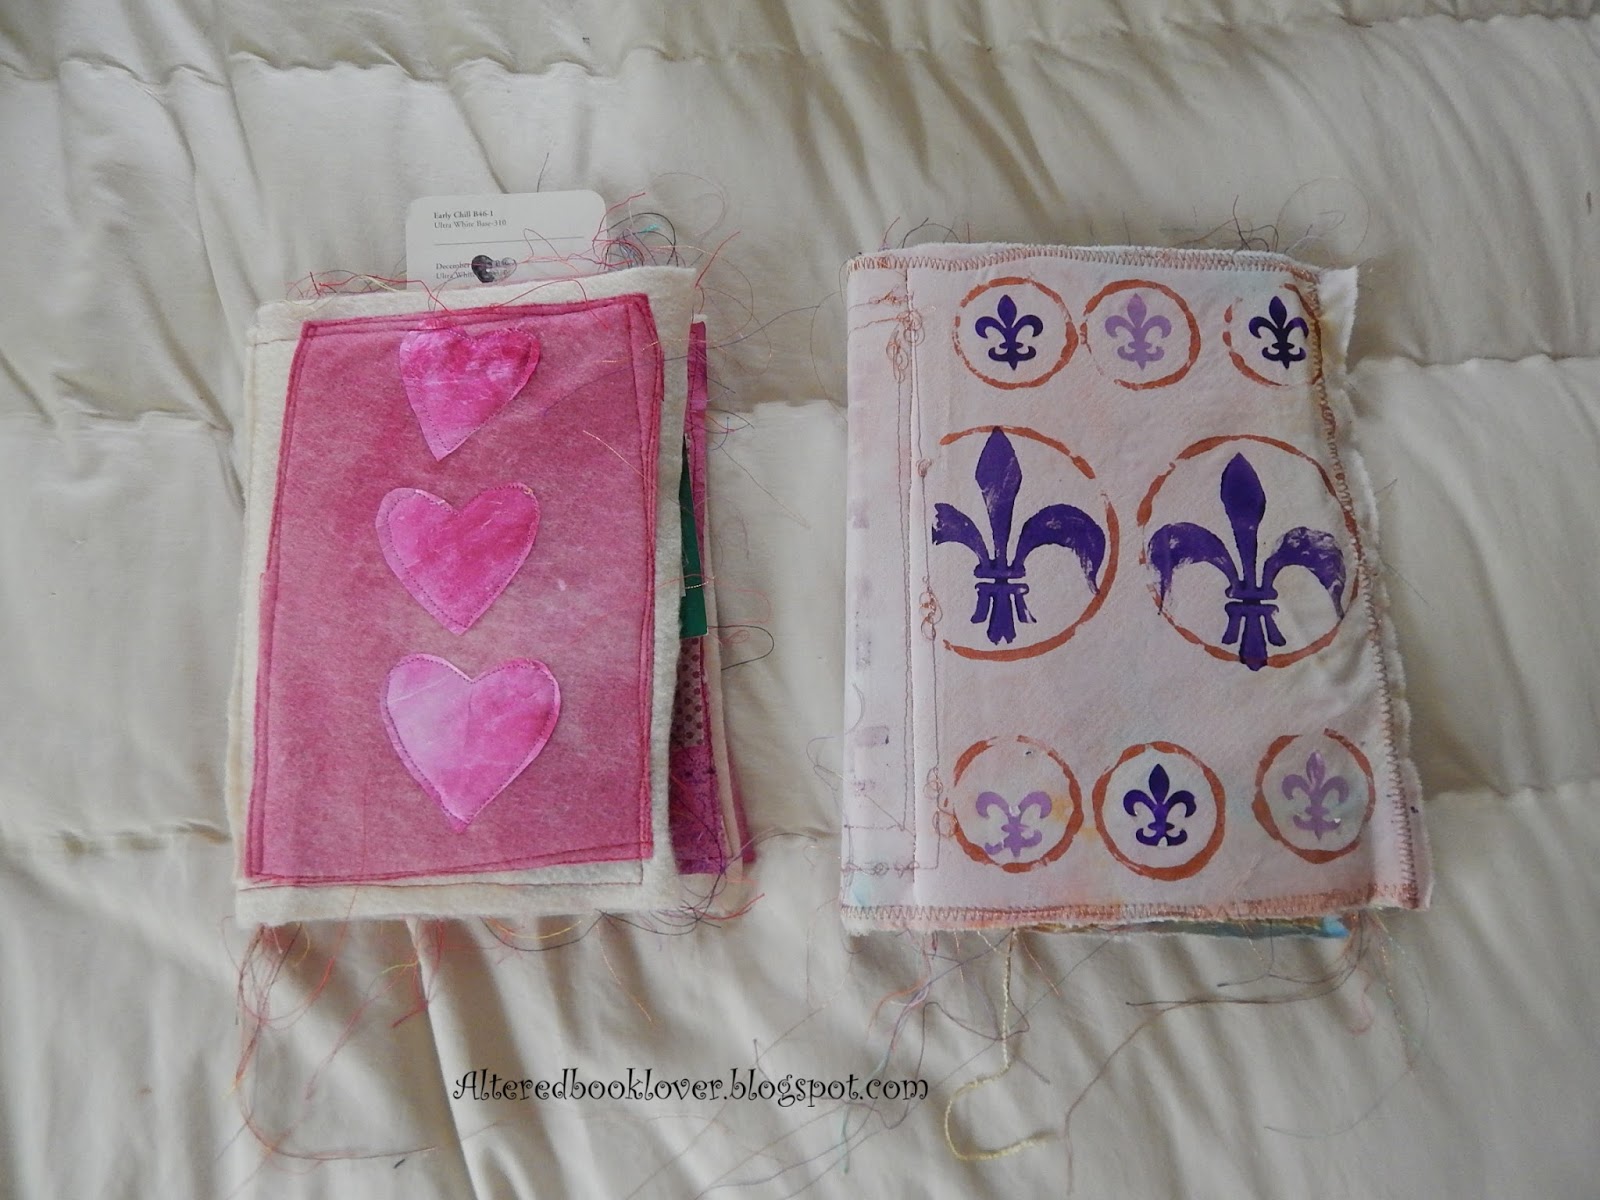
 The cover of your journal should reflect the theme. Now is the time to put your effort into dimension, something you don't want in your journal. You can see I hand dyed this felt
  and coordinated it with the fabric I used on the inside covers and some outer embellishments.
 I tried out several techniques on this cover, including using iron-on crayons.
 As you can tell, the Fleur de Lis is used throughout these pages.
 I got the two signatures a bit far apart in this one.
  Again, it's important to not use the same color pages next to each other.
 Remember to create pockets and
  lots of places where you can hide bits
 you don't want others to see. Or have them search through an interactive page.
 Always mix it up. The more scraps you bring to the table, the more exciting your scrappy journal will be.
  This is the pocket I created on the front inside to hold minutia.
 This is the pocket I created for the back. I'll be adding these charms to the outside cover one of these days.
Now that you've seen some of the pages in a completed journal, let me step you through the materials you will need to create the pages successfully.
 You will need lots of paper. You can create or color your own, just make sure the pages contain dye, not paint. The more colors you have, the more varied your book will be. You'll also need embellishments, like doilies, book pages, and clothing or other tags. Having some security envelopes helps, too.
 Here are things you do NOT want to use on your inside pages. Everything from pressed leaves to pods to tissue to dimensional flowers to paint to tea bags should be saved for covers or other mixed media art. Tissue and dried leaves don't sew well, and the other embellishments are too dimensional. NEVER use paint unless you want to lose your ink pen. Paint has killed more of my Zig pens than I care to mention.
 If you are making the scrappy journal for yourself, you might use construction paper. However, if you are making the journal for someone else, I don't recommend it, because construction paper fades rather quickly when exposed to light.
 It goes without saying you will need a sewing machine. Mine is nothing special and has no feed dogs or fancy stitches, but it does everything I need it to do. If you buy variegated thread, it gives the journal more pop.
You will probably need a paper cutter, too. You may have a better one than my guillotine cutter that is very old.
 Scissors dedicated to sewing are important to me because they are easier to use to cut the long bits of thread you will be leaving than the cutter that is on the back of your sewing machine. Long threads are the hallmark of these journals, at least they are in my journals.
 I used to be able to buy these 80/11 needles in bulk, but now they come with other needles. I personally feel this is a waste of money, but when they are the ones you need, and they are all you can find, you bite the bullet and get the assorted pack. Hopefully your sewing store still sells the 80/11 needles in bulk. This is the only size I use, because they are the sharpest and last the longest. I realize most people tell you to change needles whenever you change projects, but these needles last about 30,000 stitches on paper unless you break one.
 I often begin by sewing various pieces together before I add the assembly to the page. That way there are less stitches that show on the reverse page.
 As I mentioned before, I like to create flaps
  where you can hide journaling or add interest for others who wish to view the entry. (Note to self: just be sure you have clean fingernails when taking photos of your hand.)
 Here is another assembly I created before I sewed it to the page.
  If you have extra stickers, they work great and don't require sewing.
  Here is an assembly I sewed together to cut down on the amount of sewing shown on the back. Assemblies like this help me create/visualize my one staple ICADs, too.
 I also assembled the pieces on the right, then folded the envelope on the left and sewed it in place.
 Sadly, the envelope didn't fold exactly in half. But it still leaves room to add a bit of extra pieces in case you find something small enough. Note also how I sewed only across the top of the piece on the right. In the page above the one directly above, you see I sewed both at the the same time, even though they were very different sizes..
 I sewed the left side above first,
 then sewed the two pieces on the right together and sewed the assembly in place, hiding most of the sewing behind it. But what happens when you box yourself into a corner, like I did when I sewed the envelope which acts as a pocket, on the left?
 You get out your Staz-on and your stamps
  and create a way to cover your goof. This one was intentional so I could show how to correct a problem, but believe me, I've done this same thing in the past. Stickers would have worked, too.
After you have made dozens and dozens of these completed pages (I use 24 completed pages per book with a total of 48 single pages in each signature for a total of 96 pages. In case I lost you, there are 24 pages folded in half, and decorated on both sides. That makes 96 single pages once the book is assembled), then it's time to put the book together.
Tips:
1. Sort by theme.
2. Don't put two of the same colored papers next to each other.
3. It's OK to make some pages smaller than others for interest, but be aware they will be harder to sew together.
4. Create your cover using two fabrics, one for the inside, one for the outside. I don't turn my covers wrong side out to sew them together, so the scrapiness is on the outside, too.
5. You can go wild on the cover, but remember the object is to use this journal, so if it's too highly embellished, you might lose some of the beauty of it.
I hope this brief tutorial on how I create pages in my scrappy journals helps a few of you who may have wanted to try one, but wasn't sure where to begin. Remember to just have fun with it, because you can't really mess up scraps.
Once this goes live, it will be on my Tutorials page under Tips for creating scrappy journal pages. And thanks for the visit. I appreciate it and your support of my monthly tutorials more than you will ever know.


18 thoughtful remarks:
Fantastic tutorial, and you have put a huge amount of work and effort into it. Love your scrappy journal, it's really wonderful, so much to see and so many details to gloat over. I got an lovely envelope filled with goodies from you yesterday, so thanks very much for that, too, I so love getting happy mail! The stamps are great too, and will be just right for journaling and for TSFT! Have a great day, hugs, Valerie
That was a fantastically inspiring tutorial, thank you Elizabeth. I have a box of found objects that I want to use for something creative and I think I just discovered what that is. Can't wait to give it a go and hope I can make something a quarter as wonderful as yours.....gosh I sound like a right groveler, but it is a seriously awesome piece of work.
Great tutorial...very detailed.
````````````
sorry about yesterday...phone got whacky and you couldn't hear me so i just hung up since we were about to say goodbye anyway.
Paper, fiber, and stitching- the very best of combos! Enjoyed the variety of your pages and materials.
This is a fabulous journal Elizabeth. I love all your pages. I am about to go make pages for a journal right not and I am glad I read this first as its given me some super ideas. I LOVE the stitching- I need to do more of that definitely. Hope your basement is drying and your cleaning is done or just about done and you can move forward. Hugs-Erika
Thanks for a great tutorial. Since I no longer have a sewing machine (and didn't use it enough to replace it) I cannot sew pages. I think a lot of these tips can be used in paper/glue situations though.
A great tutorial Elizabeth, it's certainly a very complex process, but the end product is worthwhile of all the work of course!
E you put so much into your tutorials AND in what you create.
Thank you for sharing.
You are the scrappy journal Queen!
Ordering your sewing needles on line might be a good way to get exactly what you need.
You're making me itchy to set up my sewing machine.
It's a shame that I can't leave it up all the time because stitching is such a great addition to so many things.
Thanks again from scorching hot VA... it may feel like 104 this afternoon with the heat and humidity.
I plan to stay inside...thank goodness for A/C!
oxo
Hi Elizabeth,
Very nice tutorial. I had to laugh when I saw the page with shorthand. I actually took that in high school! Unfortunately (maybe) I forgot everything I learned!!! Love all the elements of your journal.
Thanks for sharing and have a wonderful weekend!
Hugs,
Kay
Its a wonderful tutorial Elizabeth full of ideas and tips. It makes me want to liberate my old machine from the attic. Your finished book is awesome.
Yvonne xx
Dear Elizabeth, what a fabulous project. Your scrappy journal looks fabulous! Thanks for all the detailed photos. It's always gorgeous to see how your projects come to life! You have such a great eye for details.
Have a lovely day!
Hugs,
Gaby
Oh my God....I love this....can I have it? (well, a girl can try...), If only I knew how to thread my sewing machine....really great. Love the stitching and all the cool paper....love it all......
Great use of pockets and open envelopes for all the goodies. We sure do beat up our sewing machines don't we. I like denim needles for tough stuff, they work so well. Great use of all those different kinds of papers, love the graph paper pages too. xox
A FANTATSIC scrappy journal! Great tutorial Elizabeth - thank you!
You make it seem easy and simple... terrific tutorial and great hints. love your stitching and the way you put it together. I think I would have trouble leaving the blank areas, as of course I always want to fill everything up. but of course that's the fun for the person who receives it!! lol! great post dear E!
Oh Elizabeth! I do love how you add sewing to your art - I really must take note and follow your excellent example! This is such a wonderful scrappy journal - and you know I have plenty of scraps so I have no excuse now!! Hugs, Chrisx
You do wonderfully complete, well illustrated and explained tutorials. I especially like the tips you share. I'm not comfy with the sewing machine (I don't even have one but on the rare occasion I might use one.) But I do love the stitching of the pockets and such. Adds such a nice texture.
What a great tutorial.
I'm excited because I can learn a lot from.
Thank you for these wonderful tipps!
And thanks for the encouraging comment to me and my first attempts in
"My Digital Wonderland"
Warm greetings from Germany
Post a Comment