


.JPG)


Before we begin my homework, I want to thank everyone who dropped by to let me know you missed me last Sunday. For those of you who thought you were getting the next lesson today, I had to put it off until next Sunday, when I will do the wrap-up or review. Some of you may already know my monitor no longer functioned properly last Sunday, making it impossible to post a lesson or upload photos. As some of you may already know, it was a malfunctioning cable between the monitor and the computer that was the offender, which was a very easy fix, but which caused all the problems and heartaches I experienced. This new cable is PERFECT, and I no longer have to jiggle the cable to get a picture on my monitor. What a wonderful difference it has made! It may even help the problem of my computer crashing every few times I visit people.
I want to also thank those of you

Now let's get to
Elizabeth's homework

TIP: If you plan to buy this product, be sure it is designed for your printer. Transparency film is made for ink jet printers, laser printers, and toner copiers. Be sure to check the package before you buy, because this film is not cheap.

For my current homework, I started with a transparency and an image I had stored on my computer.

I laid the rabbit image on a book page and proceeded to burnish it. You can see I managed to smear it a bit when I laid it onto the page. This shows the image INK SIDE DOWN.

Once you have transferred your image, wipe the transparency clean. It is ready to be used again (and again and again).


When I returned, it was too late. The gel medium had dried against the transparency and there was nothing I could do short of starting over. So let that be a lesson. Be sure to try this technique when you will not be interrupted for any reason!

If I wanted to repeat this technique, I would have to start over, which began with me painting the substrate similar to how I show above. I decided that was too much trouble, because I am sure most of you can figure out that you:
1. Make sure your transparency film is designed for your printer. You cannot use inkjet printer transparencies in a laser printer because the heat of the laser will melt the inkjet transparencies.
2. Print an image on the matte or rough side of your transparency. If your image contains words, be sure to reverse the image before printing.
3. Choose a substrate you want to transfer the transparency to. It can be anything, including fabric you will never wash, paper, or even unpainted wood.
4. Apply a generous amount of gel medium to the substrate using a foam brush or your fingers. However, be sure to apply the three bears rule: not too much, not too little, just the right amount of gel medium for the job!
5. Place the transparency printed side against the substrate and burnish using a plastic spoon, brayer, or even your fingers. Do not allow the gel medium to dry while burnishing, or before you remove the transparency from the substrate.
6. Check the transfer by lifting one edge of the transparency. If the transfer is not to your liking, or is incomplete, return the transparency edge and burnish a bit longer. Do not allow to sit unattended for more than two or three minutes.
7. Remove the transparency and enjoy your transfer.


After you have printed your image making sure to watch as it prints and making sure there are no wrinkles to cause the printer to jam,
1. Remove the wax paper from the backing. Be sure there is no tape on the wax paper.
2. Gently lay the transfer over your substrate, ink side against the substrate, which can be fabric, paper, or wood. Be sure not to move the wax paper once you have laid it on the substrate.
3. Burnish well. For this technique, I suggest either a brayer or a faux credit card. You may lift one edge to check your progress, if you feel you have missed an area.
4. Carefully remove the wax paper by lifting it away from the substrate because there will still be ink on the wax paper.
5. Use again in a collage or mixed media piece.
If you want to try another transfer method, substitute freezer paper for wax paper. Tape it to a piece of cardstock and print on the shiny side of the freezer paper. Although at this stage, freezer paper is similar to wax paper, after printing, there are a few differences:
1. Remove the freezer paper from the cardstock backing.
2. Once again, lay the transfer over your substrate, ink side against the substrate.
3. Burnish well. I suggest using a plastic spoon as your burnishing tool.
4. Carefully remove the freezer paper. You can wipe the freezer paper clean as you did your transparency, so don't use it in collages.
I hope I have given you some ideas for making transfers.
Let's review:
1. Packing tape: use with magazine images (must soak and remove backing)
2. Clear contact paper: use with magazine images (must soak and remove backing)
3. Blender pen: use with photocopies only (works when ink, but not paint is on substrate)
4. Orange cleaner: use with inkjet printer images (black and white or color) works like a blender pen
5. Citra-Solv: use with photocopies only (no magazine images) works like a blender pen
6. Gel medium: use with magazine images by brushing layers of medium on image, then soaking image to remove backing
7. Gel medium: use with transparencies by brushing a single layer of medium on substrate, then burnishing
8. Transparencies: print on shiny side and treat like a rub-on
9. Transparencies: use gel medium (see # 7)
10. Wax paper: use a paper backing, print on wax side, and burnish (treat like a rub-on)
11. Freezer paper: use a paper backing, print on shiny side, and burnish (treat like a rub-on)
12: Clear (do not use non-glare) 3-ring vinyl page protector: print and burnish (treat like a rub-on)
There are other ways to create transfers on both paper and wood. For example, you can use the heat transfer method using the heat tool (called Versa-Tool) from Walnut Hollow.
Another way to transfer images onto wood is to coat your substrate (cardstock) with a coat of Elmer's glue (or similar PVA glue). Allow to dry overnight. Print your image on the now dry glue side of the cardstock. Brush a thin layer of Mod Podge (yep, my least favorite medium) over a piece of wood, then lay the inkjet image face down on the Mod Podge coated wood. Allow to dry overnight. Place the wood in a bucket of water and treat like a tape transfer where you remove the cardstock backing.
Of course there are ways to get semi-transparent (actually translucent) images that do not entail transfers. One good way is to coat your inkjet image or book page (not magazine) with linseed oil. You have an instant translucent image.
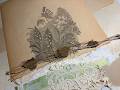
Another way to get a translucent image is to use deli paper. Deli paper is a great surface for ethereal images, stamped images, or hand written words.
Of course, if you don't want to go to the trouble of making transfers, you can still achieve "basically" the same look by stamping on a transparency and adhering it over another image with brads or eyelets. That seems a bit like cheating, though, so that's why I left it to the end.
I apologize that I pushed this homework a week, because I feel I have not done it justice. However, I hope you understand that even the instructor can have a bad day, or even a bad week. Sorry there are so many failures, but be aware, the techniques I showed this week will all work when you have a printer that has ink!
And don't forget. Next week I will have a wrap-up, or review before we deal with our covers. I encourage you to fill as many pages in your book as possible, because once the covers are on, it's far more difficult to work on your book pages.
_________________


15 thoughtful remarks:
It's reassuring to know things that can make it go wrong..your bad day is our learning curve, so I appreciate it..knowing that I can't walk away for a chat on the phone for example....definitely need to know that!
Hi Elizabeth, just dropping by to see what you've been working on and I can see you put a lot into this post!! It's so great of you to share your creative process with others the way you do.
I am glad you got your computer bugs mostly worked out! That can be so frustrating!
I was looking at the yummy food at the Lebanese restaurant you went to...where is that place? The food looks amazing.
Happy Sunday!
Your tutorial is great (as usual). I've tried the transfer with the overhead projector sheets without much success. I'm going to try again with your step by step directions. Thanks!
Darla
You've explained some techniques that I've not seen before--the waxed paper, transparency and freezer paper. The packing tape method seems to be the most widely explained, and always sounded so tedious to me. These new (to me) techniques might actually be something I'd try! So glad you've gotten your computer problems (at least some) corrected! Did you ever get a new email account? Waving hi! from Ohio...
All pages done and ready to do my covers Miss.
BJ stands to attention and salutes her tutor. :)
Wow Elizabeth. This is a great tutorial!!! I'll have to give it a shot!
I don't like the new Blogger. I have little annoyances with the program - like the image not being where it's supposed to be!!!
Hugs,
Kay
Wow Elizabeth, yet another fab, informative end exceedingly well explained and demonstrated tutorial thank-you honey.
Lol, i'm going to nag now!! Please may I have your address my lovely, I have a few things that I would dearly love to be able to send to you by way of a humongous thank-you for your time and dedication to your lessons and students.
Thank-you soooooo much also for your very very kind comments on my last lot of pages, they truly made my heart swell with pride.
Huge hugs x x x x
You are simply gob-smackingly astounding and splendiforous, Elizabeth. I canNOT imagine you are sharing all of this so generously without Thought 1 of what is in it for you. That may sound weird, but I have been pondering what the value of my time is, what others seem to feel theirs is, and so, to alleviate any sense of my foot in my mouth, I am just using your generosity to measure against...
So amazing all of this, so really and truly amazing...
Thank you SO much for such detailed and clear instructions for these techniques. I am not sure when I will be capable of using them, but I have bookmarked this with the hope that I can utilise your expertise before too long. You are a very generous person to share all this with everyone :D *hug*
Wow Elizabeth you got some wonderful results from your transfers. Hoping that following all your instructions will give me the same when I start my homework. Thank you for your comments on my fabric page and of course you are welcome to use any of my work at any time. Thank you for all the time you have devoted to giving this altered book course, it has been very inspiring and informative.
Excellent tutorial and wonderful creations ~ (A Creative Harbor) ^_^
Thank you for visiting my blog Elizabeth :) I think you're awsome! I love your tutorials, wonderful instructions and really appreciate knowing the things that could go wrong too. I have one question .. as after reading your tutorial I decided that I wanted to experiment with the wax paper technique but was concerned that it might get stuck in the printer .. have you had any problems with that? Sending warm wishes, Susanne
Hi Elizabeth! I am glad to read that you solved your computer problems, that can be so frustrating!
you always amaze me with your detailed tutorials on the creative approaches to altering books. Hope you have an easy and creative week!
After reading through this post several times, I was amazed at the variety of ways to make transfers. That's why you are the teacher & I am the student, haha! Of course, nothing goes right all the time for everyone and you are so good to share what you have learned each time about what to do and what not to do.
Howdy! I could have sworn I've been to this site before but after browsing through some of the articles I realized it's new to me.
Anyways, I'm definitely delighted I found it and I'll be book-marking it and checking back
often!
Also visit my blog post ingredients of quantrim
Post a Comment