 Supplies from lower left clockwise:
Substrate (I used 12 X 12 heavy white cardstock)
Craft sheet and/or plastic to protect your work surface
Plastic cups (shown with paint in one, water in the other)
Cling wrap
Cheap acrylic paint
Mica powders (optional)
Foam brush
Not shown: rubber gloves and paper towels
 Create a wash by mixing 1/2 water and 1/2 acrylic paint. Don't use expensive paints, since you are watering them down, anyway. This is one time when cheap is better. At this point, you can add mica powders. I used a metallic paint on this sheet, so didn't need the mica powder. Work quickly and make sure there is lots of wash on the page.
Cut a piece of cling wrap about 1 1/2 times the length of your substrate. Since mine was square, I ended up using two lengths to cover each sheet. Crumple the cling wrap.
 Lay the cling wrap on the wet paper.
  If you haven't crumpled it enough, you can still push and twist the cling wrap at this point. Set aside to dry.
Set aside to dry. Yes, I mentioned that before, but you must leave the cling wrap on the paper until the paint is completely dry. If you don't the top layer of your paper will peel away with the cling wrap (don't ask how I know this).
 One of my two favorite pieces happened as an accident. This background was made using pink paint and water only. I reused some of the cling wrap and thought I had used the clean side, only to find out that the copper paint from the previous background had transferred to the page. What a gorgeous accident I created. You should click on this photo to see the true beauty of it.
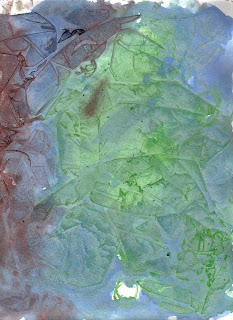
 My other favorite background used green, blue, and copper colored acrylics. The colors sort of bled together in the process and created this stunning piece.
 Here are all the pieces I created using this technique. I could have made more, but I ran out of room to dry them. It's a small craft room and I had no place to put them outside to dry. The scanned images above are the top and middle pages in the left column of this photo. The middle and lower pages in the right column are the ones I demoed above.


.JPG)


5 thoughtful remarks:
one of my favorite techniques
great examples of results!
These are very cool. The green, blue, and copper one reminds me of looking into a microscope! Nice. Have you tried the same technique only crumpling up wax paper a little, opening it up and then placing that over the paint? I love to experiment with this stuff.
Pam
http://alteredmymuse.wordpress.com/
"Altered My Muse"
Gorgeous, simply gorgeous.
I love this. I have done ink pourings and then laid cling wrap on top until the ink dried and then did a watercolor on top of that, in the negative. It turned out beautiful and my instructor said it was good enough for a show. It's amazing what you can do with almost nothing.
Does this work with watercolors? I'm trying to make my backgrounds more interesting and will try the acrylics, but I thought I'd ask before I tried the watercolors. (I'll follow comments here if you'd rather answer on your blog.)
Post a Comment