


.jpeg)


.JPG)


This is a post about rusted tea dyeing, and I repeat it in its entirety below. Please be aware, although it may look the same, this is NOT the same tea I sun dyed last Tuesday.
Second Thursday Tutorial: Rusted Tea Dyeing
Welcome to my first ever Second Thursday tutorial, where I will create a new tutorial each second Thursday of the month. I hope it is helpful to some of you. Once it goes live, you will find it on my Tutorials Page under Rusted Tea Dyeing.
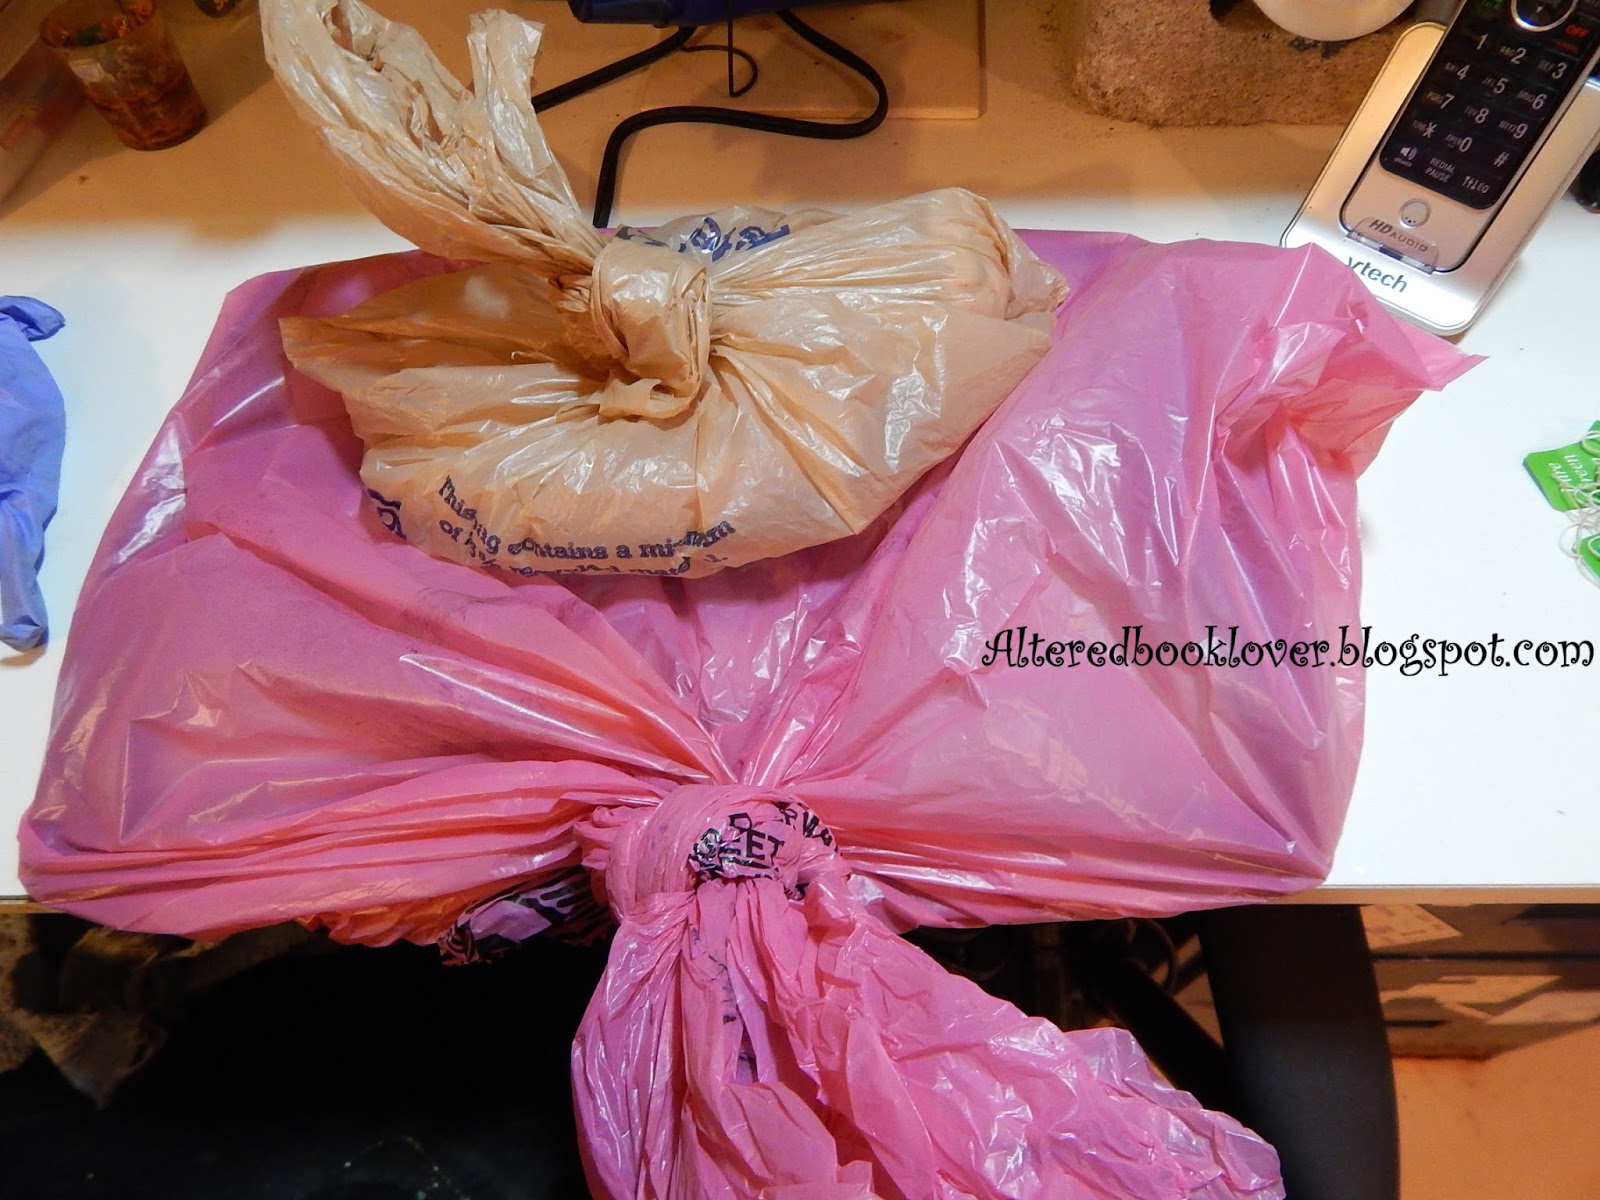
 Some of you remember this photo from T this past Tuesday (Ed note: January 11, 2016). Something I
didn't mention then, but will now, is I wrapped one of the tea bags
around the handle of the container, thus keeping most of it out of the
water. The other 11 tea bags were completely submerged in hot water.
In case you missed the post, you can find it here.
Some of you remember this photo from T this past Tuesday (Ed note: January 11, 2016). Something I
didn't mention then, but will now, is I wrapped one of the tea bags
around the handle of the container, thus keeping most of it out of the
water. The other 11 tea bags were completely submerged in hot water.
In case you missed the post, you can find it here.As I pointed out in the T post, green tea has tannins, large quantities, in fact. Tannins in green tea bind to iron, something I thought might be helpful when rust dyeing fabric.

As with all my tutorials, I'll begin with the supplies I used (from back left clockwise):
Pink plastic bag (used to cover the table and self-healing mat)
Empty plastic bag
Distilled vinegar 5% (I got this FREE at my local Household Hazardous Waste Swap and Shop, but any vinegar will work)
Bag of rusty chain
Container of pre-rusted bits (that I didn't use in the end)
Three pieces of dry cotton fabric, torn to size from old bed sheets
Container of day old tea and tea bags
Gloves to protect my hands from rust that could get under my skin
Rusty bits to choose from
 With one glove on, I added eight intact still wet tea bags to the dry top fabric.
 With both gloves on, I laid the extremely heavy rusty chain over the fabric and around the tea bags.
 I covered the tea and chain fabric with the other half and hid the chain
under the fold. Then I tried to roll it up, but realized that wasn't
going to work. I had to rethink the action, so
I covered the tea and chain fabric with the other half and hid the chain
under the fold. Then I tried to roll it up, but realized that wasn't
going to work. I had to rethink the action, so I dug out my rusty cookie sheet I keep tightly wrapped in plastic and
proceeded to try to move the chain and tea covered fabric to the cookie
sheet.
I dug out my rusty cookie sheet I keep tightly wrapped in plastic and
proceeded to try to move the chain and tea covered fabric to the cookie
sheet.  Of course it didn't work, so I had to reassemble everything once the
fabric was spread out on the cookie sheet. Yes, that chain is every bit
as heavy and cumbersome as it looks.
Of course it didn't work, so I had to reassemble everything once the
fabric was spread out on the cookie sheet. Yes, that chain is every bit
as heavy and cumbersome as it looks.  I laid the excess chain on top of the fabric that wasn't exposed to tea
bags and poured a small amount of vinegar over the fabric.
I laid the excess chain on top of the fabric that wasn't exposed to tea
bags and poured a small amount of vinegar over the fabric. Luckily, I have quite a few pink plastic bags, so I placed the cookie
sheet and its contents in the bag. I also added a tiny bit more
vinegar. Then I wrapped the bag, but I had to remove one of my gloves
because my grip isn't as good as yours probably is.
Luckily, I have quite a few pink plastic bags, so I placed the cookie
sheet and its contents in the bag. I also added a tiny bit more
vinegar. Then I wrapped the bag, but I had to remove one of my gloves
because my grip isn't as good as yours probably is. I used the final four (sounds like college basketball playoffs to me)
tea bags on the second piece of fabric. Note the tea bag at the back
right is the one that was not completely submerged in water. I'll be
curious to see if it makes a difference in the dyeing/rusting process.
I used the final four (sounds like college basketball playoffs to me)
tea bags on the second piece of fabric. Note the tea bag at the back
right is the one that was not completely submerged in water. I'll be
curious to see if it makes a difference in the dyeing/rusting process. I added a few rusty pieces and
  rolled the fabric up. I also tucked in the ends, but didn't take a
photo of it. I then placed it in a plastic bag and added a bit of
vinegar.
rolled the fabric up. I also tucked in the ends, but didn't take a
photo of it. I then placed it in a plastic bag and added a bit of
vinegar.  With no tea bags left, I took some rusty bits with shapes I liked,
 added some rust filings
  and rolled the dry fabric up around the rusted pieces.
  I saturated the fabric with vinegar once it was inside the bag. Then I tied it to keep the moisture inside.
 It was now safe to remove my gloves and wash my hands. Since I was
wearing long sleeves, I also removed my clothes and washed them in my
washer after I showered. You can never be too careful around rust,
because it can get in the pores of your skin, or cuts on your hands.
And whatever you do, please don't put your gloved hand anywhere near
your face or eyes. I was hopeful I didn't need the heat from the sun,
which normally activates the rust process. I've never rusted fabric or
paper in the winter before, so this was a new experience.
It was now safe to remove my gloves and wash my hands. Since I was
wearing long sleeves, I also removed my clothes and washed them in my
washer after I showered. You can never be too careful around rust,
because it can get in the pores of your skin, or cuts on your hands.
And whatever you do, please don't put your gloved hand anywhere near
your face or eyes. I was hopeful I didn't need the heat from the sun,
which normally activates the rust process. I've never rusted fabric or
paper in the winter before, so this was a new experience. If you decide to try this technique, all you need are some rusty pieces, fabric, vinegar, and protective gloves. And PATIENCE, of course. In lieu of rusty pieces, you can substitute steel wool pads, found at most hardware and home improvement stores.
In a day or six, depending upon how hot the sun is (or how warm the studio is) where you live,
 put on disposable gloves and open your bag to see if the rust has bloomed.
 Now is the time YOU are most vulnerable to rust on your skin, so please keep those gloves on.
  Realizing the science behind rust made this teabag study even more
enjoyable and enlightening. Not to overstate the science, but I should
explain how these tea bags turned this black color. Remember that green
tea contains huge amounts of tannins, which in turn, bind to iron.
Rust is iron oxide, and for you chemists out there, it is the chemical
Fe2O3, because iron (found in the green tea
tannins) was combined with oxygen and water (or rather liquid from the
tea leaves and vinegar). All I had to do was wait for corrosion to begin. I had
hoped this reaction would occur, but wasn't quite sure until I was able
to test my theory. I admit I never expected this black to emerge,
though.
Realizing the science behind rust made this teabag study even more
enjoyable and enlightening. Not to overstate the science, but I should
explain how these tea bags turned this black color. Remember that green
tea contains huge amounts of tannins, which in turn, bind to iron.
Rust is iron oxide, and for you chemists out there, it is the chemical
Fe2O3, because iron (found in the green tea
tannins) was combined with oxygen and water (or rather liquid from the
tea leaves and vinegar). All I had to do was wait for corrosion to begin. I had
hoped this reaction would occur, but wasn't quite sure until I was able
to test my theory. I admit I never expected this black to emerge,
though.  Of course, I simply wasn't prepared for what I found when I opened the bag with the chain link and tea bags.
  Even before it had been washed and cleaned,
  this fabric was out of this world.
 I confess that rust gets my heart pumping a bit faster, although it's
not because the rust has attacked the hemoglobin in my blood, which is
why I wear gloves, but because I see such beauty in it. It was now
time to rinse the rust out and stop the chemical process.
I confess that rust gets my heart pumping a bit faster, although it's
not because the rust has attacked the hemoglobin in my blood, which is
why I wear gloves, but because I see such beauty in it. It was now
time to rinse the rust out and stop the chemical process. I did that by soaking and rinsing the fabric in baking soda. I
apologize, I forgot to show a photo of baking soda, but it's the stuff
you use in baking, to keep your refrigerator smelling good, and has
about a hundred other uses. You get it at the grocery store and you can
probably find it at dollar stores, too. I soaked and rinsed three
times, then hand washed the fabric in my liquid laundry detergent. It
was now safe to remove the protective gloves, touch, and dry the fabric.
I did that by soaking and rinsing the fabric in baking soda. I
apologize, I forgot to show a photo of baking soda, but it's the stuff
you use in baking, to keep your refrigerator smelling good, and has
about a hundred other uses. You get it at the grocery store and you can
probably find it at dollar stores, too. I soaked and rinsed three
times, then hand washed the fabric in my liquid laundry detergent. It
was now safe to remove the protective gloves, touch, and dry the fabric.I admit, I was less than impressed with the fabric that held the metal filings and lovely shapes. I think it probably could have lived in the bag a bit longer, since there was no green tea to quickly activate the rust and there was no sun to heat the bag.
 This is the fabric that contained the four tea bags, one of which had
not been completely submerged. I believe you can tell which one was
less effective than the others.
This is the fabric that contained the four tea bags, one of which had
not been completely submerged. I believe you can tell which one was
less effective than the others. Here is another view of both these fabrics side by side. It's really
obvious which one had tea bags added, and which one didn't. But I'm
stalling, because I wanted to keep you in suspense.
Here is another view of both these fabrics side by side. It's really
obvious which one had tea bags added, and which one didn't. But I'm
stalling, because I wanted to keep you in suspense. Here is the piece that stole my heart. Not only did the chain produce
lovely effects, what surprised me was how the tea bag "rust" migrated to
the portion of the fabric I placed over the top of the chain.
Here is the piece that stole my heart. Not only did the chain produce
lovely effects, what surprised me was how the tea bag "rust" migrated to
the portion of the fabric I placed over the top of the chain.  Although this is NOT a good photo because I tried to hold the camera
above my head and shoot down onto the fabric, you can still see the
patterns that emerged on the side directly exposed to the rusty chain
and tea bags.
Although this is NOT a good photo because I tried to hold the camera
above my head and shoot down onto the fabric, you can still see the
patterns that emerged on the side directly exposed to the rusty chain
and tea bags.  Another not especially good photo since I was standing on tip toes and
shooting from overhead, this is the portion that had the chain laid over
the top of it.
Another not especially good photo since I was standing on tip toes and
shooting from overhead, this is the portion that had the chain laid over
the top of it. I admit this turned out even better than I anticipated and showed what
can be done using green tea bags. So if you don't care for green tea,
this is a good way to rust your fabric using those tea bags you won't
ever use for drinking.
I admit this turned out even better than I anticipated and showed what
can be done using green tea bags. So if you don't care for green tea,
this is a good way to rust your fabric using those tea bags you won't
ever use for drinking.I realize this was an extremely long tutorial, which included the science behind rust and how the tea bags interacted with it, but I hope you enjoyed it and learned a bit about it, too. I have never tried rusting fabric in winter before, preferring to do this outside, where the bag and the rusty parts can stay until the rust cycle is complete. However, I needed a quick way to rust fabric and was extremely pleased with what I got.
Thank you again for sticking through to the end. I hope you found my first Second Thursday Tutorial informative. I look forward to finding something for next month's tutorial. Again, I appreciate your incredibly generous comments and joining me here where art can take many experimental forms.
____________________________________________________________
Actually, this is Day 2 of 22 in 2018, and I shared a post where I recycled several green tea bags and repurposed a rusty chain and rusty cookie tin to turn them into beautiful rusty fabric.
Now it's your turn to share your Second on the 2nd. The rules are quite simple and everyone is welcome to join the fun look back. All you have to do is bring back a post that you are especially proud of, or perhaps one you shared before anyone knew your blog existed. It could even be a post that is as relevant today as it was when you originally posted it. Any post, any genre, any artistic endeavor is acceptable. Then link below (direct links only, please) and Bleubeard and I, along with other Second on the 2nd friends, will be by to visit. Please be aware this link is only open for five days, so linking on the 2nd is preferred.
Also, please don't forget if your Second on the 2nd post involves a T Tuesday post, please link to InLinkz. However, if your Second look is NOT also a T Tuesday post, please link to both InLinkz and Mr. Linky. If you are here for T Stands For Tuesday ONLY, please link only to Mr. Linky.
If you are here for T Stands For Tuesday ONLY, please link only to Mr. Linky.


29 thoughtful remarks:
You got some beautiful results from your rusting, thanks for sharing again. Valerie
I know that I found this very interesting the first time you shared it - but it was also very exciting for me to read and see it again.
I am sure I am much too lazy to dye fabric in this way, but I am sure it would be a fantastic experience. I am in awe of your love of experimentation Dr.E.!
Did you use parts of this fabrics already? I can't remember if I had seen it used until now. The results are incredible- especially those fabric with the rusty chain. Great to show the tutorial once again !
Happy Second on th 2nd Elizabeth!See you tomorrow for T-Day again!
oxo Susi
Amazing effects that you produced with the wonders that you found. I just love the piece of chain. Not sure I recall seeing it before so thank you for the repost.
Happy T Day for tomorrow
Love Chrissie xx
Ooh! Fabulous results with the teabags added Elizabeth! Love the chunky, rusty chain too!
Happy almost T-Day!
Alison xx
wowzer your rusting results are awesome.💖 [Aussie aNNie's Blog]
Fabulous rusty results, it was a great post to revisit.
Yvonne xx
I haven't seen this post before so I am glad you shared it again. This technique made some fantastic rusty fabric-at least some pieces. I didn't know about tannins and rust and it is good to know since last summer on my walks I collected some items to use to make some rust fabric. I never had time to make it, but this summer it is on my list. Hope your computer issues are fixed and your week starts off with lots of recycling fun. hugs-Erika
Wow Elizabeth, when we first moved down here I got into rust dyeing for a few years-I really loved it-but I never knew anything about adding tea bags to the mix-I may need to do this again this summer. I used a couple pieces to make art pieces with quilting and needle felting etc and I even surprised myself and sold a piece. thanks for sharing this. i still have a big pile of rusty stuff outdoors-I bet it is really rusty now lol
Happy T Day and Second on the 2nd
Oh and looking at these photos again I did not place mine in bags. but in direct sun that were soaked in vinegar and water I think it was-and then with a spray bottle checked on them and kept them wet your bag sounds much easier-
I thoroughly enjoyed this post Elizabeth! Amazing the results you achieved! I like that you explained the science of it.. never too old to learn something new. Happy T day! Hugs! deb
You achieved some wonderful effects. I’m pretty sure I remember this post but I was pleased to see it again and enjoyed reading about your experiments.
It’s amazing how your fabric turned out just by placing tea bags and a huge chain on top. I love the end effect and it will be cool to see what you will come up with. Funny, growing up on a sawmill, I always touched rusty crap including chains with my bare hands. I never thought it could be dangerous.
You put a lot of work into this, Elizabeth, and the results show it...beautiful.
nice to see this again, your rusted pieces are wonderful! only thing i regret is that i have trouble to stitch through the rust... the needle sometimes refuses... but i find solutions;)
happy t-day, elizabeth!
Loved seeing these fascinating results again! I hope to be back later for T!!! Hugs, Chrisx
What beautiful results! Especially the last images you shared. I love the colours. I knew you liked rust, but i didn't know you created these dyed fabrics. What did you eventually do with the fabric. (I am curious to know. Per haps you framed one. They are certainly beautiful enough to hang on the wall in my opinion)
Happy Second On the Second,
Lisca
Back again with my T post - I hope I have done this right!! Chrisx
I'm always intrigued by your work with rust. The results are remarkable but what I really appreciate is your care and commitment to trying and doing new things.
That rusting is so cool!!! I've never tried it but I also think you have a knack for it and make it look easy:) Thanks for sharing your process again,and happy T day too!
I absolutely LOVE the rusty tea colored fabric that you made. Those chains left behind some awesome rust spots. It is so helpful to see the process that you used.
Happy Tea Day,
Kate
Totally forgot it was the 2nd! Duh!! I love your rusting results. Esp the super dark almost crusty rusted areas. I love the most. Hmm...now that Mr. G isn't working with rusty iron things, where in the world am I going to get my rust bits??
Happy T day dear!
Happy T day Elizabeth.
I loved all the rusting and this super post.
Still having internet hiccups
Yvonne xx
Wow, the teabags and rusty metal pieces worked beautifully 😀. Wishing you a very Happy T Day dear Elizabeth! J 😊 x
This is a fabulous tutorial! I would never have known that green tea bags would enhance the rusting process...makes me smile that we artists love rust, and most other folks would be trying to figure out how to prevent or remove it. lol...
I received a lovely package from you in the mail this week... It is beautiful, I love it! the fabrics and the vintage girl stole my heart. ;) thank you soo much! ♥ hope things are looking up for you...is your keyboard fixed? we are having thunder boomer storms here today, and lots of standing water in the yard. Fingers crossed that the basement stays dry. So far so good. hugs!
Wonderful cloth dying results, Elizabeth. Thank you for explaining some of the chemistry. I knew rust in an open wound is extremely dangerous and that inhaled over a long term rust causes lung disease. But your precautions and warnings shocked me enough to go read more!
Happy T-day! Hugs, Eileen
It was interesting to see the marks that were made on the fabric. I was really fascinated by the cloth that stole your heart. I really liked the marks that heavy chain made. I'll be interested to see what you make with the cloth. Happy T Day
Well, I am way late! Please forgive me. I don't understand what happened to this week. Ha, I really do; I have been busy packing! We have been West siders for over 20 years and now about to become East siders! Only, you, Elizabeth would understand about the West sider/East sider thing in this city! LOL
Quite a tutorial. I am not that ambitious, even when my craft room is in tact! Have a great week!
this was so fun..
Thank you for sharing..I love how educational it was. Might have to try try this stuff as a home school project for Helena:)
Post a Comment