


.JPG)


.jpg)


 It's been at least two years since I bought this new high temp hot glue gun. I am ashamed of the fact I've let it languish still unopened in its hard plastic shell for so long. So today I'm going to create a tutorial for how to use this never-before-used glue gun and high temp glue for something other than what it was originally intended.
 Supplies you will need:
Non-stick heat resistant craft mat (a must)
Alternately, a tempered glass craft mat that will accept hot glue
High temp glue gun (preferred over low temp)
High temp glue sticks (diameter to fit your glue gun)
 Draw a design on your craft mat with your hot glue. Make sure all your lines connect. If not, your glue art will fall apart.
Allow to cool completely before removing from the craft mat.
 Clean up and remove any "spider webs" created by the glue. If stubborn webs don't come off with your fingernails, you can cut them with scissors.
Lay onto your substrate and spritz some of your handmade shimmering mists over the design. When the mists are dry, remove your new stencil, wipe off, and pocket all the savings. We all know how expensive those stencils can get.
 For my second tutorial, I began with a small tea cup rubber stamp.
 I inked it well with pigment ink, which just happened to coincide with the color of the rubber. Any pigment ink will work, but the juicier the better for this project.
 Lay out a glob of hot glue on your craft sheet slightly larger than the stamp. While the glue is still hot, press your rubber stamp into the glue. I have only done this with rubber, never clear acrylic stamps.
The globs on the back of this stamp is my "famous" Wacky Tac that I paint on stamps before I place them on a clear stamping block. The Wacky Tac is repositionable, and when you remove the rubber from the stamping block, you don't have to clean the block, because the Wacky Tac stays in place. Sometimes it stains your hands, though (grin).
 When cool, remove the rubber from the glue impression. Unfortunately, I rushed the process, because I needed to leave. However, if done properly, which I have done in times past, you will get a perfect impression you can use as a polymer or air-dry clay mold.
Today is Day 17 of 22, and I repurposed hot glue to make two floral stencils and one tea cup mold.
 It was also time to pick up my friend Sally from the airport. I took a bouquet of cut tulips to her as a welcome home gift, too.


11 thoughtful remarks:
Your beautiful garden area is a welcome site as we woke up to snow this morning!
The flower stencils are a brilliant idea--I used a similar technique to make a magnet that I painted with acrylic paint. It has held up very well!
Thanks for your lovely compliments on my eggs--of course, these were done when I was younger and had steadier hands! :)
This I gotta try. Thanks!
this is such a great idea. Works a treat. Thanks for introducing me to Wacky Tac.
I had to come by to see what was keeping you from WOYWW and find you having fun here....
I have 30 year old glue sticks that work fine.
How lovely for your friend Kathy to receive such a welcome home.
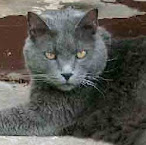
thanks for your kind words I appreciate Bluebeard coming to visit and bringing you with him.
\
Monica
very ingenious uses of hot glue-- the mold for polymer clay is a new concept for me...excellent idea! I suspect some of those spray inks you made a while back would work well with the flower stencils. Your tulips are lovely...I am pretty sure my daffodils got frozen!
Hot glue can also be very dangerous. I always keep a bowl of ice water right where I am working to dip any fingers in that got in the way. You would think after all these years I'd learn to keep them out of the "hot" glue....LOL
I've always wanted to try this technique with glue but still haven't. I thought it might be cool to make snowflakes then sprinkle them with glitter while still molten I'm not sure I could be that quick though.
Love using hot glue to create with and love the uses you put it to and gave that new glue gun a good work out!!
I did something similar a couple of years ago here http://gardenpinks.wordpress.com/2012/08/05/can-you-tell-what-is/ and here is the completed frame
http://gardenpinks.wordpress.com/2012/08/12/drum-roll-please/
Lynn
Hello! What a great idea with the hot glue, LOVE IT!! These would be pretty to use on any projects.
OMG, that little teacup stamp is so sweet. Never would have known to use the stamp this way. You always have clever ideas my friend!
YAY, for spring flowers!! Isn't it so nice to see them finally! What a nice welcome home gesture for Sally.
Hope you can relax a bit now that she is home.
Post a Comment